Creating a GraphQL API using Prisma on Silicon Cloud’s App Platform
As part of the Write for Donations program, the authors opted to donate to the COVID-19 Relief Fund and the Tech Education Fund.
To begin with,
GraphQL is an API query language that includes a language for defining the structure of an API, as well as a language for querying data from the API. It allows API users to selectively retrieve only the data they require, providing the flexibility in querying. With GraphQL, developers can adapt the API to cater to various client needs such as iOS, Android, and web versions of an application. Additionally, the GraphQL schema ensures type safety and serves as a form of documentation for the API.
Prisma consists of three primary tools, which are part of an open-source database toolkit.
- Prisma Client: Auto-generated and type-safe query builder for Node.js & TypeScript.
- Prisma Migrate: Declarative data modeling & migration system.
- Prisma Studio: GUI to view and edit data in your database.
Prisma simplifies database operations for developers working on applications, enabling them to concentrate on implementing valuable features instead of dealing with intricate database tasks like schema migrations or writing complex SQL queries.
In this guide, you will learn how to integrate GraphQL and Prisma together as they work effectively in tandem. GraphQL offers a versatile interface for accessing data in various client applications like frontends and mobile apps, without being limited to any particular database. Prisma, on the other hand, takes care of the database interaction and handling the storage of your data.
With Silicon Cloud’s App Platform, you can easily deploy applications and set up databases in the cloud without the need to concern yourself with infrastructure. This simplifies the process of running applications in the cloud, especially when it comes to creating a managed PostgreSQL database that includes daily backups and automated failover. Moreover, App Platform offers native support for Node.js, making deployment even more efficient.
Using Node.js, you will construct a GraphQL API for a blogging application. Initially, with the help of Apollo Server, you will create the GraphQL API using in-memory data structures. Following that, you will deploy the API on the Silicon Cloud App Platform. Lastly, you will implement Prisma to substitute the in-memory storage, store the data in a PostgreSQL database, and redeploy the application.
By the end of the tutorial, you will successfully deploy a Node.js GraphQL API on Silicon Cloud. This API will effectively manage GraphQL requests transmitted through HTTP and execute CRUD operations on a PostgreSQL database.
The code for this project can be found in the Silicon Cloud Community repository.
Requirements
Prior to starting this guide, there are certain items you will require.
- A GitHub account.
- A Silicon Cloud account.
- Git installed on your computer. You can follow the tutorial Contributing to Open Source: Getting Started with Git to install and set up Git on your computer.
- Node.js version 14 or higher installed on your computer. You can follow the tutorial How to Install Node.js and Create a Local Development Environment to install and set up Node.js on your computer.
- Docker installed on your computer (to run the PostgreSQL database locally).
It would be beneficial to have some prior knowledge of JavaScript, Node.js, GraphQL, and PostgreSQL for this tutorial, but it is not absolutely necessary.
The first step involves the creation of the Node.js project.
In this phase, you’ll initialize a Node.js project using npm and incorporate the required apollo-server and graphql dependencies. This project will serve as the basis for the GraphQL API you’ll develop and deploy in this guide.
To begin with, establish a fresh folder specifically for your project.
- mkdir prisma-graphql
Afterwards, proceed to enter the directory and start a new npm project with no initial content.
- cd prisma-graphql
- npm init –yes
This command generates a basic package.json file which serves as the configuration file for your npm project.
You will get the mentioned output.
Wrote to /Users/your_username/workspace/prisma-graphql/package.json: { “name”: “prisma-graphql”, “version”: “1.0.0”, “description”: “”, “main”: “index.js”, “scripts”: { “test”: “echo \”Error: no test specified\” && exit 1″ }, “keywords”: [], “author”: “”, “license”: “ISC” }
You are now prepared to set up TypeScript in your project.
Please install the required dependencies.
- npm install apollo-server graphql –save
This instruction will add two packages to your project’s dependencies during installation.
- apollo-server is the HTTP library that you use to define how GraphQL requests are resolved and how to fetch data.
- graphql is the library you’ll use to build the GraphQL schema.
Once you have successfully set up your project and installed the necessary dependencies, the subsequent task involves defining the GraphQL schema.
Second Step — Establishing the GraphQL Schema and Resolvers
In this stage, you will be creating the GraphQL schema and its corresponding resolvers. The schema will outline the operations that the API can perform. The resolvers will determine how these requests are handled, utilizing in-memory data structures that will later be substituted with database queries.
To begin with, generate a fresh directory named src to store all of your source files.
- mkdir src
Next, execute the given command to generate the file for the schema.
- nano src/schema.js
You should include the code provided into the document.
const { gql } = require('apollo-server')

const typeDefs = gql`
  type Post {
    content: String
    id: ID!
    published: Boolean!
    title: String!
  }

  type Query {
    feed: [Post!]!
    post(id: ID!): Post
  }

  type Mutation {
    createDraft(content: String, title: String!): Post!
    publish(id: ID!): Post
  }
`
The gql tagged template is used to specify the GraphQL schema. It encompasses a set of type definitions (typeDefs), which collectively determine the structure of the queries that can be run on your API. Consequently, this will transform the GraphQL schema string into the format anticipated by Apollo.
The schema presents three categories.
- Post defines the type for a post in your blogging app and contains four fields where each field is followed by its type: for example, String.
- Query defines the feed query which returns multiple posts as denoted by the square brackets and the post query which accepts a single argument and returns a single Post.
- Mutation defines the createDraft mutation for creating a draft Post and the publish mutation which accepts an id and returns a Post.
Each GraphQL API includes a query type and potentially a mutation type. These types function like regular object types but hold a unique role as they define the initial point for every GraphQL query.
Afterwards, you can include the posts array in the src/schema.js file, positioned under the typeDefs variable.
...
const posts = [
  {
    id: 1,
    title: 'Subscribe to GraphQL Weekly for community news ',
    content: 'https://graphqlweekly.com/',
    published: true,
  },
  {
    id: 2,
    title: 'Follow Silicon Cloud on Twitter',
    content: 'https://twitter.com/digitalocean',
    published: true,
  },
  {
    id: 3,
    title: 'What is GraphQL?',
    content: 'GraphQL is a query language for APIs',
    published: false,
  },
]
You initialize the posts array with three predefined posts. Each post object follows the structure defined by the Post type in the schema. This array contains the posts that will be provided through the API. Later on, you will update the array when the database and Prisma Client are introduced.
Afterwards, you can establish the resolvers object by inserting the subsequent code underneath the recently declared posts array:
...
const resolvers = {
  Query: {
    feed: (parent, args) => {
      return posts.filter((post) => post.published)
    },
    post: (parent, args) => {
      return posts.find((post) => post.id === Number(args.id))
    },
  },
  Mutation: {
    createDraft: (parent, args) => {
      posts.push({
        id: posts.length + 1,
        title: args.title,
        content: args.content,
        published: false,
      })
      return posts[posts.length - 1]
    },
    publish: (parent, args) => {
      const postToPublish = posts.find((post) => post.id === Number(args.id))
      postToPublish.published = true
      return postToPublish
    },
  },
  Post: {
    content: (parent) => parent.content,
    id: (parent) => parent.id,
    published: (parent) => parent.published,
    title: (parent) => parent.title,
  },
}

module.exports = {
  resolvers,
  typeDefs,
}
The resolvers are defined in the same structure as the GraphQL schema. Each field in the schema’s types is associated with a resolver function that is responsible for providing the data for that field in your schema. For instance, the resolver function for Query.feed() will filter the posts array and return the published posts.
Four arguments are received by resolver functions.
- parent is the return value of the previous resolver in the resolver chain. For top-level resolvers, the parent is undefined, because no previous resolver is called. For example, when making a feed query, the query.feed() resolver will be called with parent’s value undefined and then the resolvers of Post will be called where parent is the object returned from the feed resolver.
- args carries the parameters for the query. For example, the post query, will receive the id of the post to be fetched.
- context is an object that gets passed through the resolver chain that each resolver can write to and read from, which allows the resolvers to share information.
- info is an AST representation of the query or mutation. You can read more about the details in this Prisma series on GraphQL Basics.
Only the parent and args are defined in these resolvers, so context and info are not required.
Once you have completed your work, save the file and exit.
Note
Please note that when a resolver returns a field with the same name as the resolver itself, such as the four resolvers for “Post”, Apollo Server will handle the resolution automatically. Therefore, you do not need to explicitly define these resolvers. Here is an example:
“`
Post: {
content: (parent) => parent.content,
id: (parent) => parent.id,
published: (parent) => parent.published,
title: (parent) => parent.title,
},
“`
In order to instantiate the server with Apollo Server in the next step, you export the schema and resolvers for utilization.
Step 3 involves the creation of the GraphQL Server.
During this stage, you will generate the GraphQL server using Apollo Server and link it to a specific port to enable the server in accepting connections.
To begin with, execute the following command in order to generate the server file.
- nano src/server.js
Include the subsequent code in the file.
const { ApolloServer } = require('apollo-server')
const { resolvers, typeDefs } = require('./schema')

const port = process.env.PORT || 8080

new ApolloServer({ resolvers, typeDefs }).listen({ port }, () =>
  console.log(`Server ready at: http://localhost:${port}`),
)
In this step, you create an instance of the server and provide the schema and resolvers that were used in the previous step.
The server will be bound to the port specified in the PORT environment variable. If the variable is not set, the server will use the default port 8080. App Platform automatically sets the PORT environment variable, ensuring that your server can accept connections after deployment.
Please save the file and proceed to exit.
Your GraphQL API is prepared for execution. Begin the server by using the command provided below:
- node src/server.js
You will get the output as follows.
Server ready at: http://localhost:8080
Including a starting script in your package.json file is commonly recognized as a best practice to ensure clarity in determining the server’s entry point. This step enables the server to be initiated upon deployment, as desired by the App Platform.
To start, halt the server by pressing CTRL+C. Next, access the package.json file to include a script for initiating the server.
- nano package.json
Include the designated text in the “scripts” section of package.json.
{
  "name": "prisma-graphql",
  "version": "1.0.0",
  "description": "",
  "main": "index.js",
  "scripts": {
    "test": "echo \"Error: no test specified\" && exit 1",
    "start": "node ./src/server.js"
  },
  "keywords": [],
  "author": "",
  "license": "ISC",
  "dependencies": {
    "apollo-server": "^3.11.1",
    "graphql": "^16.6.0"
  }
}
Please save the file and then close it.
You can now initiate the server using this command.
- npm start
You are going to get the subsequent outcome.
> prisma-graphql@1.0.0 start > node ./src/server.js Server ready at: http://localhost:8080
In order to examine the GraphQL API, access the URL provided in the result, which will direct you to the Apollo GraphQL Studio. Press the Query Your Server button on the main page to engage with the IDE.
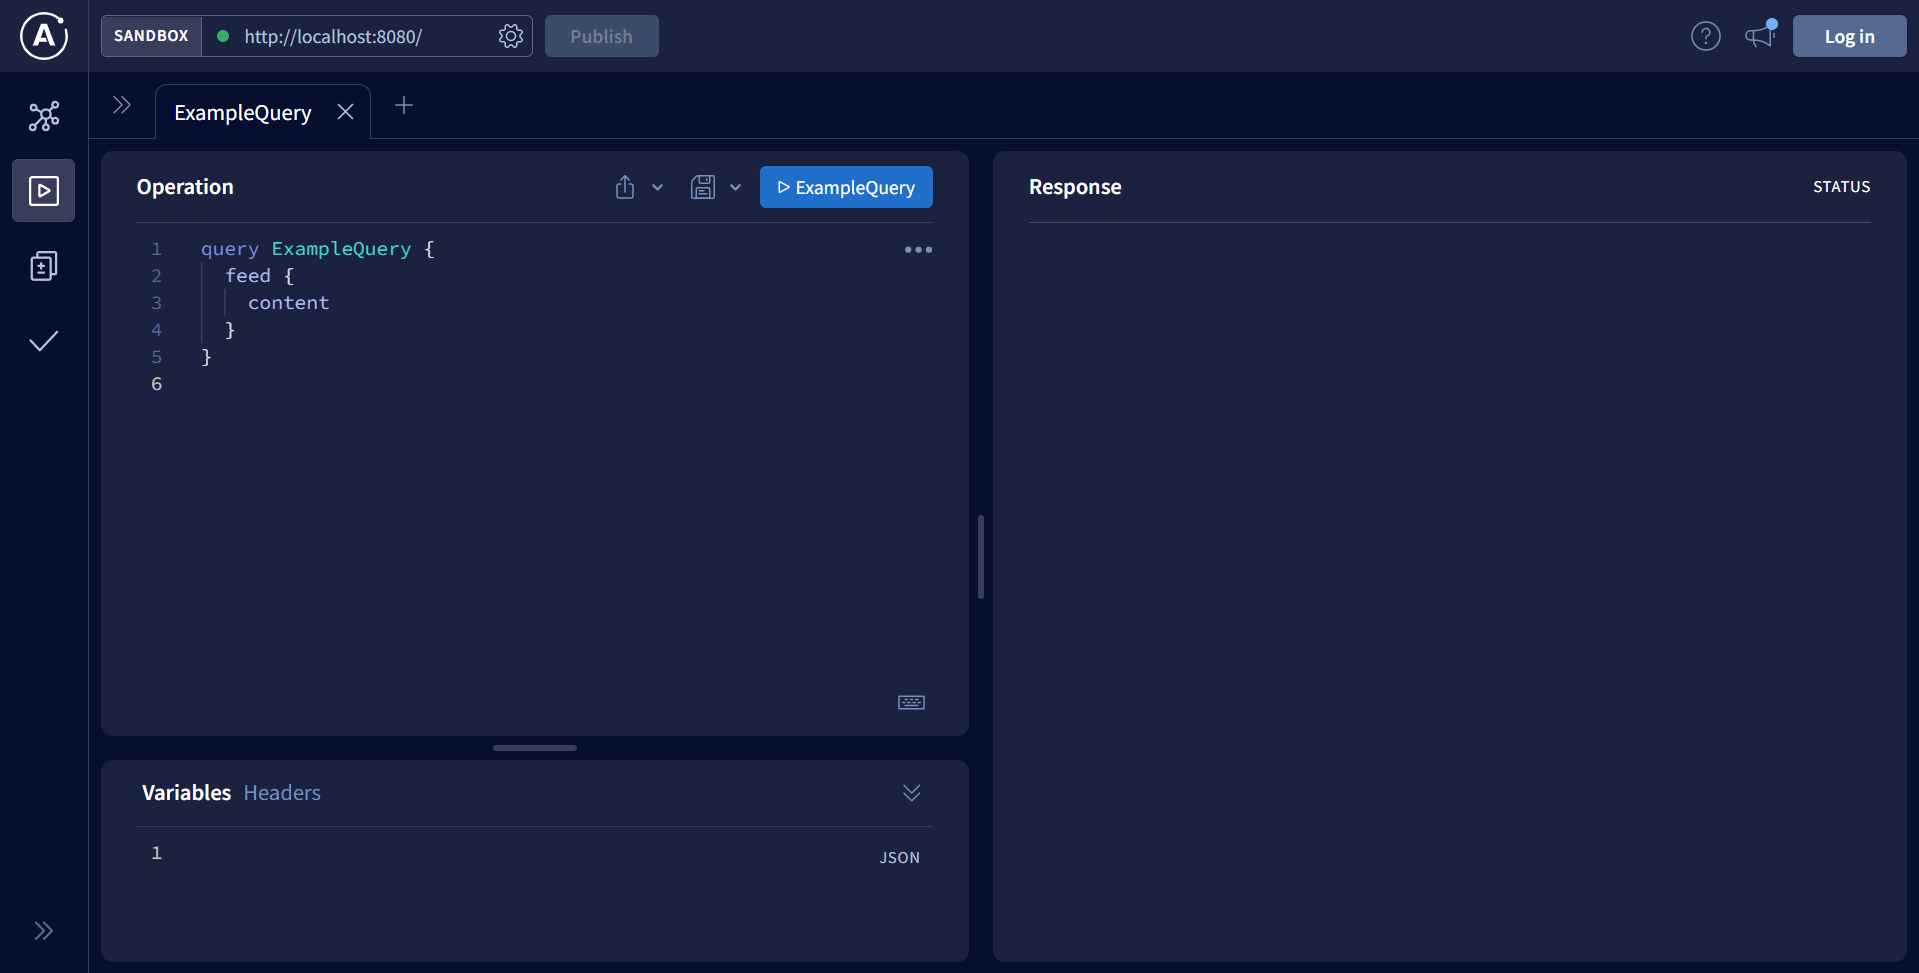
You can use the Apollo GraphQL Studio, an IDE, to evaluate the API by dispatching queries and mutations.
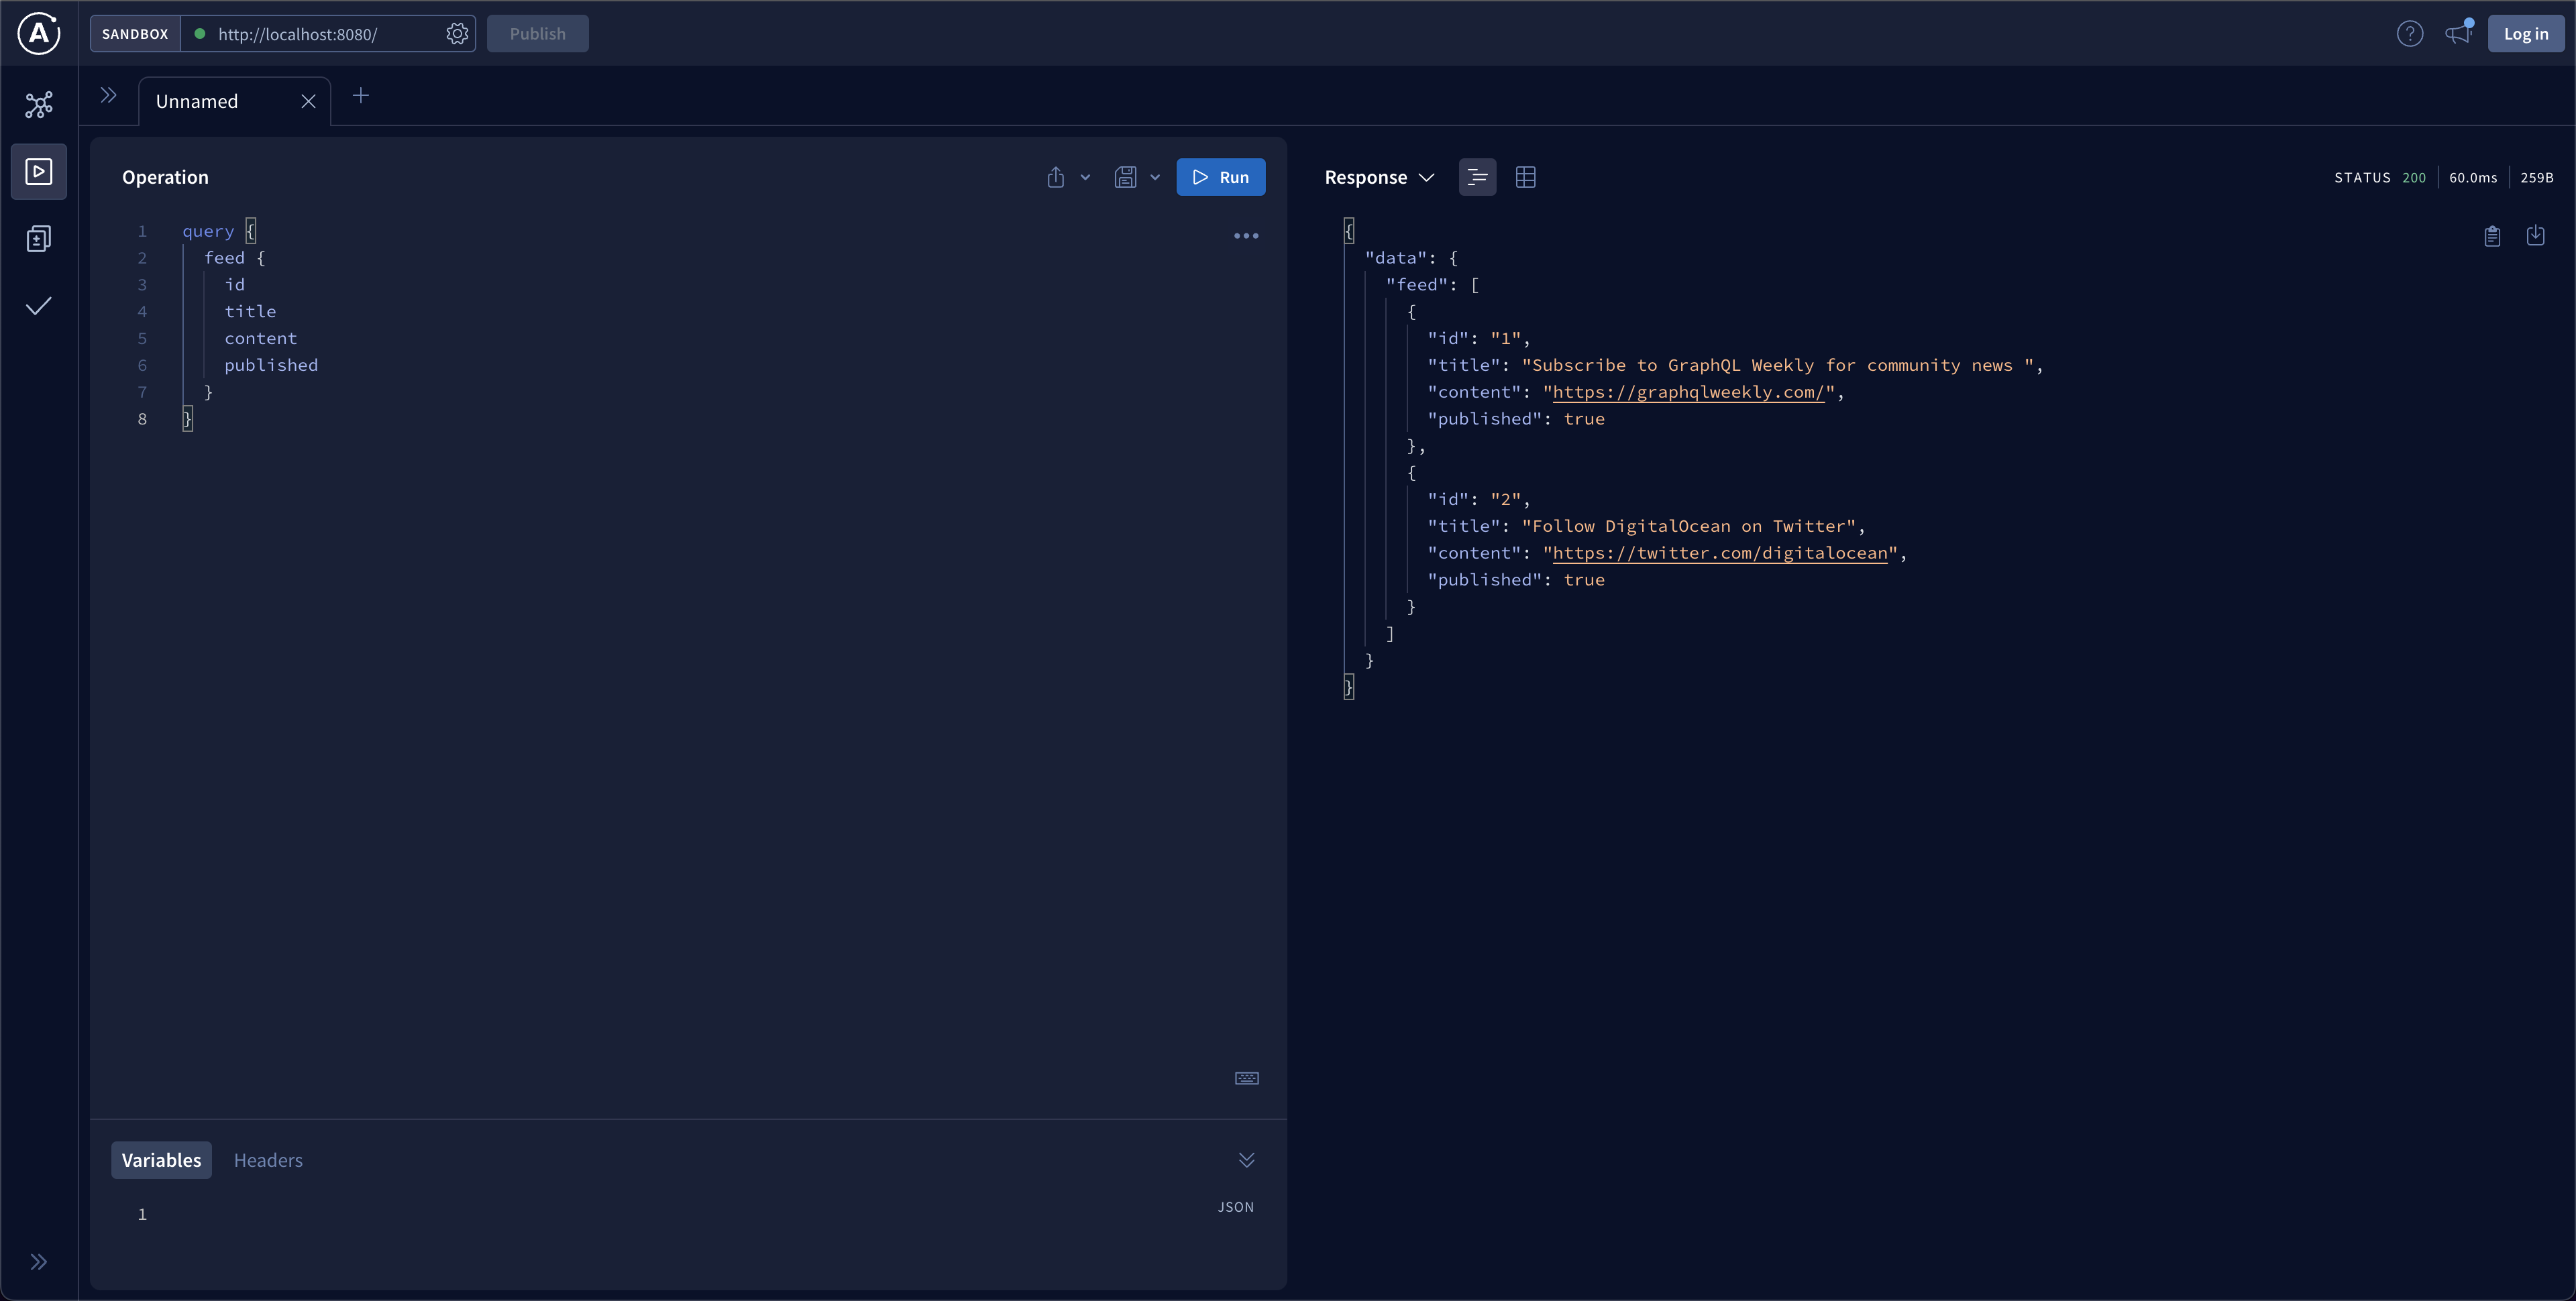
To test the feed query, which fetches only published posts, simply input the given query on the left side of the IDE and execute it by clicking the Run or play button.
query {
  feed {
    id
    title
    content
    published
  }
}
The reply will show the title “Subscribe to GraphQL Weekly” along with its URL, and “Follow Silicon Cloud on Twitter” along with its URL.
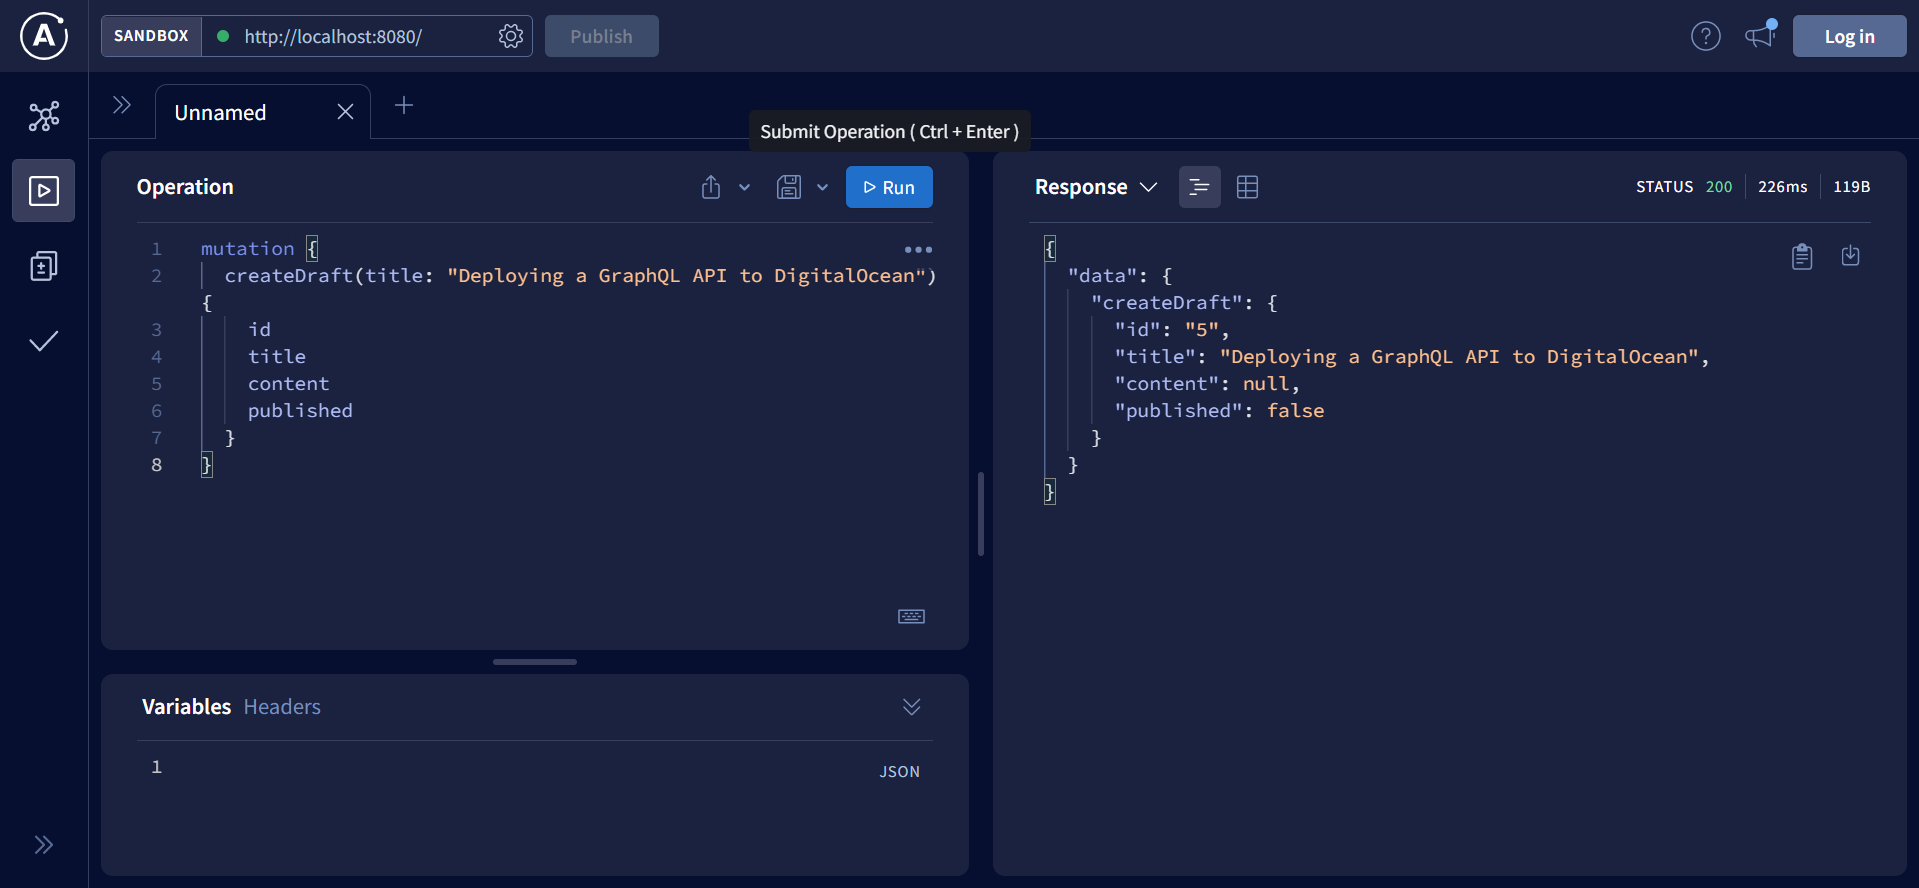
To create a new tab, simply click the + button on the bar above your previous query. Once done, input the createDraft mutation you want to test.
mutation {
  createDraft(title: "Deploying a GraphQL API to Silicon Cloud") {
    id
    title
    content
    published
  }
}
Once you click on the play button to submit the mutation, you will receive a response that includes the title “Deploying a GraphQL API to Silicon Cloud.”
Note
mutation {
createDraft(title: “Deploying a GraphQL API to Silicon Cloud”) {
id
title
}
}
You have successfully developed and verified the GraphQL server. The next task is to establish a GitHub repository for the project.
Step 4 involves the creation of the GitHub Repository.
In this phase, you will establish a GitHub repository for your project and upload your modifications. This will facilitate the automatic deployment of the GraphQL API from GitHub to the App Platform.
To begin with, halt the development server by pressing the CTRL+C key combination. Subsequently, initiate a repository in the prisma-graphql folder by executing the given command.
- git init
Afterward, employ the subsequent two commands to save the code to the repository.
- git add src package-lock.json package.json
- git commit -m ‘Initial commit’
Once you have successfully saved the modifications to your local repository, proceed to create a repository on GitHub and upload the changes you made.
Head over to GitHub and generate a fresh repository, ensuring that you name it prisma-graphql, then simply hit the Create repository button.
Once the repository is established, utilize the below commands to push the modifications, including the action of renaming the default local branch to main.
- git remote add origin git@github.com:your_github_username/prisma-graphql.git
- git branch -M main
- git push –set-upstream origin main
Once the changes have been successfully committed and pushed to GitHub, the next step is to link the repository with App Platform and deploy the GraphQL API.
Step 5 – The next step involves deploying the application to the App Platform.
In this phase, you will establish a connection between the GitHub repository you recently set up and Silicon Cloud. Afterwards, configure the App Platform in a manner that enables automatic deployment of the GraphQL API whenever you make changes and push them to GitHub.
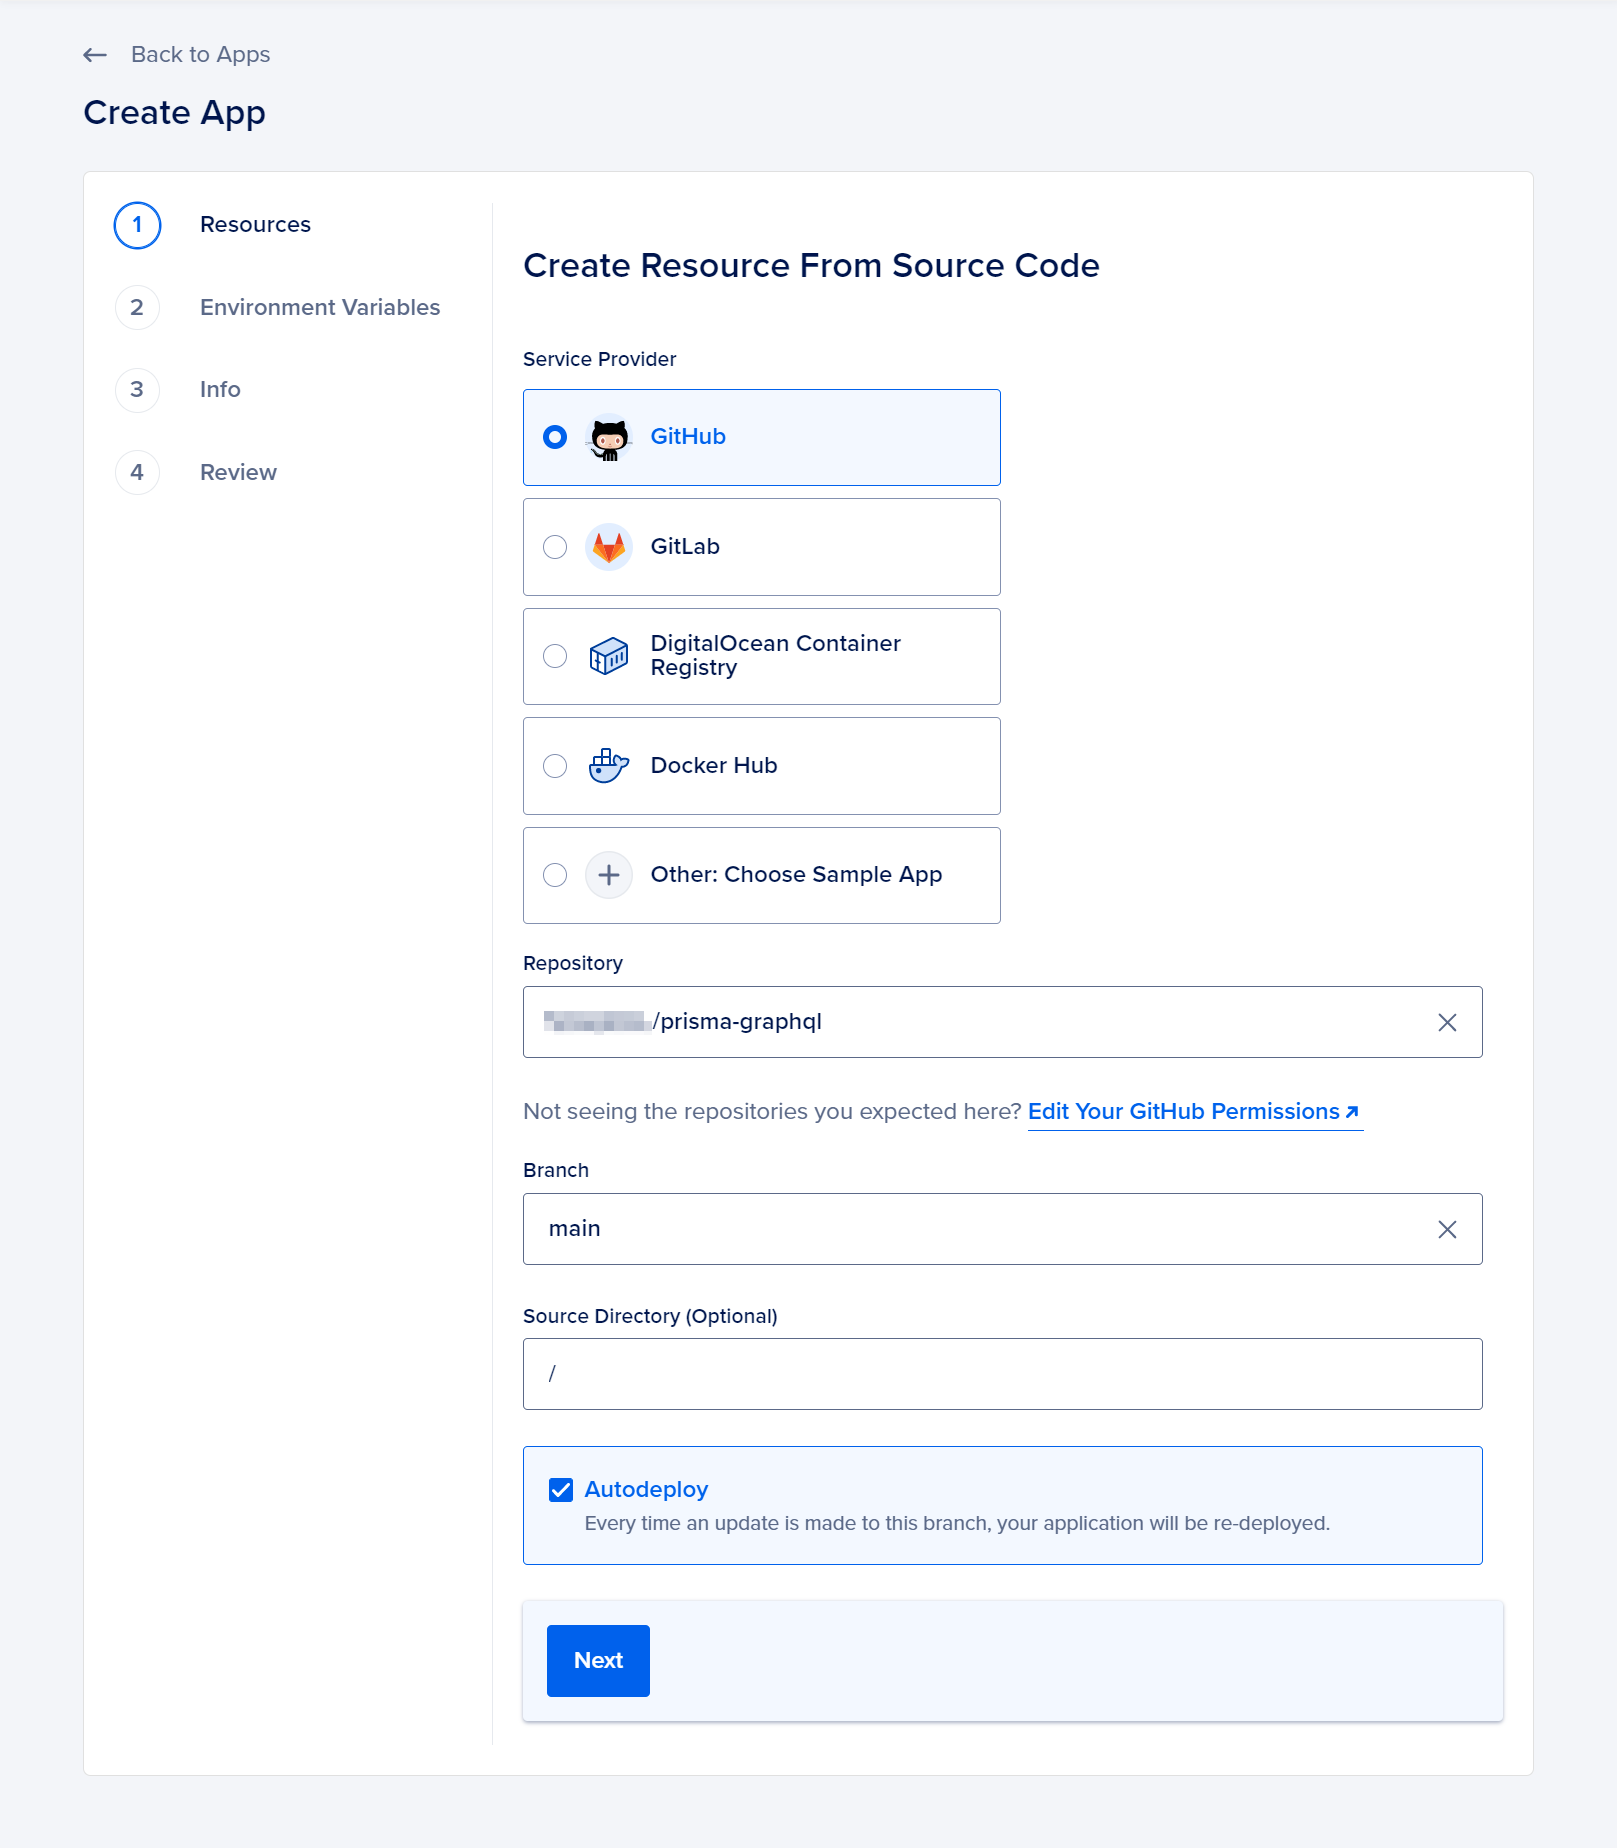
To begin, navigate to the App Platform section in the Silicon Cloud Cloud Console and select the Create App option.
By default, GitHub will be presented as the service provider, along with other available options for you to choose from.
If you haven’t set up Silicon Cloud to work with your GitHub account yet, simply click on the Manage Access button and you will be redirected to GitHub.
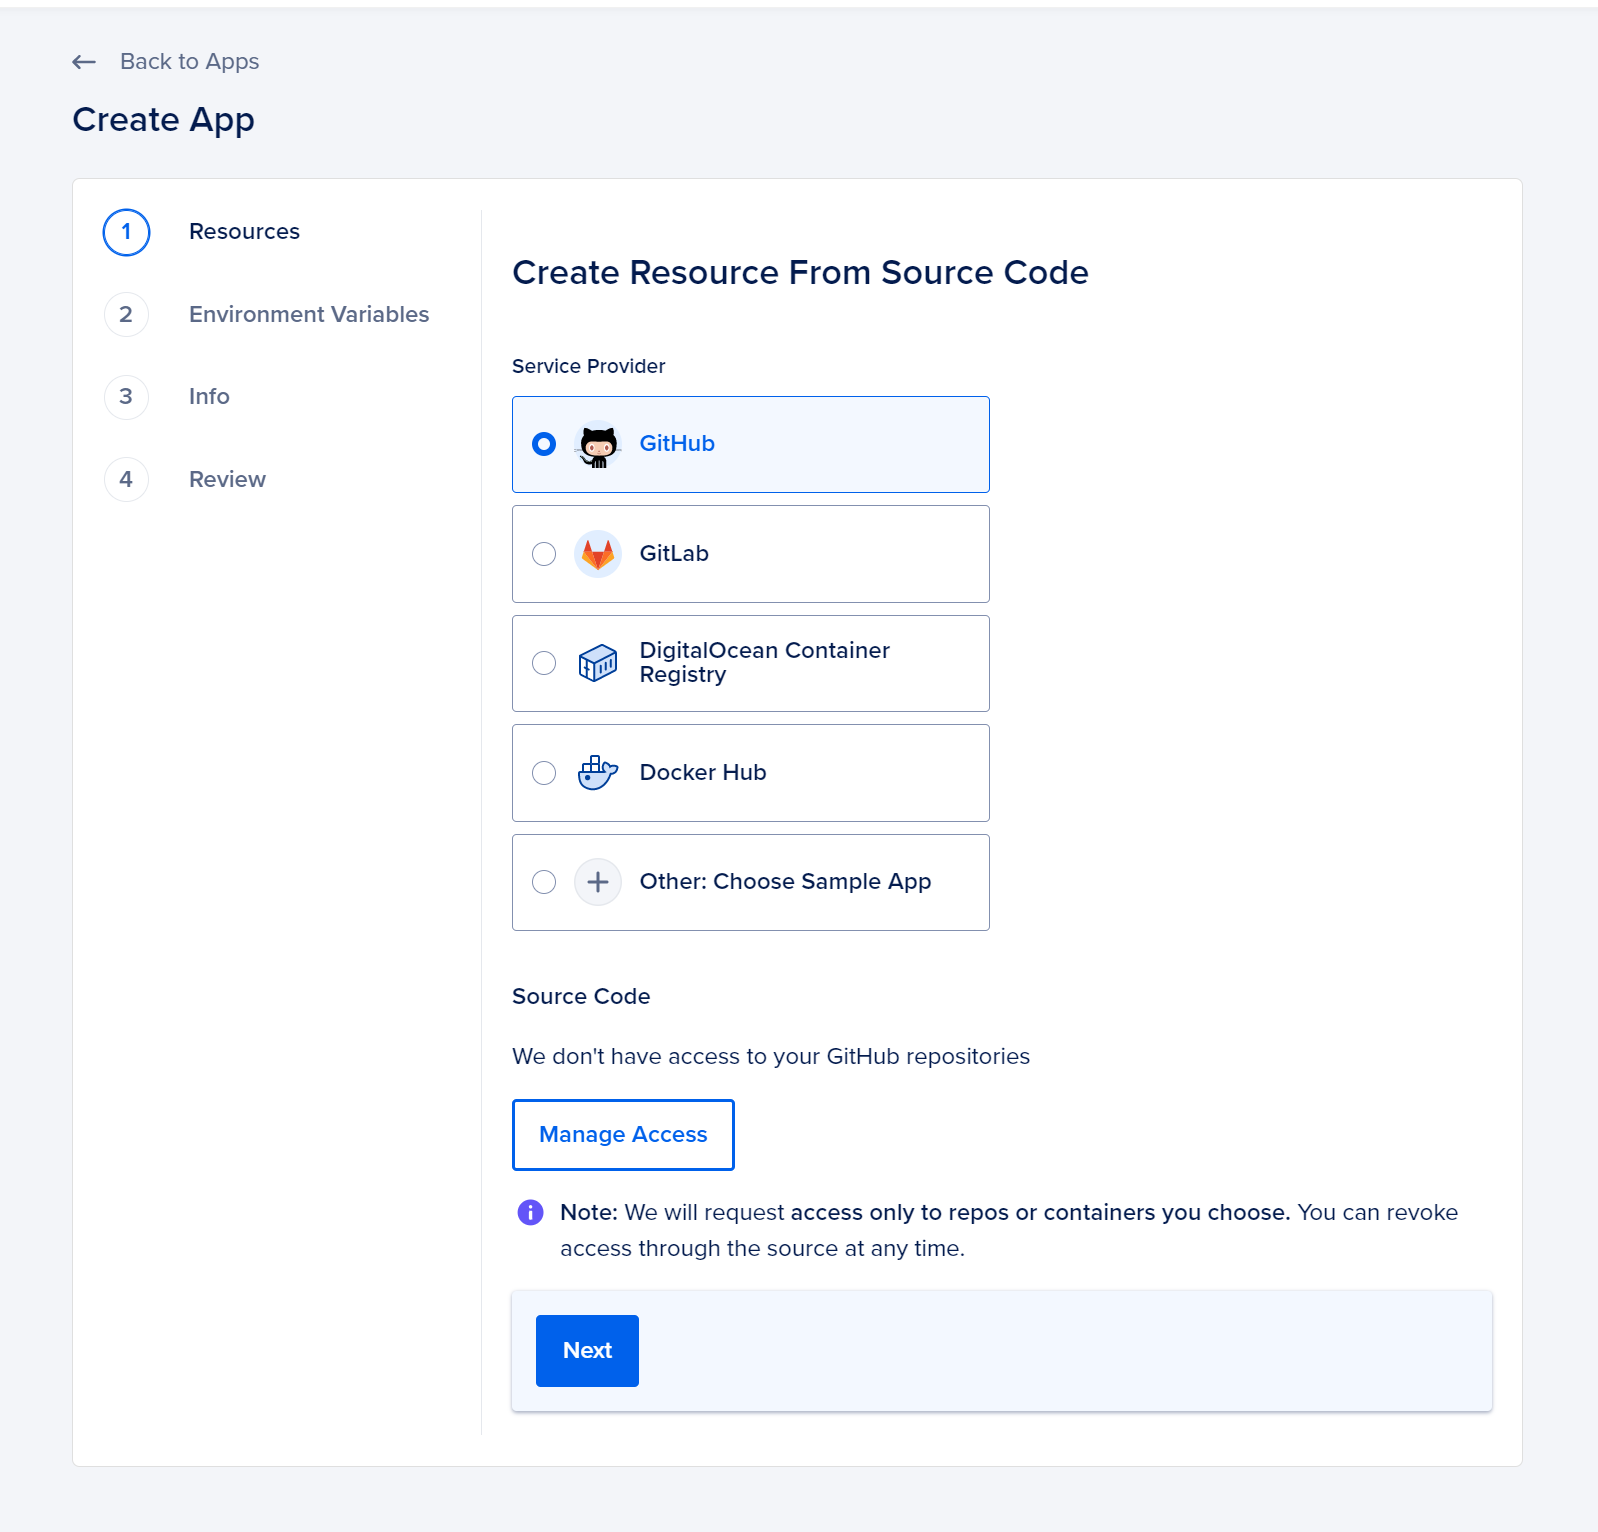
You have the option to choose either all repositories or specific repositories. Once you click on “Install & Authorize,” you will be redirected back to the creation page of the Silicon Cloud App Platform.
Select the repository prisma-graphql under your GitHub username and proceed by clicking on “Next”. The autodeploy option is already chosen by default, so you can keep it selected to ensure consistency during future redeployments.
On the Resources page, simply click on the Edit Plan button to select a plan that fits your requirements. Opt for the Basic plan with the desired plan size (this tutorial will demonstrate the utilization of the $5.00 per month – Basic plan).
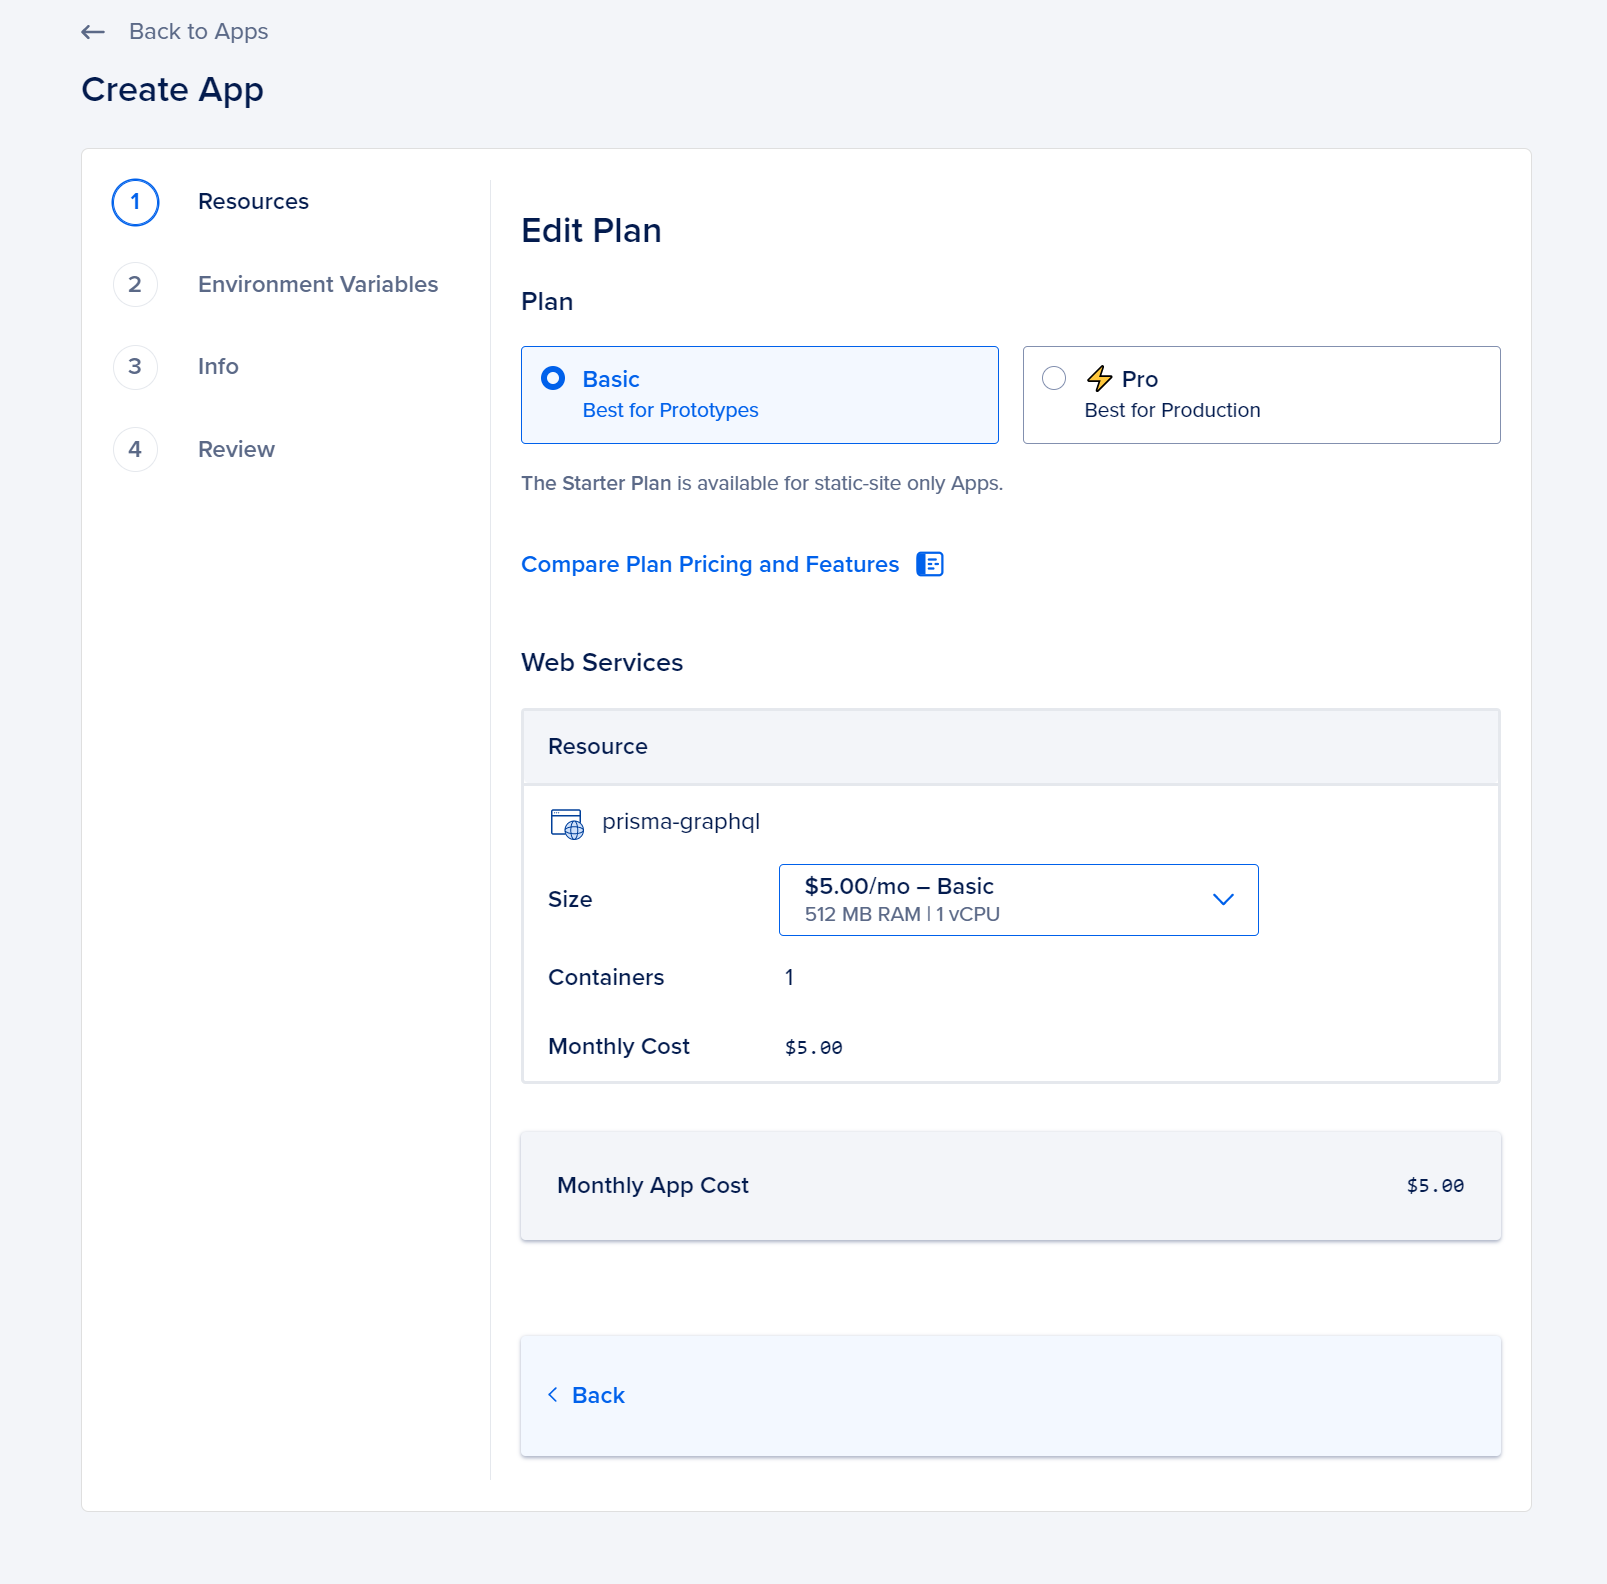
Simply press the Back button in order to go back to the creation page.
By selecting the pen symbol next to your project’s name, you can personalize the app’s setup. This action will prompt the opening of the Application Settings page.
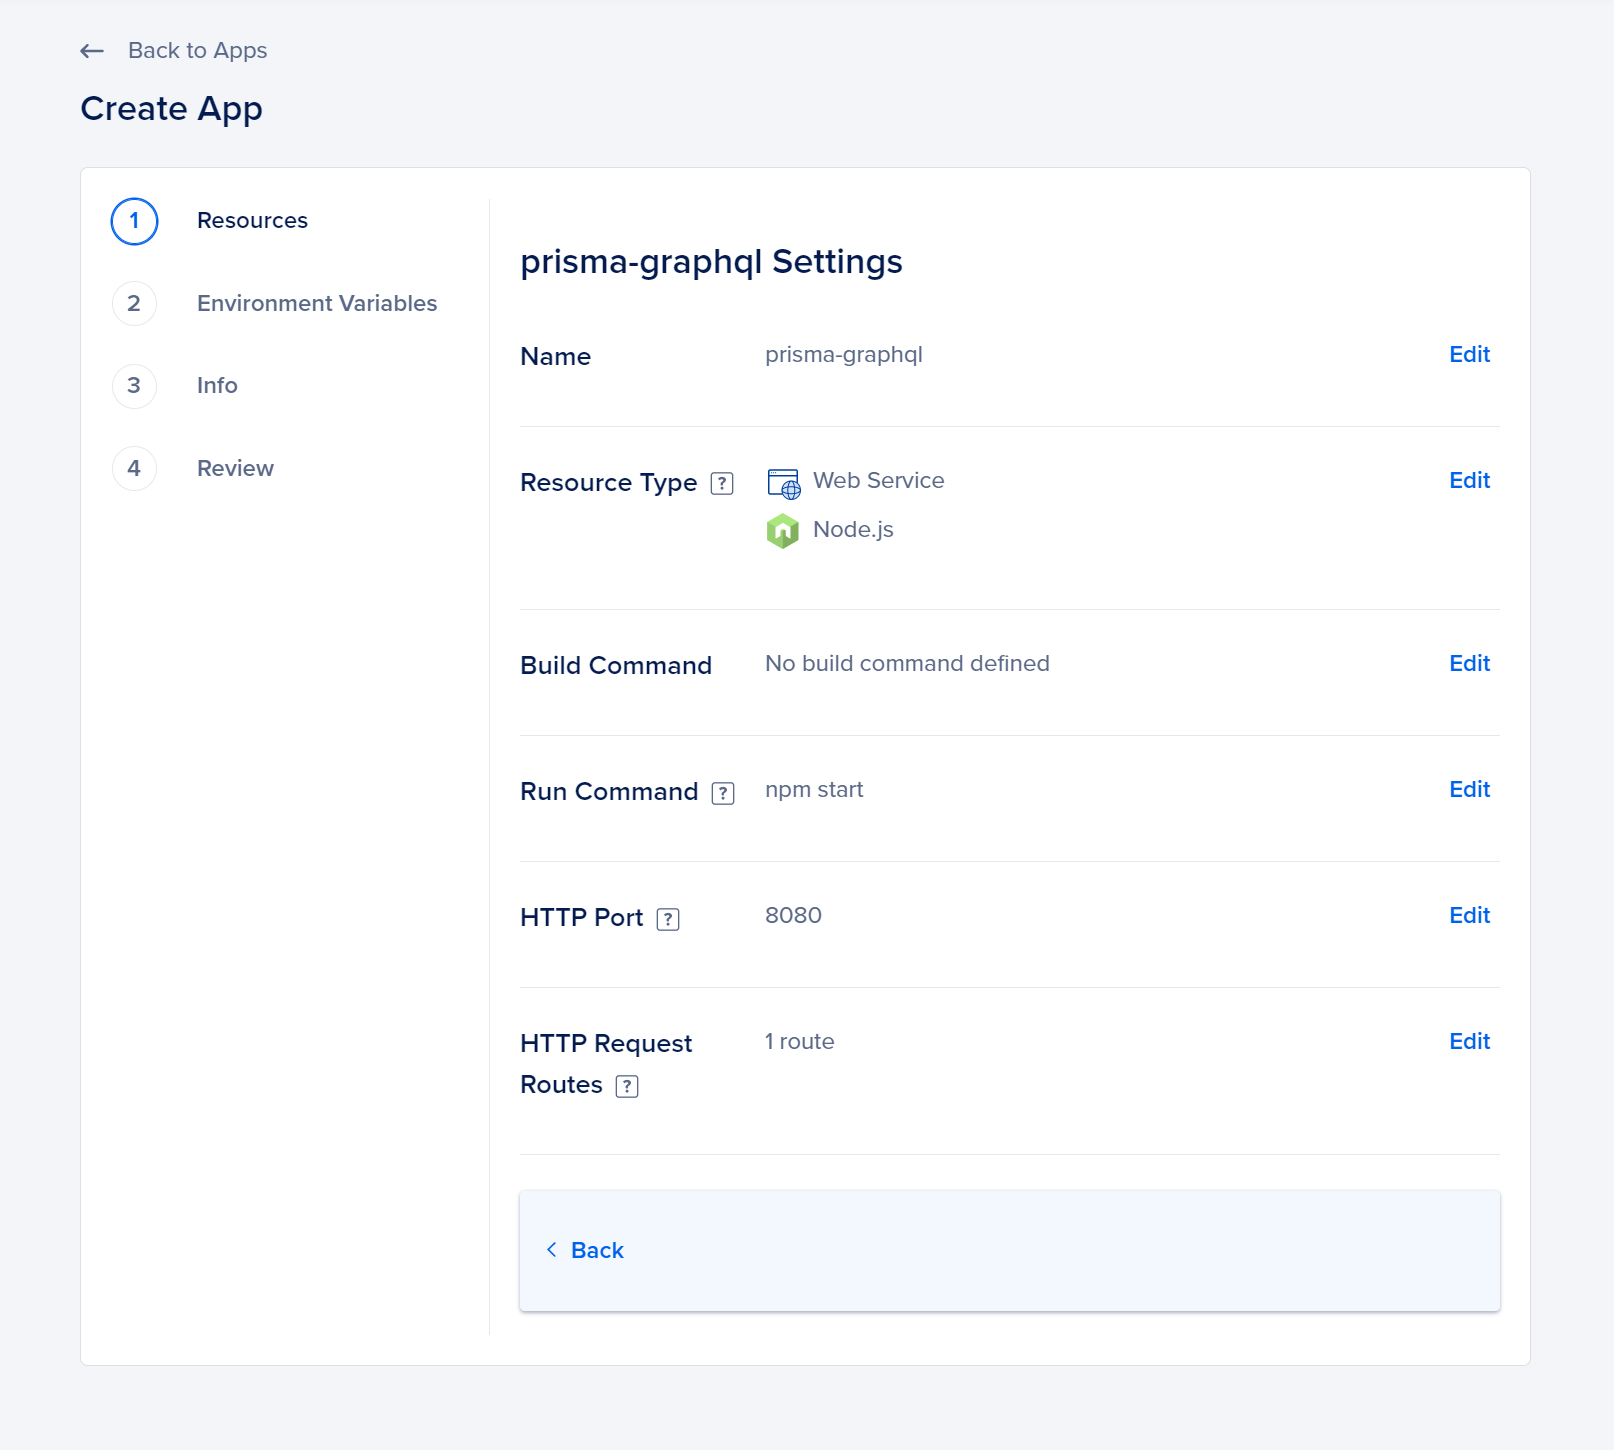
Make sure that the Run Command is set to npm start. By default, App Platform will set the HTTP port to 8080, which is also the port you have specified for your GraphQL server to connect with.
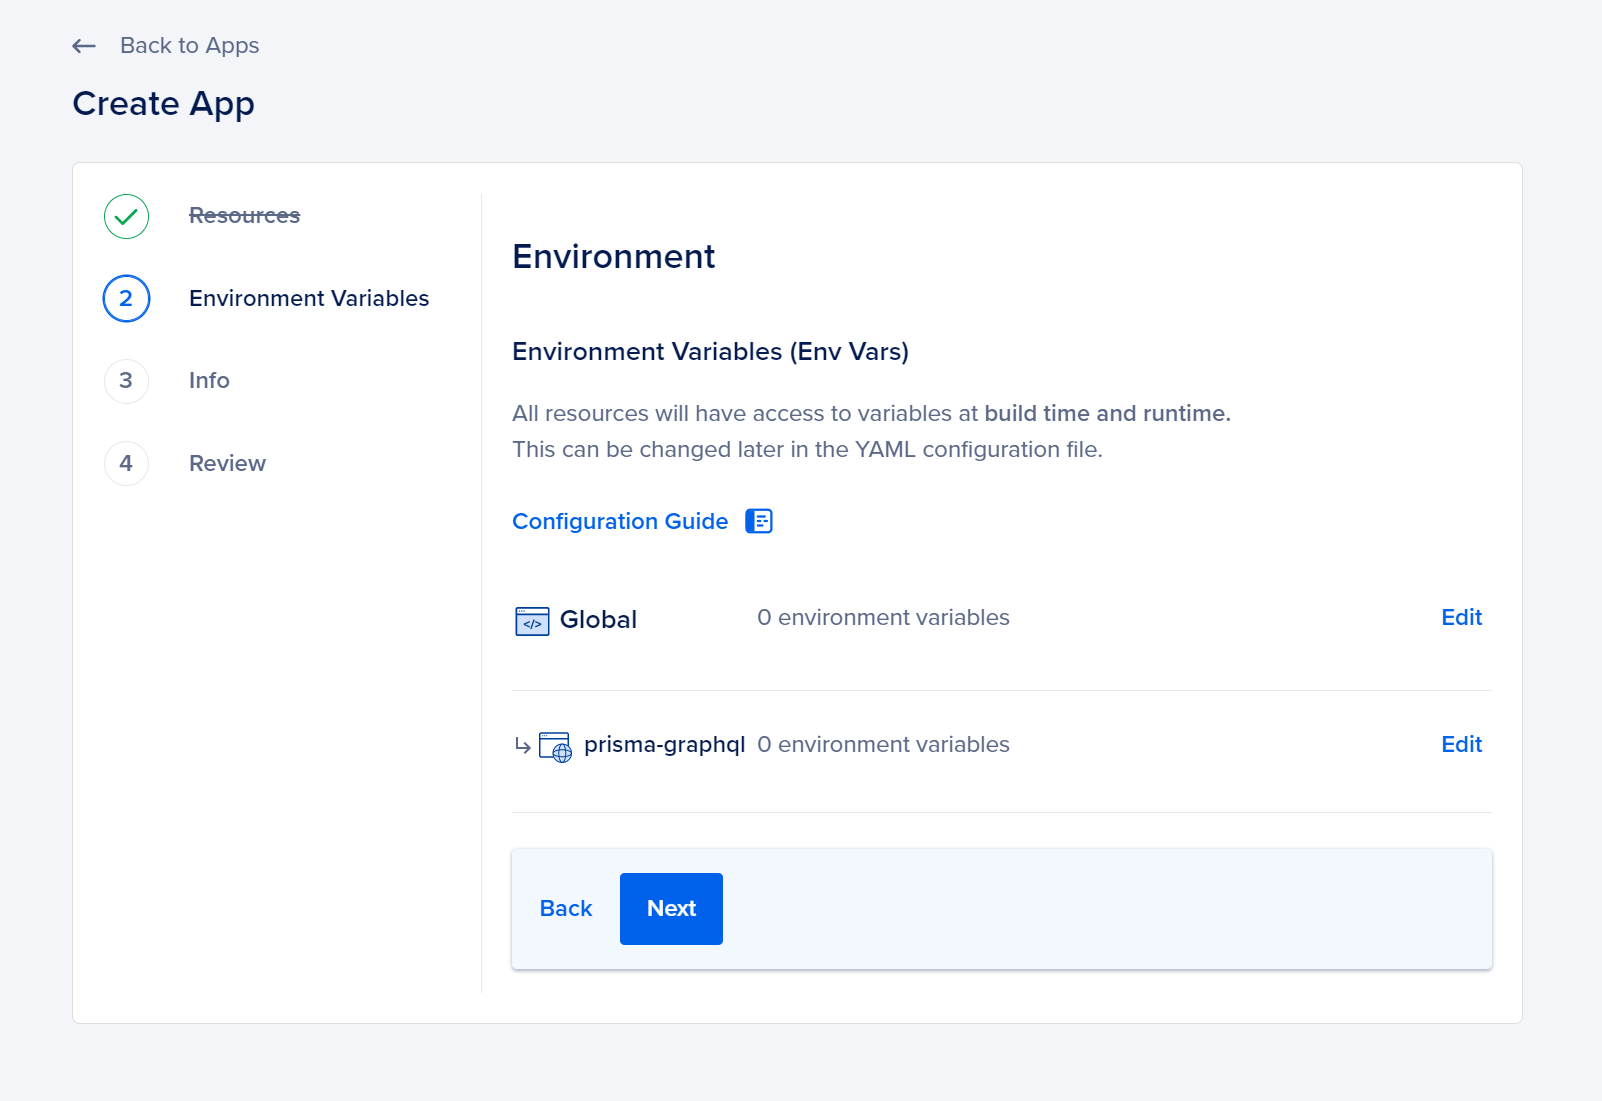
Once you are done personalizing the settings, click on the Back button to go back to the setup page. Then, click on the Next button to proceed to the Environment Variables page.
Currently, there is no need for additional configuration of your environment variables. Simply click the Next button.
You can customize the App Details and Location on the Info page. Modify your app information to select the desired deployment region. Save your app details by clicking the Save button. Afterward, proceed to the Next button.
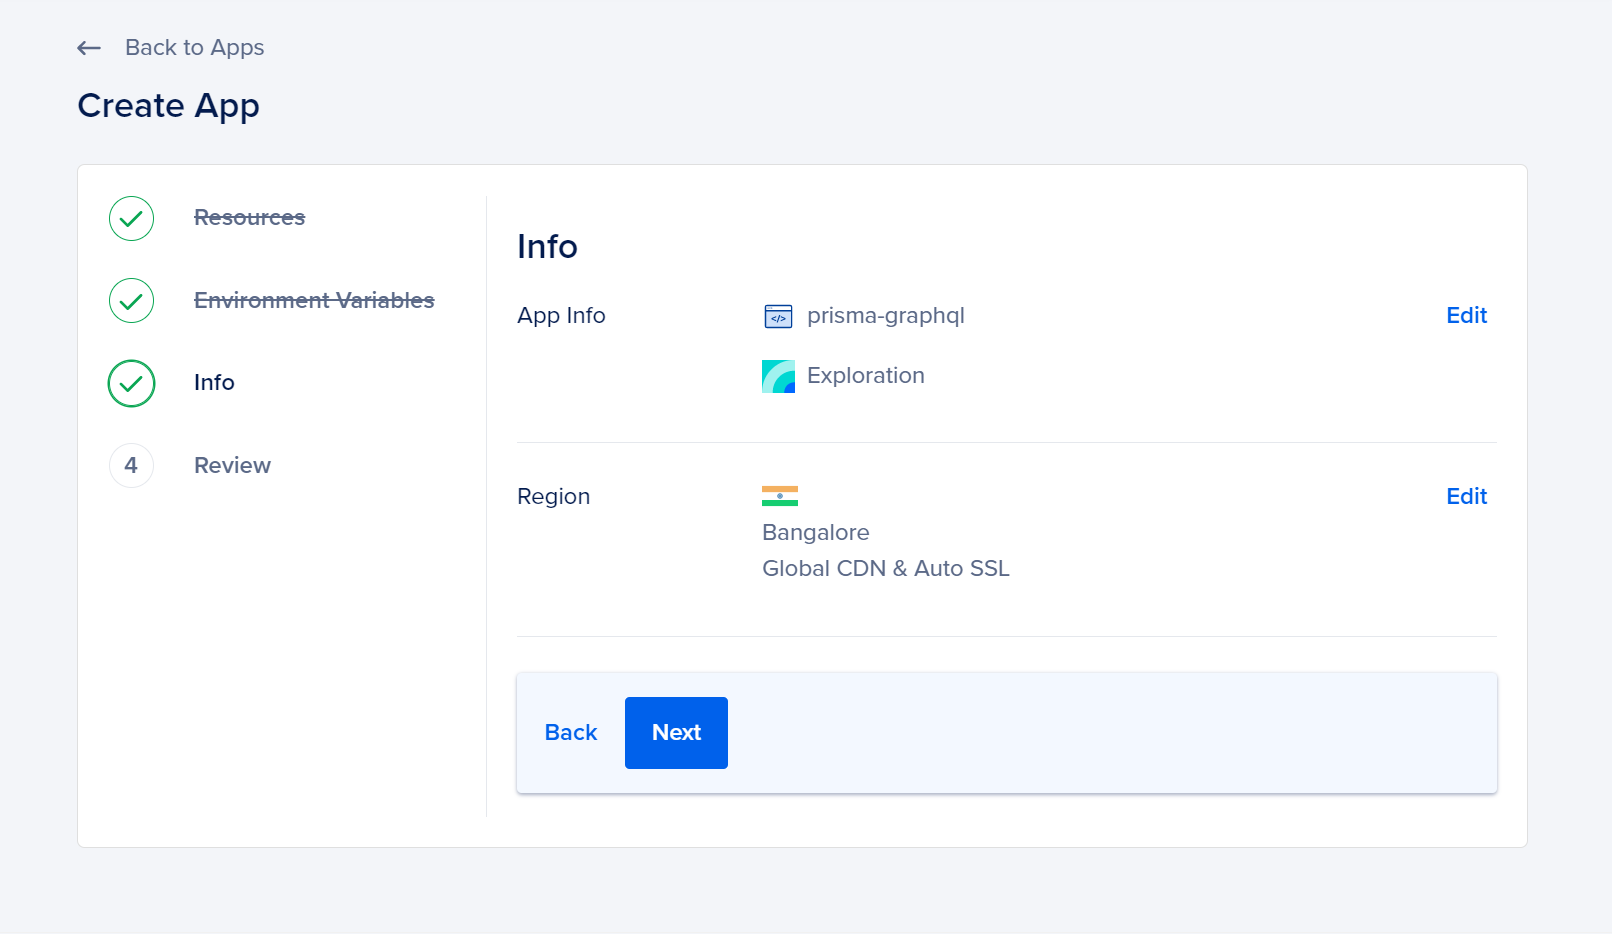
Once you have chosen your preferred options, you can access them on the Review page. After reviewing, click on Create Resources. This will take you to the application page, where you can observe the initial deployment progress.
Once the compilation is completed, you will receive a notification signifying the deployment of your application.
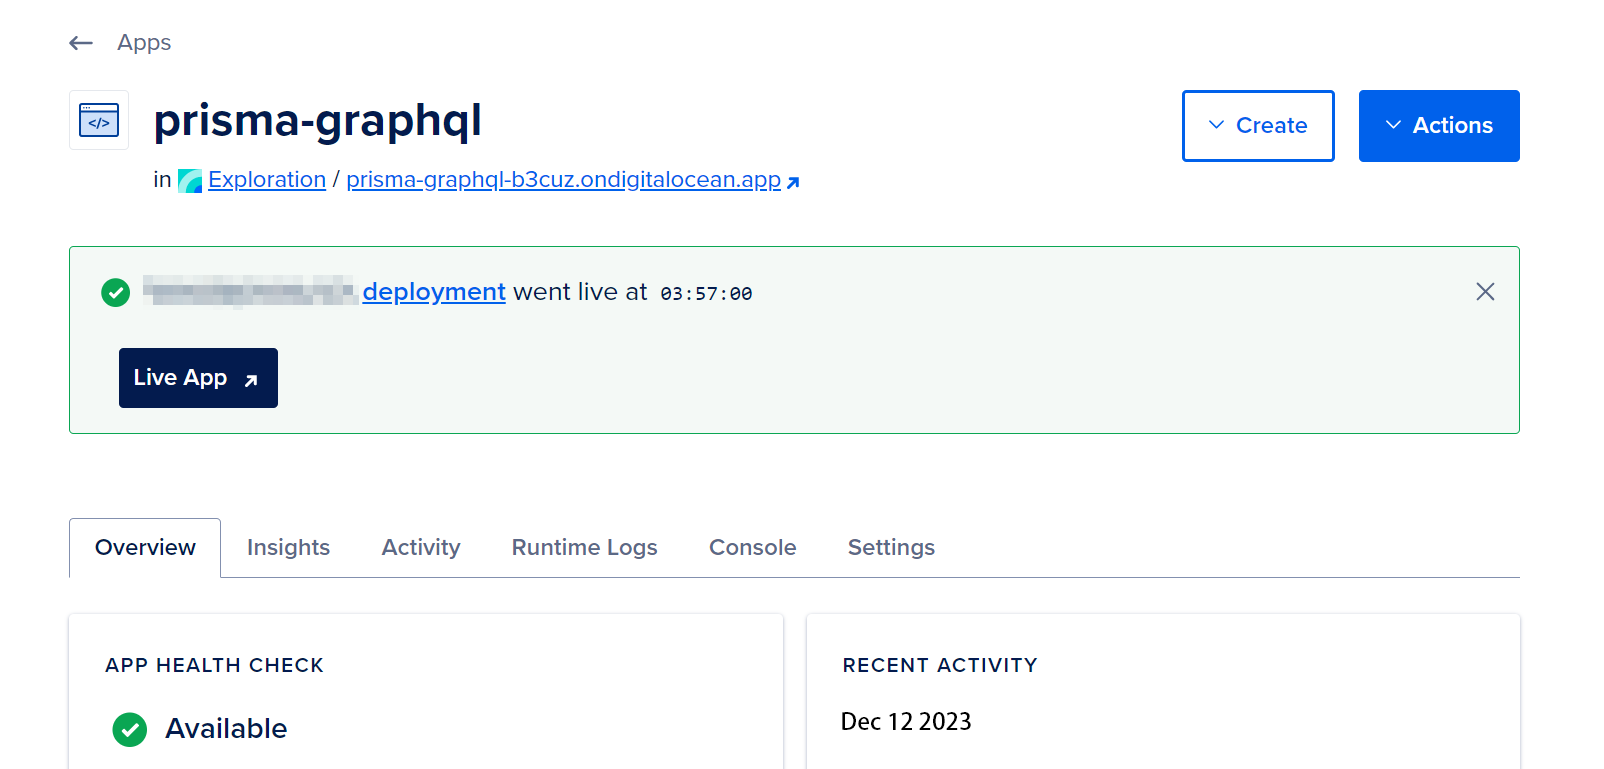
You can access your deployed GraphQL API by visiting the URL below the app’s name in your Silicon Cloud Console. The URL will be connected through the ondigitalocean.app subdomain. Opening the URL will bring up the GraphQL Playground, just like in Step 3 of this tutorial.
Once your repository is linked to App Platform and your GraphQL API is deployed, you can proceed to enhance your application by substituting the in-memory data of the GraphQL API with a database.
Step 6 involves configuring Prisma to work with PostgreSQL.
Up until now, you have developed a GraphQL API that utilizes the in-memory posts array for data storage. However, any modifications made to the data will be erased if the server restarts. To guarantee the secure persistence of your data, you will substitute the posts array with a PostgreSQL database and employ Prisma for data access.
In this stage, you will carry out the installation of the Prisma CLI, generate your initial Prisma schema (the principal setup file for your Prisma setup, which comprises your database schema), configure PostgreSQL with Docker on your local system, and establish Prisma’s connection to it.
To start, initiate the installation of the Prisma CLI using this command:
- npm install –save-dev prisma
The Prisma CLI assists in managing database tasks like executing database migrations and creating Prisma Client.
Afterwards, you will configure your PostgreSQL database by utilizing Docker. Generate a fresh Docker Compose file by running the given command:
- nano docker-compose.yml
Include the provided code into the recently established file.
prisma-graphql/docker-compose.yml can be rephrased as:
The docker-compose.yml file for prisma-graphql.
version: '3.8'
services:
  postgres:
    image: postgres:14
    restart: always
    environment:
      - POSTGRES_USER=test-user
      - POSTGRES_PASSWORD=test-password
    volumes:
      - postgres:/var/lib/postgresql/data
    ports:
      - '5432:5432'
volumes:
  postgres:
This native paraphrase of the given sentence could be:
The purpose of this Docker Compose configuration file is to initiate the official PostgreSQL Docker image on your local device. The environment variables POSTGRES_USER and POSTGRES_PASSWORD are utilized for establishing the superuser’s credentials, granting administrative privileges. These same credentials will be employed to connect Prisma with the database. So, kindly update the test-user and test-password with your own user credentials.
Ultimately, you designate a storage location for PostgreSQL to store its data and connect the port 5432 on your device to the equivalent port in the Docker container.
Please save the file and then exit.
Once you have set up this configuration, you can commence the PostgreSQL database server using the subsequent command.
- docker-compose up -d
It might require a couple of minutes for the loading process.
To ensure that the database server is operational, execute the given command.
- docker ps
This instruction will produce a result that is comparable to:
CONTAINER ID IMAGE COMMAND CREATED STATUS PORTS NAMES 198f9431bf73 postgres:10.3 “docker-entrypoint.s…” 45 seconds ago Up 11 seconds 0.0.0.0:5432->5432/tcp prisma-graphql_postgres_1
After starting the PostgreSQL container, proceed to set up your Prisma. Execute the given command from the Prisma CLI.
- npx prisma init
To ensure the use of your local installation, it is recommended to prefix all Prisma CLI invocations with npx.
This will print an output as such:
✔ Your Prisma schema was created at prisma/schema.prisma You can now open it in your favorite editor. Next steps: 1. Set the DATABASE_URL in the .env file to point to your existing database. If your database has no tables yet, read https://pris.ly/d/getting-started 2. Set the provider of the datasource block in schema.prisma to match your database: postgresql, mysql, sqlite, sqlserver, mongodb or cockroachdb. 3. Run prisma db pull to turn your database schema into a Prisma schema. 4. Run prisma generate to generate the Prisma Client. You can then start querying your database. More information in our documentation: https://pris.ly/d/getting-started
Once you execute the command, the Prisma CLI will create a .env file in the project folder to specify the database connection URL. Additionally, it will generate a new folder named prisma, which will hold the schema.prisma file. This file serves as the primary configuration file for your Prisma project, where you can define your data model.
To ensure that Prisma is aware of the location of your database, access the .env file.
- nano .env
Update the DATABASE_URL environment variable by adding your user credentials.
DATABASE_URL="postgresql://test-user:test-password@localhost:5432/my-blog?schema=public"
To access the database, utilize the login details “test-user” and “test-password” mentioned in the Docker Compose file. If you make any changes to these credentials in your Docker Compose file, remember to modify this line accordingly with the updated credentials. For additional information on the connection URL format, refer to the Prisma documentation.
You have performed the successful initiation of PostgreSQL and configured Prisma by implementing the Prisma schema. Now, in the subsequent phase, you will establish your data model for the blog and employ Prisma Migrate to generate the database schema.
In Step 7, we create the Data Model using Prisma Migrate.
Now, you will specify your data structure in the newly created Prisma schema file. This structure will be translated into the database using Prisma Migrate, which will automatically generate and execute the necessary SQL commands to create tables based on your data model.
As you construct a blog, the fundamental components of the system will consist of users and posts. At this stage, your task is to establish a Post model that mirrors the structure of the Post type in the GraphQL schema. In a subsequent stage, you will progress further and introduce a User model.
Note
Prisma employs its unique data modeling language to specify the structure of your application’s data.
Navigate to the location of the package.json file in your project’s folder and open the schema.prisma file.
- nano prisma/schema.prisma
Note
Include the subsequent model definitions in it.
...
model Post {
  id        Int     @default(autoincrement()) @id
  title     String
  content   String?
  published Boolean @default(false)
}
You create a Post model with various fields. This model will be associated with a database table, where each field corresponds to a column.
The id fields possess the subsequent field characteristics:
- @default(autoincrement()) sets an auto-incrementing default value for the column.
- @id sets the column as the primary key for the table.
Please save the file and then exit.
Once you have set up the model, you can proceed to generate the corresponding table in the database utilizing Prisma Migrate. Apply the “migrate dev” command to create and execute the migration files.
Please execute the following command in your terminal.
- npx prisma migrate dev –name init –skip-generate
This instruction generates a fresh migration on your file system and executes it to produce the database schema. The –name init parameter determines the migration’s name, which will also be used as the name for the created migration folder on your file system. The –skip-generate parameter avoids the generation of Prisma Client, which will be done in the subsequent step.
The result of this command will be something resembling:
Environment variables loaded from .env Prisma schema loaded from prisma/schema.prisma Datasource “db”: PostgreSQL database “my-blog”, schema “public” at “localhost:5432” PostgreSQL database my-blog created at localhost:5432 Applying migration `20201201110111_init` The following migration(s) have been created and applied from new schema changes: migrations/ └─ 20201201110111_init/ └─ migration.sql Your database is now in sync with your schema.
Now your prisma/migrations directory contains the SQL migration file. This method enables you to monitor modifications made to the database schema and reproduce the exact same database schema in a production environment.
Note
After successfully designing your database schema, the subsequent phase involves the installation of Prisma Client, which can be utilized in your GraphQL resolvers.
Step 8 involves utilizing Prisma Client within the GraphQL Resolvers.
You will incorporate Prisma Client, an automatically generated and secure Object Relational Mapper (ORM), into your Node.js application to facilitate programmatic reading and writing of data from a database. This step involves installing Prisma Client in your project.
Please install the Prisma Client npm package in your terminal.
- npm install @prisma/client
Note
Once you have set up the database and GraphQL schema and installed Prisma Client, you can utilize Prisma Client within the GraphQL resolvers to access and manipulate data in the database. This involves substituting the existing posts array, which has been serving as the data storage, with Prisma Client.
Please generate and access the file mentioned below:
- nano src/db.js
Include the subsequent lines in the fresh document:
const { PrismaClient } = require('@prisma/client')

module.exports = {
  prisma: new PrismaClient(),
}
This code is responsible for importing the Prisma Client module, initializing an instance of it, and then exporting the same instance for usage in your resolvers.
Please save and exit the src/db.js file.
Afterwards, you need to import the prisma instance into src/schema.js. To accomplish this, go ahead and open src/schema.js.
- nano src/schema.js
At the beginning of the file, include the following line to import prisma from the ./db directory.
const { prisma } = require('./db')
...
To eliminate the posts array, get rid of the lines that contain the hyphen symbol (-).
...
-const posts = [
-  {
-    id: 1,
-    title: 'Subscribe to GraphQL Weekly for community news ',
-    content: 'https://graphqlweekly.com/',
-    published: true,
-  },
-  {
-    id: 2,
-    title: 'Follow Silicon Cloud on Twitter',
-    content: 'https://twitter.com/digitalocean',
-    published: true,
-  },
-  {
-    id: 3,
-    title: 'What is GraphQL?',
-    content: 'GraphQL is a query language for APIs',
-    published: false,
-  },
-]
...
To fetch published posts from the database, you need to update the Query resolvers. Start by removing the current lines in the resolvers.Query, and then enhance the object by incorporating the highlighted lines.
One possible option for paraphrasing the given text could be:
“The schema.js file can be found in the prisma-graphql directory.”
...
const resolvers = {
  Query: {
    feed: (parent, args) => {
      return prisma.post.findMany({
        where: { published: true },
      })
    },
    post: (parent, args) => {
      return prisma.post.findUnique({
        where: { id: Number(args.id) },
      })
    },
  },
...
In this context, two Prisma Client queries are utilized.
- findMany fetches posts whose publish field is false.
- findUnique fetches a single post whose id field equals the id GraphQL argument.
According to the GraphQL specification, the ID type is serialized in the same manner as a String. As a result, you can convert it to a Number since the id in the Prisma schema is of type int.
Afterwards, you will need to modify the Mutation resolver in order to store and modify posts in the database. Start by removing the code located within the resolvers.Mutation object as well as the Number(args.id) lines. Following that, incorporate the suggested lines.
Sure, here’s one possible paraphrase:
“Schema.js located in the prisma-graphql directory.”
const resolvers = {
  ...
  Mutation: {
    createDraft: (parent, args) => {
      return prisma.post.create({
        data: {
          title: args.title,
          content: args.content,
        },
      })
    },
    publish: (parent, args) => {
      return prisma.post.update({
        where: {
          id: Number(args.id),
        },
        data: {
          published: true,
        },
      })
    },
  },
}
You are utilizing two queries with Prisma Client.
- create to create a Post record.
- update to update the published field of the Post record whose id matches the one in the query argument.
In the end, eliminate the resolvers.Post entity.
...
-Post: {
-  content: (parent) => parent.content,
-  id: (parent) => parent.id,
-  published: (parent) => parent.published,
-  title: (parent) => parent.title,
-},
...
Your schema.js should now be written in the following manner:
One possible paraphrase could be:
“schema.js located in the prisma-graphql directory”
const { gql } = require('apollo-server')
const { prisma } = require('./db')

const typeDefs = gql`
  type Post {
    content: String
    id: ID!
    published: Boolean!
    title: String!
  }

  type Query {
    feed: [Post!]!
    post(id: ID!): Post
  }

  type Mutation {
    createDraft(content: String, title: String!): Post!
    publish(id: ID!): Post
  }
`

const resolvers = {
  Query: {
    feed: (parent, args) => {
      return prisma.post.findMany({
        where: { published: true },
      })
    },
    post: (parent, args) => {
      return prisma.post.findUnique({
        where: { id: Number(args.id) },
      })
    },
  },
  Mutation: {
    createDraft: (parent, args) => {
      return prisma.post.create({
        data: {
          title: args.title,
          content: args.content,
        },
      })
    },
    publish: (parent, args) => {
      return prisma.post.update({
        where: {
          id: Number(args.id),
        },
        data: {
          published: true,
        },
      })
    },
  },
}

module.exports = {
  resolvers,
  typeDefs,
}
Please save the file and then close it.
Once you have made the necessary changes to the resolvers by utilizing Prisma Client, you can initiate the server to examine how data flows between the GraphQL API and the database. Launch the server by executing the given command.
- npm start
Once more, you will be given the ensuing result.
Server ready at: http://localhost:8080
Go to the address provided in the output and use the Apollo GraphQL Studio to test the GraphQL API with the queries mentioned in Step 3.
Now, you need to save your modifications in order for them to be implemented on App Platform. Use CTRL+C to stop the Apollo server.
To prevent including the node_modules folder and .env file, review the .gitignore file located in your project directory.
- cat .gitignore
Please verify if the lines mentioned are present in your .gitignore file.
node_modules
.env
If it’s not the case, modify the file to correspond.
Please save the file and then exit.
Next, execute the subsequent two commands for committing the modifications.
- git add .
- git commit -m ‘Add Prisma’
You will get a response output similar to this one.
git commit -m ‘Add Prisma’ [main 1646d07] Add Prisma 9 files changed, 157 insertions(+), 39 deletions(-) create mode 100644 .gitignore create mode 100644 docker-compose.yml create mode 100644 prisma/migrations/20201201110111_init/migration.sql create mode 100644 prisma/migrations/migration_lock.toml create mode 100644 prisma/schema.prisma create mode 100644 src/db.js
After incorporating the Prisma Client into your GraphQL resolvers for database queries and mutations, you have successfully pushed all the modifications to your remote repository. Now, your next step involves integrating a PostgreSQL database into your application on the App Platform.
Step 9 involves the creation and migration of the PostgreSQL database within the App Platform.
In this stage, you will integrate a PostgreSQL database into your application in App Platform. Next, you will utilize Prisma Migrate to execute the migration on this database, ensuring that the deployed database structure aligns with your local database.
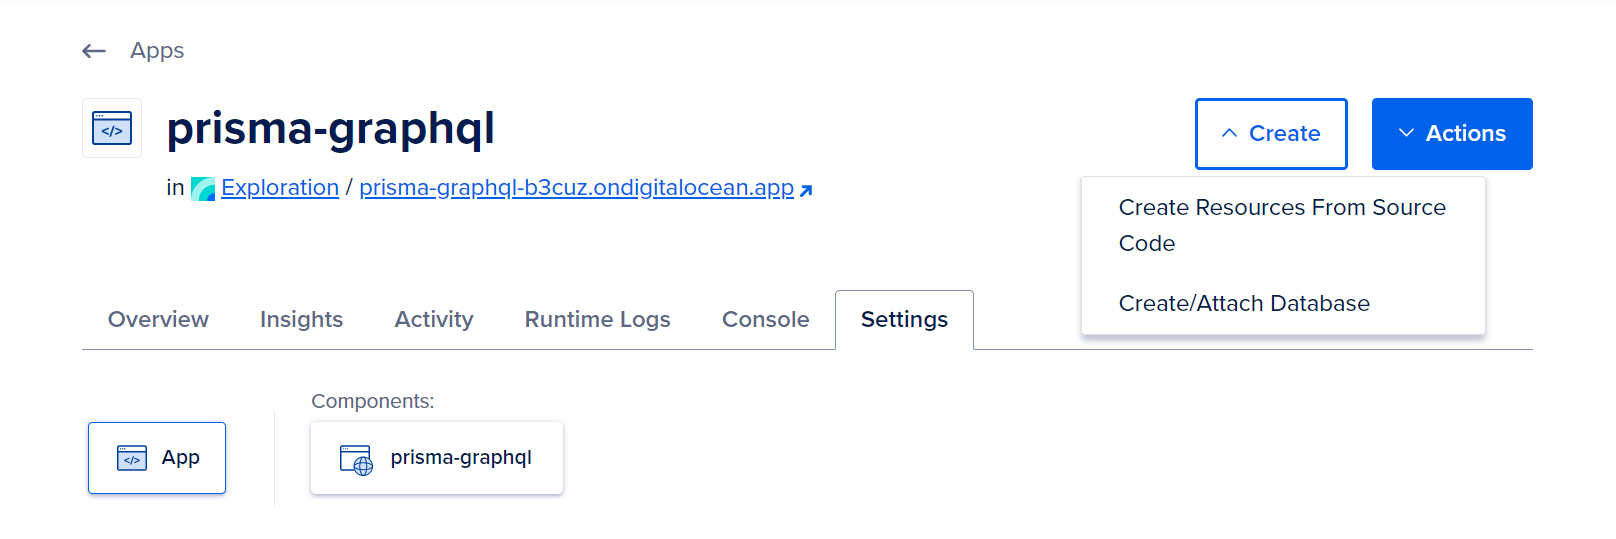
Initially, go to the App Platform console and choose the prisma-graphql project that you established in Step 5.
Afterward, proceed to click the Create button and choose Create/Attach Database from the dropdown menu. This selection will direct you to a page where you can configure your database.
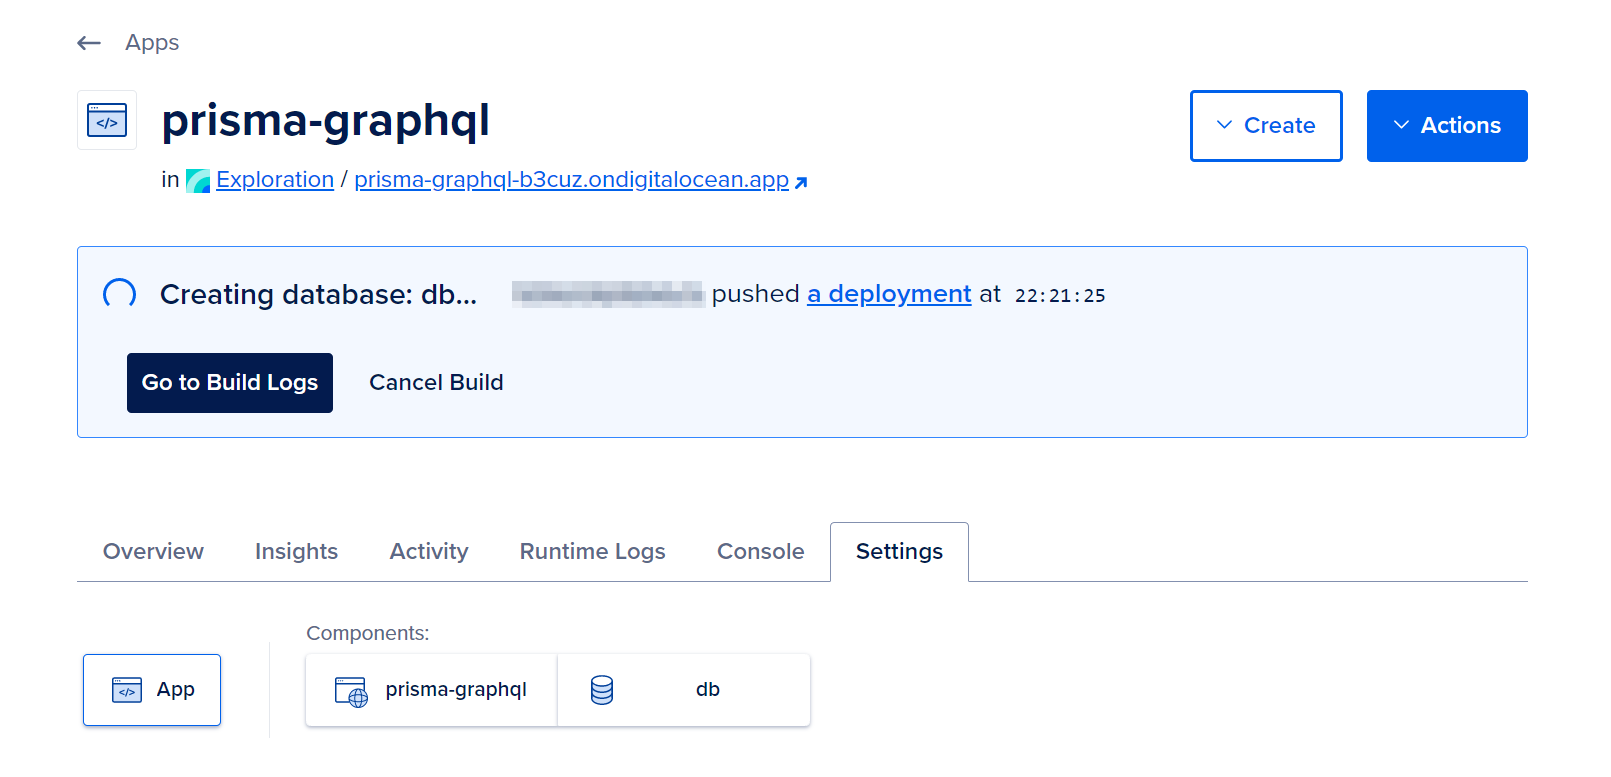
Select the Dev Database of your choice, choose a name, and then click on the option to Create and Attach.
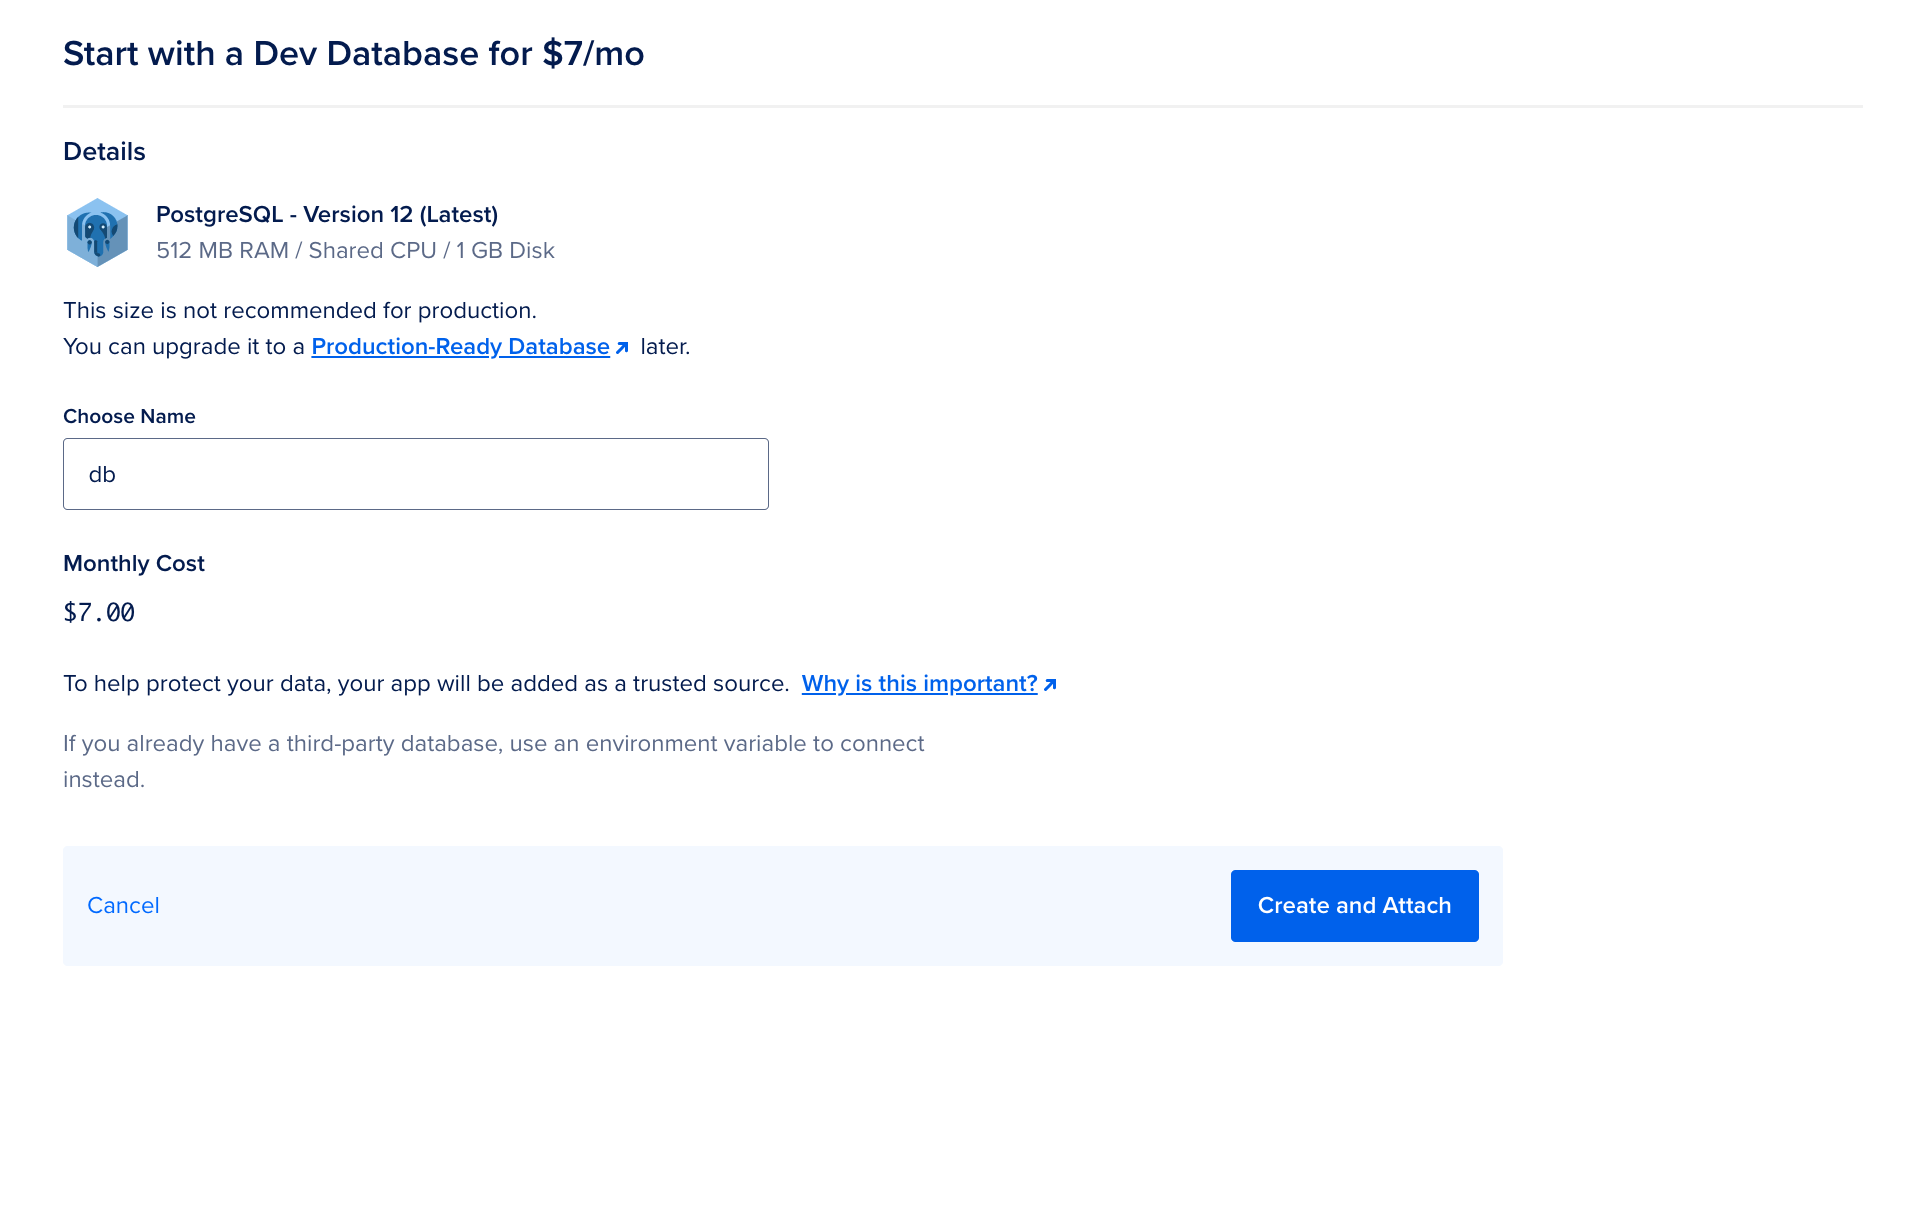
Once you are redirected to the Project view, you will notice a progress bar indicating the creation of the database.
Once you have created the database, you will execute the database migration on the Silicon Cloud production database from your local computer. In order to perform the migration, you will require the connection string for the hosted database.
To access it, simply click on the db icon located in the Components section of the Settings tab.
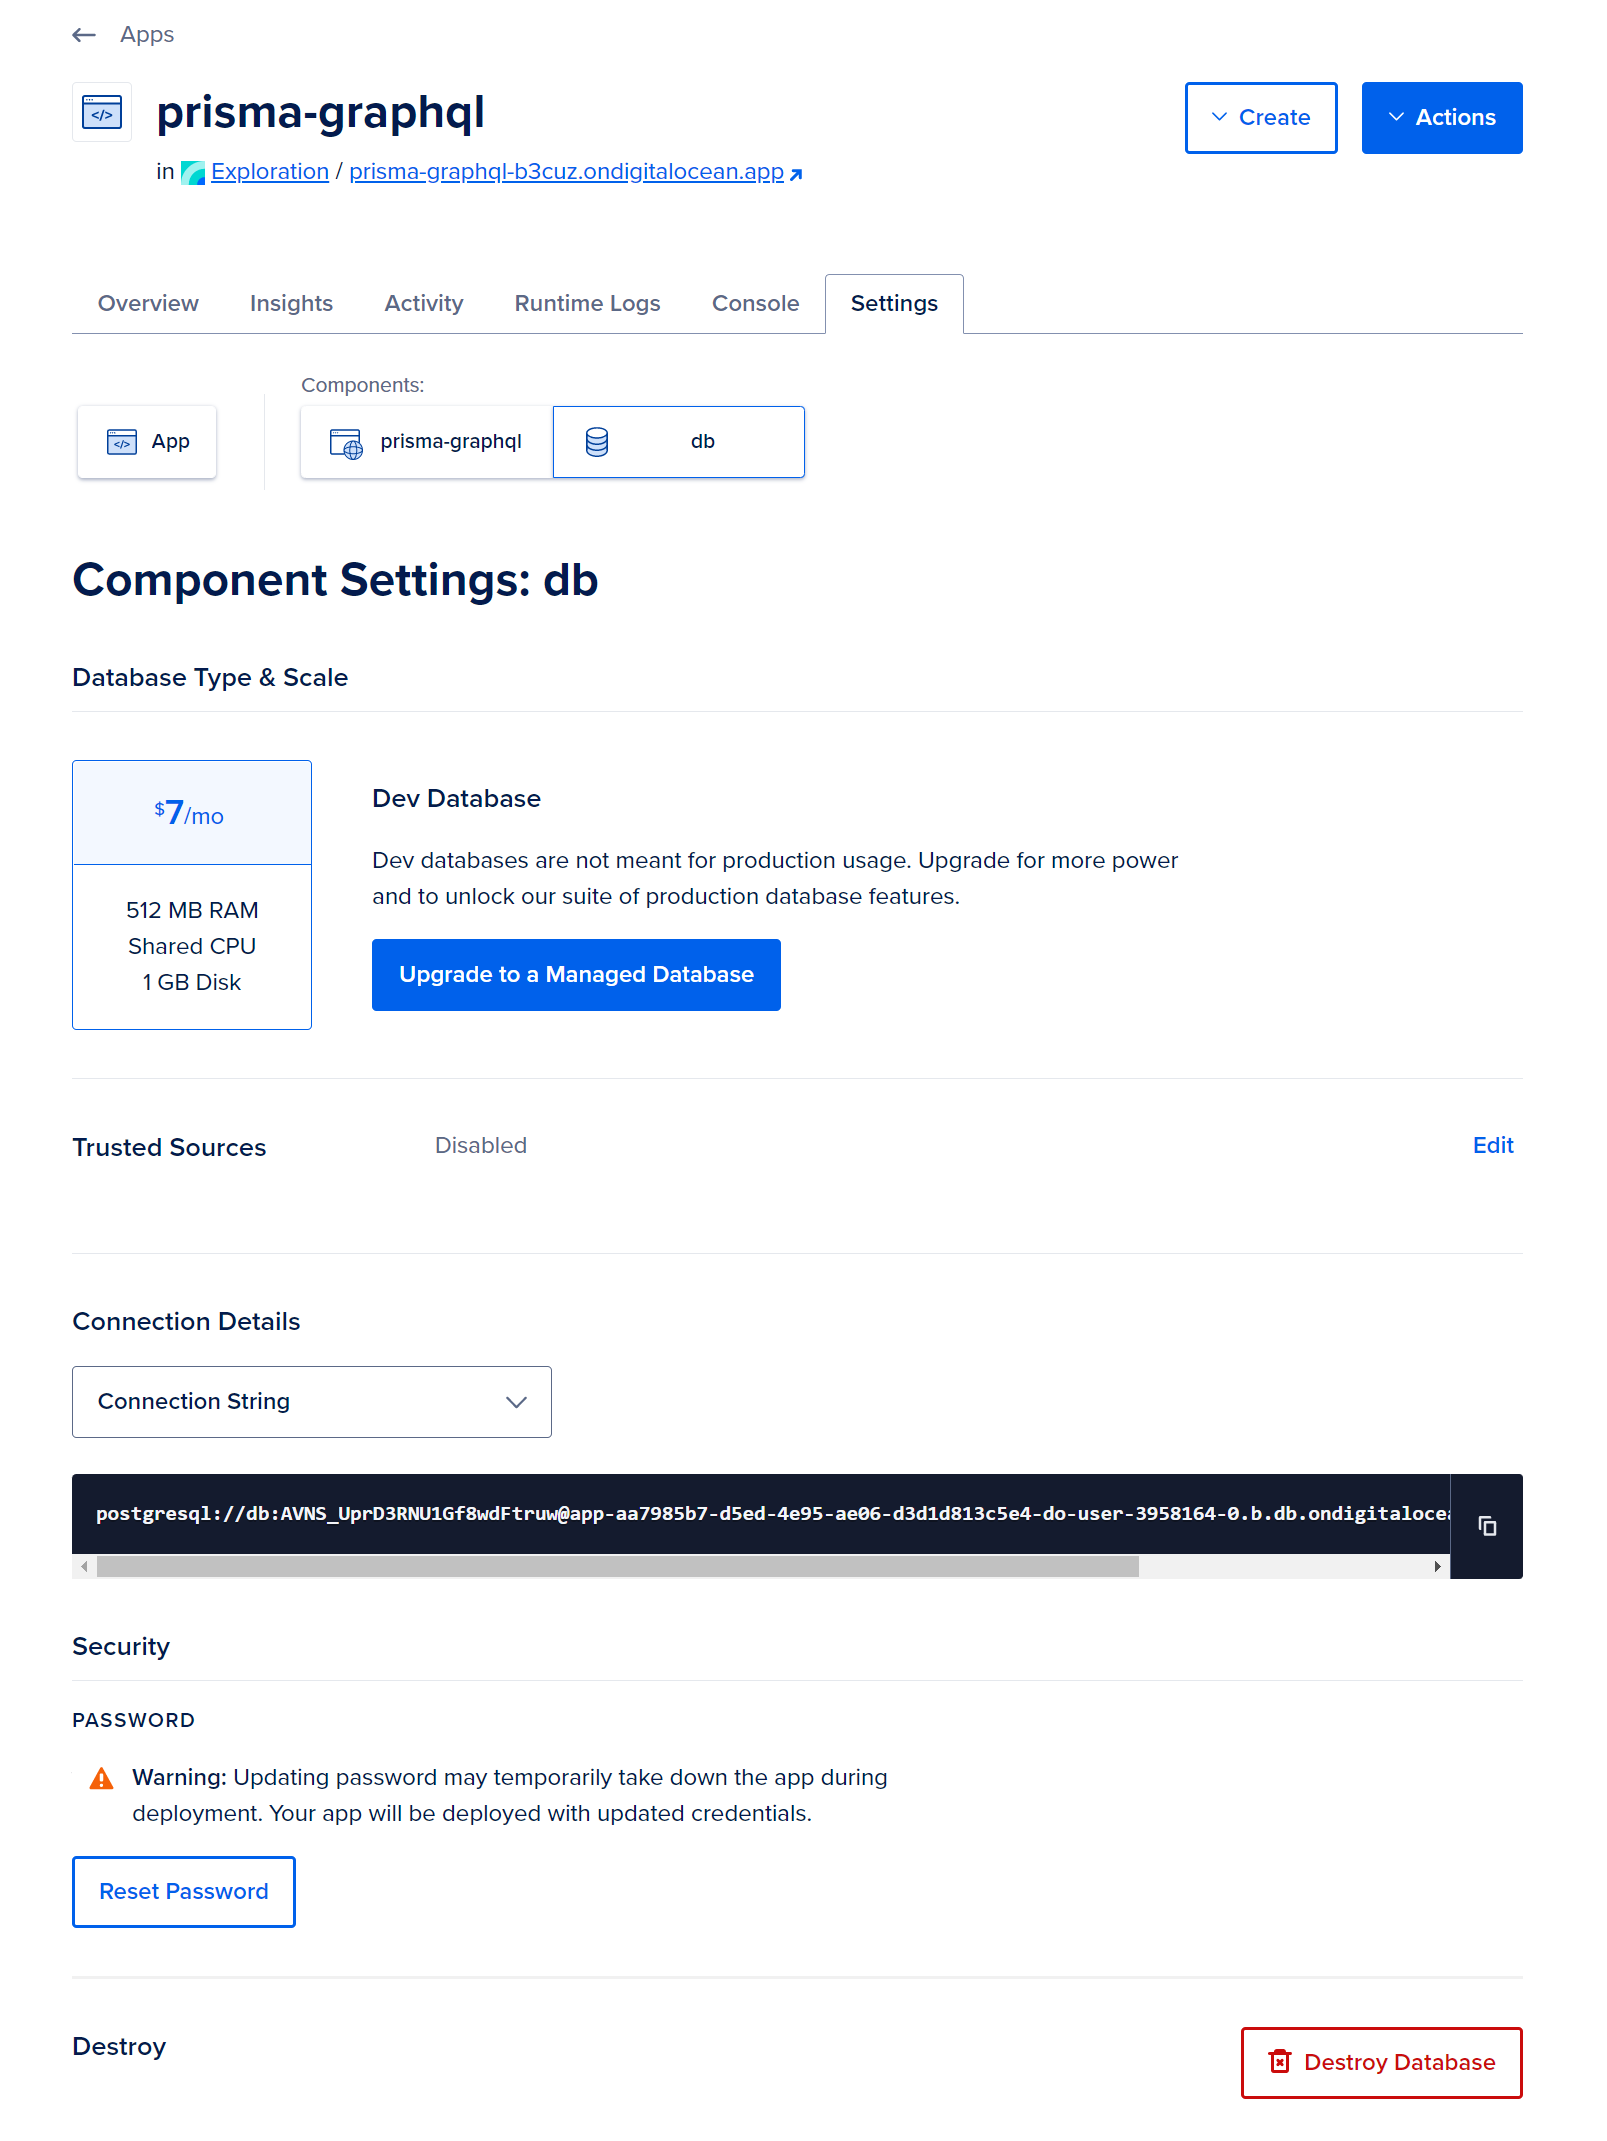
In Connection Details, click on View and then choose Connection String from the dropdown menu. Duplicate the database URL, which will be formatted as follows:
postgresql://db:some_password@unique_identifier.db.ondigitalocean.com:25060/db?sslmode=require
Next, execute the given command in your terminal, making sure to replace “your_db_connection_string” with the URL you just copied.
- DATABASE_URL=“your_db_connection_string“ npx prisma migrate deploy
With Prisma Migrate, executing this command will apply the migrations to the active database.
If the migration is successful, you will get the following result.
PostgreSQL database db created at unique_identifier.db.ondigitalocean.com:25060 Prisma Migrate applied the following migration(s): migrations/ └─ 20201201110111_init/ └─ migration.sql
The migration of the production database on Silicon Cloud has been successfully completed, and it now aligns with the Prisma schema.
Note
You can now launch your application by executing the given command to push your Git changes.
- git push
Note
If you open the App Platform console, a build will be triggered automatically and you will be able to see the progress of the deployment through a progress bar.
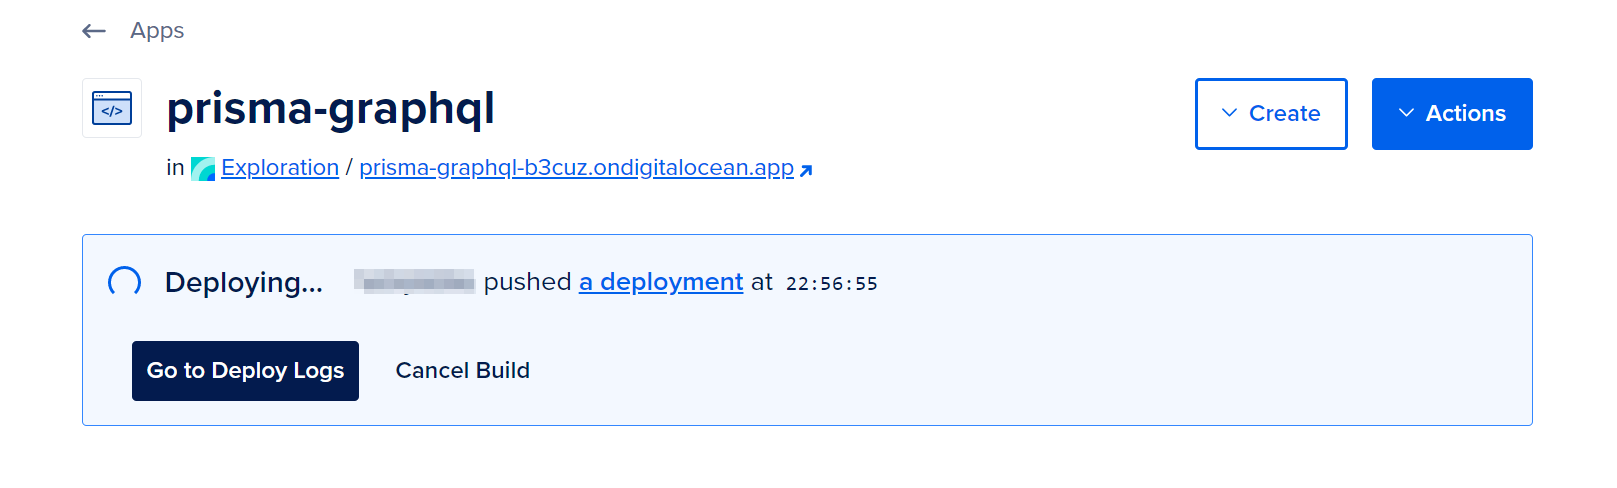
After the successful deployment, you will be notified with a message confirming that the deployment has gone live.
Now that you have safeguarded your deployed GraphQL API by creating a database backup, access the Live App to be directed to the Apollo GraphQL Studio. Proceed with evaluating the GraphQL API by employing the identical queries used in Step 3.
In the last stage, you will enhance the GraphQL API by incorporating the User model.
Step 10: Including the User Model
In the process of enhancing your blogging GraphQL API, you will introduce a new model called User in the Prisma schema and adapt the GraphQL schema accordingly. By establishing a one-to-many relationship between the User and Post models, you can effectively depict the post authors and enable multiple posts to be associated with each user. Lastly, you will update the GraphQL schema to facilitate user creation and enable the association of posts with users through the API.
To get started, access the Prisma schema file.
- nano prisma/schema.prisma
To incorporate the authorId field into the Post model and establish the User model, include the highlighted lines.
...
model Post {
  id        Int     @id @default(autoincrement())
  title     String
  content   String?
  published Boolean @default(false)
  author    User?   @relation(fields: [authorId], references: [id])
  authorId  Int?
}

model User {
  id    Int    @id @default(autoincrement())
  email String @unique
  name  String
  posts Post[]
}
You have included these items in the Prisma schema.
- Two relation fields: author and posts. Relation fields define connections between models at the Prisma level and do not exist in the database. These fields are used to generate the Prisma Client and to access relations with Prisma Client.
- The authorId field, which is referenced by the @relation attribute. Prisma will create a foreign key in the database to connect Post and User.
- The User model to represent users.
The author column in the Post model is not required, but it gives you the option to create posts that do not have any user associated with them.
When you finish, save the file and then exit.
After that, generate and execute the migration on your local device using the given command.
- npx prisma migrate dev –name “add-user”
Once the migration is completed successfully, you will be notified with the following message.
Environment variables loaded from .env Prisma schema loaded from prisma/schema.prisma Datasource “db”: PostgreSQL database “my-blog”, schema “public” at “localhost:5432” Applying migration `20201201123056_add_user` The following migration(s) have been created and applied from new schema changes: migrations/ └─ 20201201123056_add_user/ └─ migration.sql Your database is now in sync with your schema. ✔ Generated Prisma Client (4.6.1 | library) to ./node_modules/@prisma/client in 53ms
Once the command is executed, Prisma Client is automatically created for utilizing the newly generated table and fields.
Now, execute the migration on the production database on App Platform to ensure that the database schema matches your local database. Open your terminal and enter the following command, while configuring the DATABASE_URL with the connection URL from App Platform.
- DATABASE_URL=“your_db_connection_string“ npx prisma migrate deploy
You will get the output mentioned below.
Environment variables loaded from .env Prisma schema loaded from prisma/schema.prisma Datasource “db”: PostgreSQL database “db”, schema “public” at “unique_identifier.db.ondigitalocean.com:25060” 2 migrations found in prisma/migrations Applying migration `20201201123056_add_user` The following migration have been applied: migrations/ └─ 20201201123056_add_user/ └─ migration.sql All migrations have been successfully applied.
You need to update the GraphQL schema and resolvers with the latest changes made to the database schema.
Please access the src/schema.js file.
- nano src/schema.js
Modify typeDefs by incorporating the lines highlighted below:
...
const typeDefs = gql`
  type User {
    email: String!
    id: ID!
    name: String
    posts: [Post!]!
  }

  type Post {
    content: String
    id: ID!
    published: Boolean!
    title: String!
    author: User
  }

  type Query {
    feed: [Post!]!
    post(id: ID!): Post
  }

  type Mutation {
    createUser(data: UserCreateInput!): User!
    createDraft(authorEmail: String, content: String, title: String!): Post!
    publish(id: ID!): Post
  }

  input UserCreateInput {
    email: String!
    name: String
    posts: [PostCreateWithoutAuthorInput!]
  }

  input PostCreateWithoutAuthorInput {
    content: String
    published: Boolean
    title: String!
  }
`
...
You incorporate these modifications into the GraphQL schema in this latest version of the code.
- The User type, which returns an array of Post.
- The author field to the Post type.
- The createUser mutation, which expects the UserCreateInput as its input type.
- The PostCreateWithoutAuthorInput input type used in the UserCreateInput input for creating posts as part of the createUser mutation.
- The authorEmail optional argument to the createDraft mutation.
Once the schema has been updated, you can proceed with updating the resolvers to align with the schema.
You should modify the resolvers object by including the highlighted lines in the following manner:
...
const resolvers = {
  Query: {
    feed: (parent, args) => {
      return prisma.post.findMany({
        where: { published: true },
      })
    },
    post: (parent, args) => {
      return prisma.post.findUnique({
        where: { id: Number(args.id) },
      })
    },
  },
  Mutation: {
    createDraft: (parent, args) => {
      return prisma.post.create({
        data: {
          title: args.title,
          content: args.content,
          published: false,
          author: args.authorEmail && {
            connect: { email: args.authorEmail },
          },
        },
      })
    },
    publish: (parent, args) => {
      return prisma.post.update({
        where: { id: Number(args.id) },
        data: {
          published: true,
        },
      })
    },
    createUser: (parent, args) => {
      return prisma.user.create({
        data: {
          email: args.data.email,
          name: args.data.name,
          posts: {
            create: args.data.posts,
          },
        },
      })
    },
  },
  User: {
    posts: (parent, args) => {
      return prisma.user
        .findUnique({
          where: { id: parent.id },
        })
        .posts()
    },
  },
  Post: {
    author: (parent, args) => {
      return prisma.post
        .findUnique({
          where: { id: parent.id },
        })
        .author()
    },
  },
}
...
If the authorEmail argument is provided, the createDraft mutation resolver establishes a connection between the newly created draft and a user already in the system.
The createUser mutation resolver generates a user and its associated posts by employing nested writes.
To resolve the posts and author fields in the User or Post queries, the User.posts and Post.author resolvers are utilizing Prisma’s Fluent API for fetching the relations.
Please save the file and exit.
Begin the server to check the functionality of the GraphQL API.
- npm start
Start by trying out the createUser resolver using the given GraphQL mutation.
mutation {
  createUser(data: { email: "natalia@prisma.io", name: "Natalia" }) {
    email
    id
  }
}
This genetic alteration will generate a new individual.
Afterwards, try out the createDraft resolver by using the specified mutation.
mutation {
  createDraft(
    authorEmail: "natalia@prisma.io"
    title: "Deploying a GraphQL API to App Platform"
  ) {
    id
    title
    content
    published
    author {
      id
      name
    }
  }
}
If the query’s return value is a Post, you have the ability to retrieve the author. The Post.author resolver will be invoked in this scenario.
When you are done with the testing, please close the server.
Afterward, finalize your modifications and upload them to implement the API.
- git add .
- git commit -m “add user model”
- git push
Your updates may take a few minutes to be deployed.
You have effectively upgraded your database schema using Prisma Migrate and made the new model accessible in your GraphQL API.
In summary, to conclude.
In this article, we developed a GraphQL API using Prisma and deployed it on Silicon Cloud’s App Platform. We created a GraphQL schema and resolvers using Apollo Server. In these resolvers, we utilized Prisma Client to store and retrieve data in the PostgreSQL database. For further improvement, we can enhance the GraphQL API by adding a query to fetch individual users and a mutation to link an existing draft to a user.
If you want to delve into the data stored in the database, Prisma Studio is worth checking out. Additionally, you can refer to the Prisma documentation to gain insights into various aspects of Prisma and explore pre-built example projects in the prisma-examples repository.
The code for this project is available in the Silicon Cloud Community repository.
More Tutorials
The main method in Java(Opens in a new browser tab)
jQuery parent() and children() tree traversal functions(Opens in a new browser tab)
Python HTTP requests such as GET and POST methods.(Opens in a new browser tab)
Tutorials on Java EE(Opens in a new browser tab)
React Application Component Testing Integrate with Playwright(Opens in a new browser tab)

