How to keep track of MongoDB using Grafana and Prometheus on Ubuntu 20.04.
As part of the Write for Donations program, the author opted to donate to the COVID-19 Relief Fund.
The following paragraph should be paraphrased natively:
“Introducing oneself is crucial at the start of any conversation or meeting. It sets the tone and allows people to get to know each other. It is a way of sharing personal information and creating a connection with others.”
Database administrators must prioritize avoiding performance and memory problems. Prometheus and Grafana are valuable tools in monitoring the performance of your database cluster. Prometheus, an open-source platform, gathers and retains metrics as time-series data and provides alerting capabilities. Grafana, an open-source web application, enables interactive visualization and analysis. It offers the capability to import data from various sources, conduct queries, and present the data on customizable charts for effortless analysis. Additionally, you can establish alerts to promptly receive notifications about any unforeseen behavior. By combining these tools, you can effectively collect, monitor, analyze, and visualize data from your MongoDB instance.
Within this tutorial, you will establish a MongoDB database and oversee it through Grafana by utilizing Prometheus as a data source. To achieve this, you will set up the MongoDB exporter as a target for Prometheus. Consequently, Prometheus will be able to gather the metrics from your database and present them to Grafana.
Requirements
To complete this tutorial, you will require:
- One Ubuntu 20.04 server with a non-root user with sudo privileges and a firewall configured with ufw, which you can do by following the Initial Server Setup Guide for Ubuntu 20.04.
- MongoDB installed on the Ubuntu 20.04 server, which you can do by following the tutorial, How To Install MongoDB on Ubuntu 20.04.
- Grafana installed on the Ubuntu 20.04 server, which you can do by following Steps 1 through 4 of the tutorial, How To Install and Secure Grafana on Ubuntu 20.04.
To set up Grafana, you’ll require the following:
- A fully registered domain name. This tutorial uses your_domain throughout. You can purchase a domain name on Namecheap, get one for free on Freenom, or use the domain registrar of your choice.
- The following DNS records set up for your server. You can follow the How To Add Domains article for details on how to add them if you are using Silicon Cloud.An A record with your_domain pointing to your server’s public IP address.
An A record with www.your_domain pointing to your server’s public IP address. - Nginx set up by following the How To Install Nginx on Ubuntu 20.04 tutorial, including a server block for your domain.
- An Nginx server block with Let’s Encrypt configured, which you can set up by following How To Secure Nginx with Let’s Encrypt on Ubuntu 20.04.
First, you need to install and set up Prometheus.
Prometheus is a toolkit for monitoring and alerts, which is open source. It is responsible for gathering and storing metrics as time-series data, with each metric being stored alongside its respective timestamp. Your task now is to install Prometheus and set it up to function as a service.
Setting up Prometheus
To start the process, ensure you have Prometheus installed. Begin by logging into your server and proceed by updating the package lists in the provided manner.
- sudo apt update
Afterward, you will proceed to generate the directories for Prometheus configuration and data. To establish a configuration directory named prometheus, execute the subsequent command:
- sudo mkdir -p /etc/prometheus
Afterward, establish the directories for data.
- sudo mkdir -p /var/lib/prometheus
Once you have successfully set up the directories, you can proceed to obtain the compressed installation file. Prometheus offers precompiled binary files in compressed formats. To acquire the Prometheus installation file, visit the designated download page.
To acquire version 2.31.0, execute the subsequent command, substituting the required version number:
- wget https://github.com/prometheus/prometheus/releases/download/v2.31.0/prometheus-2.31.0.linux-amd64.tar.gz
After downloading the file, you can extract it by using the tarball option.
- tar -xvf prometheus-2.31.0.linux-amd64.tar.gz
Once the file has been extracted, go to the folder named Prometheus.
- cd prometheus-2.31.0.linux-amd64
Afterwards, transfer the prometheus and promtool executable files to the /usr/local/bin/ folder.
- sudo mv prometheus promtool /usr/local/bin/
Afterwards, you will relocate all the files associated with Prometheus to a single destination: /etc/prometheus/. To accomplish this, execute the given command to transfer the console files found in the consoles folder and the library files located in the console_libraries folder.
- sudo mv consoles/ console_libraries/ /etc/prometheus/
The Prometheus GUI is accessed through the console and console library files. These files are stored together with the configuration files to ensure they are readily available when starting the service.
Lastly, relocate the prometheus.yml template configuration file to the /etc/prometheus/ folder.
- sudo mv prometheus.yml /etc/prometheus/prometheus.yml
The Prometheus configuration file, prometheus.yml, is the designated file for customizing the port settings and determining the necessary files to enable when initiating the service.
To inquire about the installed Prometheus version, execute the following command:
- prometheus –version
You will get output that looks like this:
prometheus, version 2.31.0 (branch: HEAD, revision: b41e0750abf5cc18d8233161560731de05199330) build user: root@0aa1b7fc430d build date: 20220714-15:13:18 go version: go1.18.4 platform: linux/amd64
After successfully installing Prometheus in the previous section and confirming its version, the next step will be to initiate it as a service.
Using Prometheus in a service-oriented manner
Once Prometheus has been installed, you will proceed with setting it up to run as a service.
To achieve this, first establish a Prometheus group and user before developing the system file. It is important to have a specific user with owner privileges for the relevant folders. Carry out the following command to establish a Prometheus group.
- sudo groupadd –system prometheus
Afterward, generate a prometheus user and allocate it to the previously established prometheus group.
- sudo useradd -s /sbin/nologin –system -g prometheus prometheus
Modify the ownership and permissions of the directory accordingly to ensure that the dedicated user possesses the accurate permissions.
- sudo chown -R prometheus:prometheus /etc/prometheus/ /var/lib/prometheus/
- sudo chmod -R 775 /etc/prometheus/ /var/lib/prometheus/
Afterwards, you will generate the service file for executing Prometheus as a service. Employing either nano or your preferred text editor, forge a prometheus.service file within the systemd service.
- sudo nano /etc/systemd/system/prometheus.service
Include these lines of code:
Insert the following code snippets:
Incorporate the subsequent lines of code:
Integrate the following code lines:
“A service file for Prometheus located in the systemd directory under /etc.”
[Unit]
Description=Prometheus
ts=network-online.target
After=network-online.target

[Service]
User=prometheus
Group=prometheus
Restart=always
Type=simple
ExecStart=/usr/local/bin/prometheus \
    --config.file=/etc/prometheus/prometheus.yml \
    --storage.tsdb.path=/var/lib/prometheus/ \
    --web.console.templates=/etc/prometheus/consoles \
    --web.console.libraries=/etc/prometheus/console_libraries \
    --web.listen-address=0.0.0.0:9090

[Install]
tedBy=multi-user.target
By utilizing this code, you can set up Prometheus to utilize the files mentioned in the ExecStart section in order to operate the service. The service file instructs systemd to execute Prometheus with the prometheus user, using the configuration file located at /etc/prometheus/prometheus.yml and storing its data in the /var/lib/prometheus directory. Additionally, Prometheus is configured to operate on port 9090. Please note that the detailed explanation of systemd service files is not covered in this tutorial, however, you can find more information at Understanding Systemd Units and Unit Files.
Please save and close your file. If you are using nano, press CTRL+X, followed by Y.
Begin running the Prometheus service.
- sudo systemctl start prometheus
Allow the Prometheus service to initiate automatically upon system initialization.
- sudo systemctl enable prometheus
To determine the service status, you can utilize the given command.
- sudo systemctl status prometheus
The result will verify the service’s active status.
Generate a single option of the following paraphrase:
Result
● prometheus.service - Prometheus
     Loaded: loaded (/etc/systemd/system/prometheus.service; enabled; vendor preset: enabled)
     Active: active (running) since Fri 2022-08-05 18:06:05 UTC; 13s ago
   Main PID: 7177 (prometheus)
      Tasks: 6 (limit: 527)
     Memory: 21.0M
     CGroup: /system.slice/prometheus.service
             └─7177 /usr/local/bin/prometheus --config.file=/etc/prometheus/prometheus.yml --storage.tsdb.path=/var/lib/prometheus/ --web.console.template>
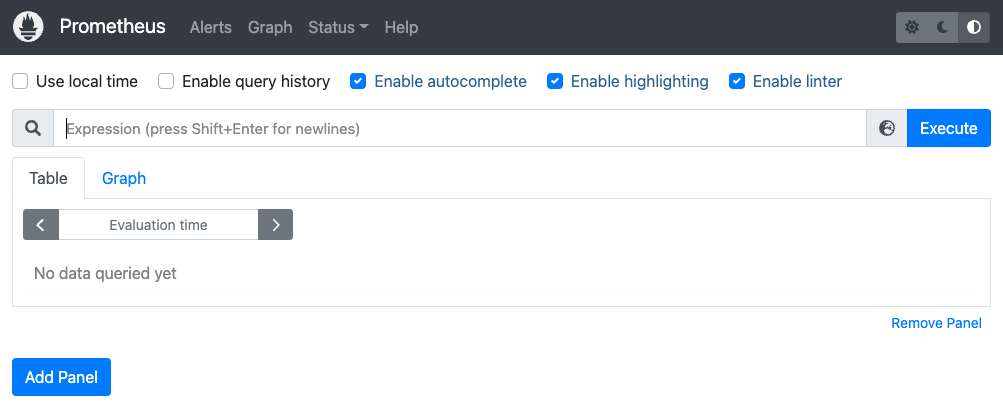
To open Prometheus, open your web browser and go to your server’s IP address with port 9090 added at the end: http://your_server_ip:9090.
Note
sudo ufw status
If port 9090 is currently not permitted, you can grant access by executing the following command:
sudo ufw allow 9090
The Prometheus web console is now available for your access.
After completing this stage, Prometheus was successfully installed and set up as a service. Now, the next step involves associating your MongoDB database with Prometheus by utilizing the MongoDB exporter.
Second step: Configuring the MongoDB Exporter.
To collect metrics, Prometheus utilizes scraping of targets. Now, you will need to install the MongoDB exporter and configure it as a Prometheus target to enable data collection from your MongoDB instance.
The process of setting up the MongoDB Exporter software.
Create a folder for the MongoDB exporter in this section and go to it.
- mkdir mongodb-exporter
- cd mongodb-exporter
To obtain the MongoDB exporter, access it on Github. It is accessible as a binary file in an archive, which you will subsequently set up as a service. Use the specified command to download the binary file.
- wget https://github.com/percona/mongodb_exporter/releases/download/v0.7.1/mongodb_exporter-0.7.1.linux-amd64.tar.gz
Afterwards, unzip the downloaded archive and place its contents into your existing directory.
- tar xvzf mongodb_exporter-0.7.1.linux-amd64.tar.gz
In the end, relocate the mongodb_exporter executable to usr/local/bin/.
- sudo mv mongodb_exporter /usr/local/bin/
You have completed the installation of the MongoDB exporter in this part. In the next step, you will activate MongoDB authentication and establish a user specifically for monitoring purposes.
Enabling authentication for MongoDB.
You will configure MongoDB authentication for the MongoDB exporter and generate a user to oversee the metrics of the cluster in this part.
Start by establishing a connection to your MongoDB instance using mongo.
- mongo
Create an administrator account for your exporter with the cluster monitor role and switch to the admin database.
- use admin
Once you have switched to the admin database, proceed to create a user who possesses the clusterMonitor role.
- db.createUser({user: “test“,pwd: “testing“,roles: [{ role: “clusterMonitor”, db: “admin” },{ role: “read”, db: “local” }]})
You will get the subsequent result.
Successfully added user: {
        "user" : "test",
        "roles" : [
                {
                        "role" : "clusterMonitor",
                        "db" : "admin"
                },
                {
                        "role" : "read",
                        "db" : "local"
                }
        ]
}
Once the user has been created, you can leave the MongoDB shell.
- exit
Afterward, assign the MongoDB URI environment variable with the correct authentication credentials.
export MONGODB_URI=mongodb://test:testing@localhost:27017
You designate the MONGODB_URI to indicate the mongodb instance which utilizes the previous authentication credentials (the test user and testing password). 27017 serves as the standard port for a mongodb instance. Once the environment variable is set, it becomes prioritized over the profile saved in the configuration file.
To verify if the MongoDO URI environment variable was accurately set, execute the subsequent command.
- env | grep mongodb
You will be given the following result.
MONGODB_URI=mongodb://mongodb_exporter:password@localhost:27017
In this part, you established a MongoDB user with the clusterMonitor function that assists in monitoring the cluster metrics. Subsequently, you will set up the MongoDB exporter to operate as a service.
Developing a service to facilitate the MongoDB exporter
In this part, you will generate a system file for the MongoDB exporter and execute it as a service.
Go to /lib/systemd/system and generate a service file for the exporter by using nano or any text editor of your choice.
- cd /lib/systemd/system/
- sudo nano mongodb_exporter.service
Copy and insert the given configuration into your service file.
[Unit]
Description=MongoDB Exporter
User=prometheus

[Service]
Type=simple
Restart=always
ExecStart=/usr/local/bin/mongodb_exporter

[Install]
tedBy=multi-user.target
The service file instructs systemd to execute the MongoDB exporter as a service using the prometheus user. ExecStart will execute the mongodb_exporter binary located in usr/local/bin/. To learn more about systemd service files, refer to the article “Understanding Systemd Units and Unit Files”.
Please save and then close your file.
Afterward, proceed with the system daemon restart to reload the unit files.
- sudo systemctl daemon-reload
Begin your service now.
- sudo systemctl start mongodb_exporter.service
To verify the condition of the MongoDB exporter service, execute the command provided below.
- sudo systemctl status mongodb_exporter.service
The result will validate the service’s status as active.
● mongodb_exporter.service - MongoDB Exporter
     Loaded: loaded (/lib/systemd/system/mongodb_exporter.service; disabled; vendor preset: enabled)
     Active: active (running) since Fri 2022-08-05 18:18:38 UTC; 1 weeks 3 days ago
   Main PID: 7352 (mongodb_exporte)
      Tasks: 5 (limit: 527)
     Memory: 14.2M
     CGroup: /system.slice/mongodb_exporter.service
             └─7352 /usr/local/bin/mongodb_exporter
To confirm proper functioning, go to the project’s main directory and execute a curl command on port 9216, which is where the exporter operates, ensuring everything is functioning correctly.
- cd ~
- sudo curl http://localhost:9216/metrics
The result will be lengthy and will consist of lines that resemble this one.
# HELP go_gc_duration_seconds A summary of the GC invocation durations. # TYPE go_gc_duration_seconds summary go_gc_duration_seconds{quantile=”0″} 0 go_gc_duration_seconds{quantile=”0.25″} 0 go_gc_duration_seconds{quantile=”0.5″} 0 go_gc_duration_seconds{quantile=”0.75″} 0 go_gc_duration_seconds{quantile=”1″} 0 go_gc_duration_seconds_sum 0 go_gc_duration_seconds_count 0 # HELP go_goroutines Number of goroutines that currently exist. # TYPE go_goroutines gauge go_goroutines 11 # HELP go_memstats_alloc_bytes Number of bytes allocated and still in use. # TYPE go_memstats_alloc_bytes gauge go_memstats_alloc_bytes 1.253696e+06 # HELP go_memstats_alloc_bytes_total Total number of bytes allocated, even if freed. # TYPE go_memstats_alloc_bytes_total counter go_memstats_alloc_bytes_total 1.253696e+06 # HELP go_memstats_buck_hash_sys_bytes Number of bytes used by the profiling bucket hash table. # TYPE go_memstats_buck_hash_sys_bytes gauge go_memstats_buck_hash_sys_bytes 3054 # HELP go_memstats_frees_total Total number of frees. # TYPE go_memstats_frees_total counter go_memstats_frees_total 2866 # HELP go_memstats_gc_sys_byte . . . # HELP mongodb_asserts_total The asserts document reports the number of asserts on the database. While assert errors are typically uncommon, if there are non-zero values for the asserts, you should check the log file for the mongod process for more information. In many cases these errors are trivial, but are worth investigating. # TYPE mongodb_asserts_total counter mongodb_asserts_total{type=”msg”} 0 mongodb_asserts_total{type=”regular”} 0 mongodb_asserts_total{type=”rollovers”} 0 mongodb_asserts_total{type=”user”} 19 mongodb_asserts_total{type=”warning”} 0 # HELP mongodb_connections The connections sub document data regarding the current status of incoming connections and availability of the database server. Use these values to assess the current load and capacity requirements of the server # TYPE mongodb_connections gauge mongodb_connections{state=”available”} 51198 mongodb_connections{state=”current”} 2 # HELP mongodb_connections_metrics_created_total totalCreated provides a count of all incoming connections created to the server. This number includes connections that have since closed # TYPE mongodb_connections_metrics_created_total counter mongodb_connections_metrics_created_total 6 # HELP mongodb_exporter_build_info A metric with a constant ‘1’ value labeled by version, revision, branch, and goversion from which mongodb_exporter was built. # TYPE mongodb_exporter_build_info gauge mongodb_exporter_build_info{branch=”v0.7.1″,goversion=”go1.11.10″,revision=”3002738d50f689c8204f70f6cceb8150b98fa869″,version=”0.7.1″} 1 # HELP mongodb_exporter_last_scrape_duration_seconds Duration of the last scrape of metrics from MongoDB. # TYPE mongodb_exporter_last_scrape_duration_seconds gauge mongodb_exporter_last_scrape_duration_seconds 0.003641888 # HELP mongodb_exporter_last_scrape_error Whether the last scrape of metrics from MongoDB resulted in an error (1 for error, 0 for success). # TYPE mongodb_exporter_last_scrape_error gauge mongodb_exporter_last_scrape_error 0 . . . …
The result affirms that the MongoDB exporter is gathering statistics, such as the version of MongoDB, the details of the metric document, and information about the connections.
After setting up the MongoDB exporter as a service and gathering metrics from MongoDB in the previous section, the next step is to configure the exporter as a destination for Prometheus.
Setting up the MongoDB Exporter to function as a Prometheus Target.
Go to the directory where your Prometheus configuration file is located and set up the MongoDB exporter as a target for Prometheus.
- cd /etc/prometheus/
Open the file for editing by using nano or any preferred text editor.
- sudo nano prometheus.yml
To include the MongoDB exporter as a destination, simply duplicate the highlighted code lines into your document.
# A scrape configuration containing exactly one endpoint to scrape:
# Here it's Prometheus itself.
scrape_configs:
  # The job name is added as a label `job=<job_name>` to any timeseries scraped from this config.
  - job_name: "prometheus"
    static_configs:
            - targets: ["localhost:9090", "localhost:9216"]
The default port for the MongoDB exporter is 9216.
Please save and close your file.
Once the target is added, reboot Prometheus.
- sudo systemctl restart prometheus
Go to http://localhost:9090/targets to confirm that Prometheus is collecting data from your recently added exporter.
Note
You will be able to see a collection of Prometheus targets.

The Prometheus scraping itself through the 9090 endpoint, while the MongoDB exporter validates if your configuration is functioning correctly through the 9216 endpoint.
After completing this step, you have successfully installed the MongoDB exporter and set it up as a Prometheus target for gathering metrics. Moving forward, you can now proceed to the Grafana web console where you will generate a MongoDB dashboard for monitoring and analyzing these metrics.
Step 3 involves creating a Grafana dashboard for MongoDB.
To proceed, create a dashboard on Grafana to display your MongoDB data. To achieve this, incorporate Prometheus as a data source within Grafana and then import a MongoDB dashboard from Percona. Percona offers various dashboards specific to MongoDB, available in their product documentation. For this guide, import the MongoDB Overview dashboard into your Grafana setup. To get started, define Prometheus as a data source in Grafana.
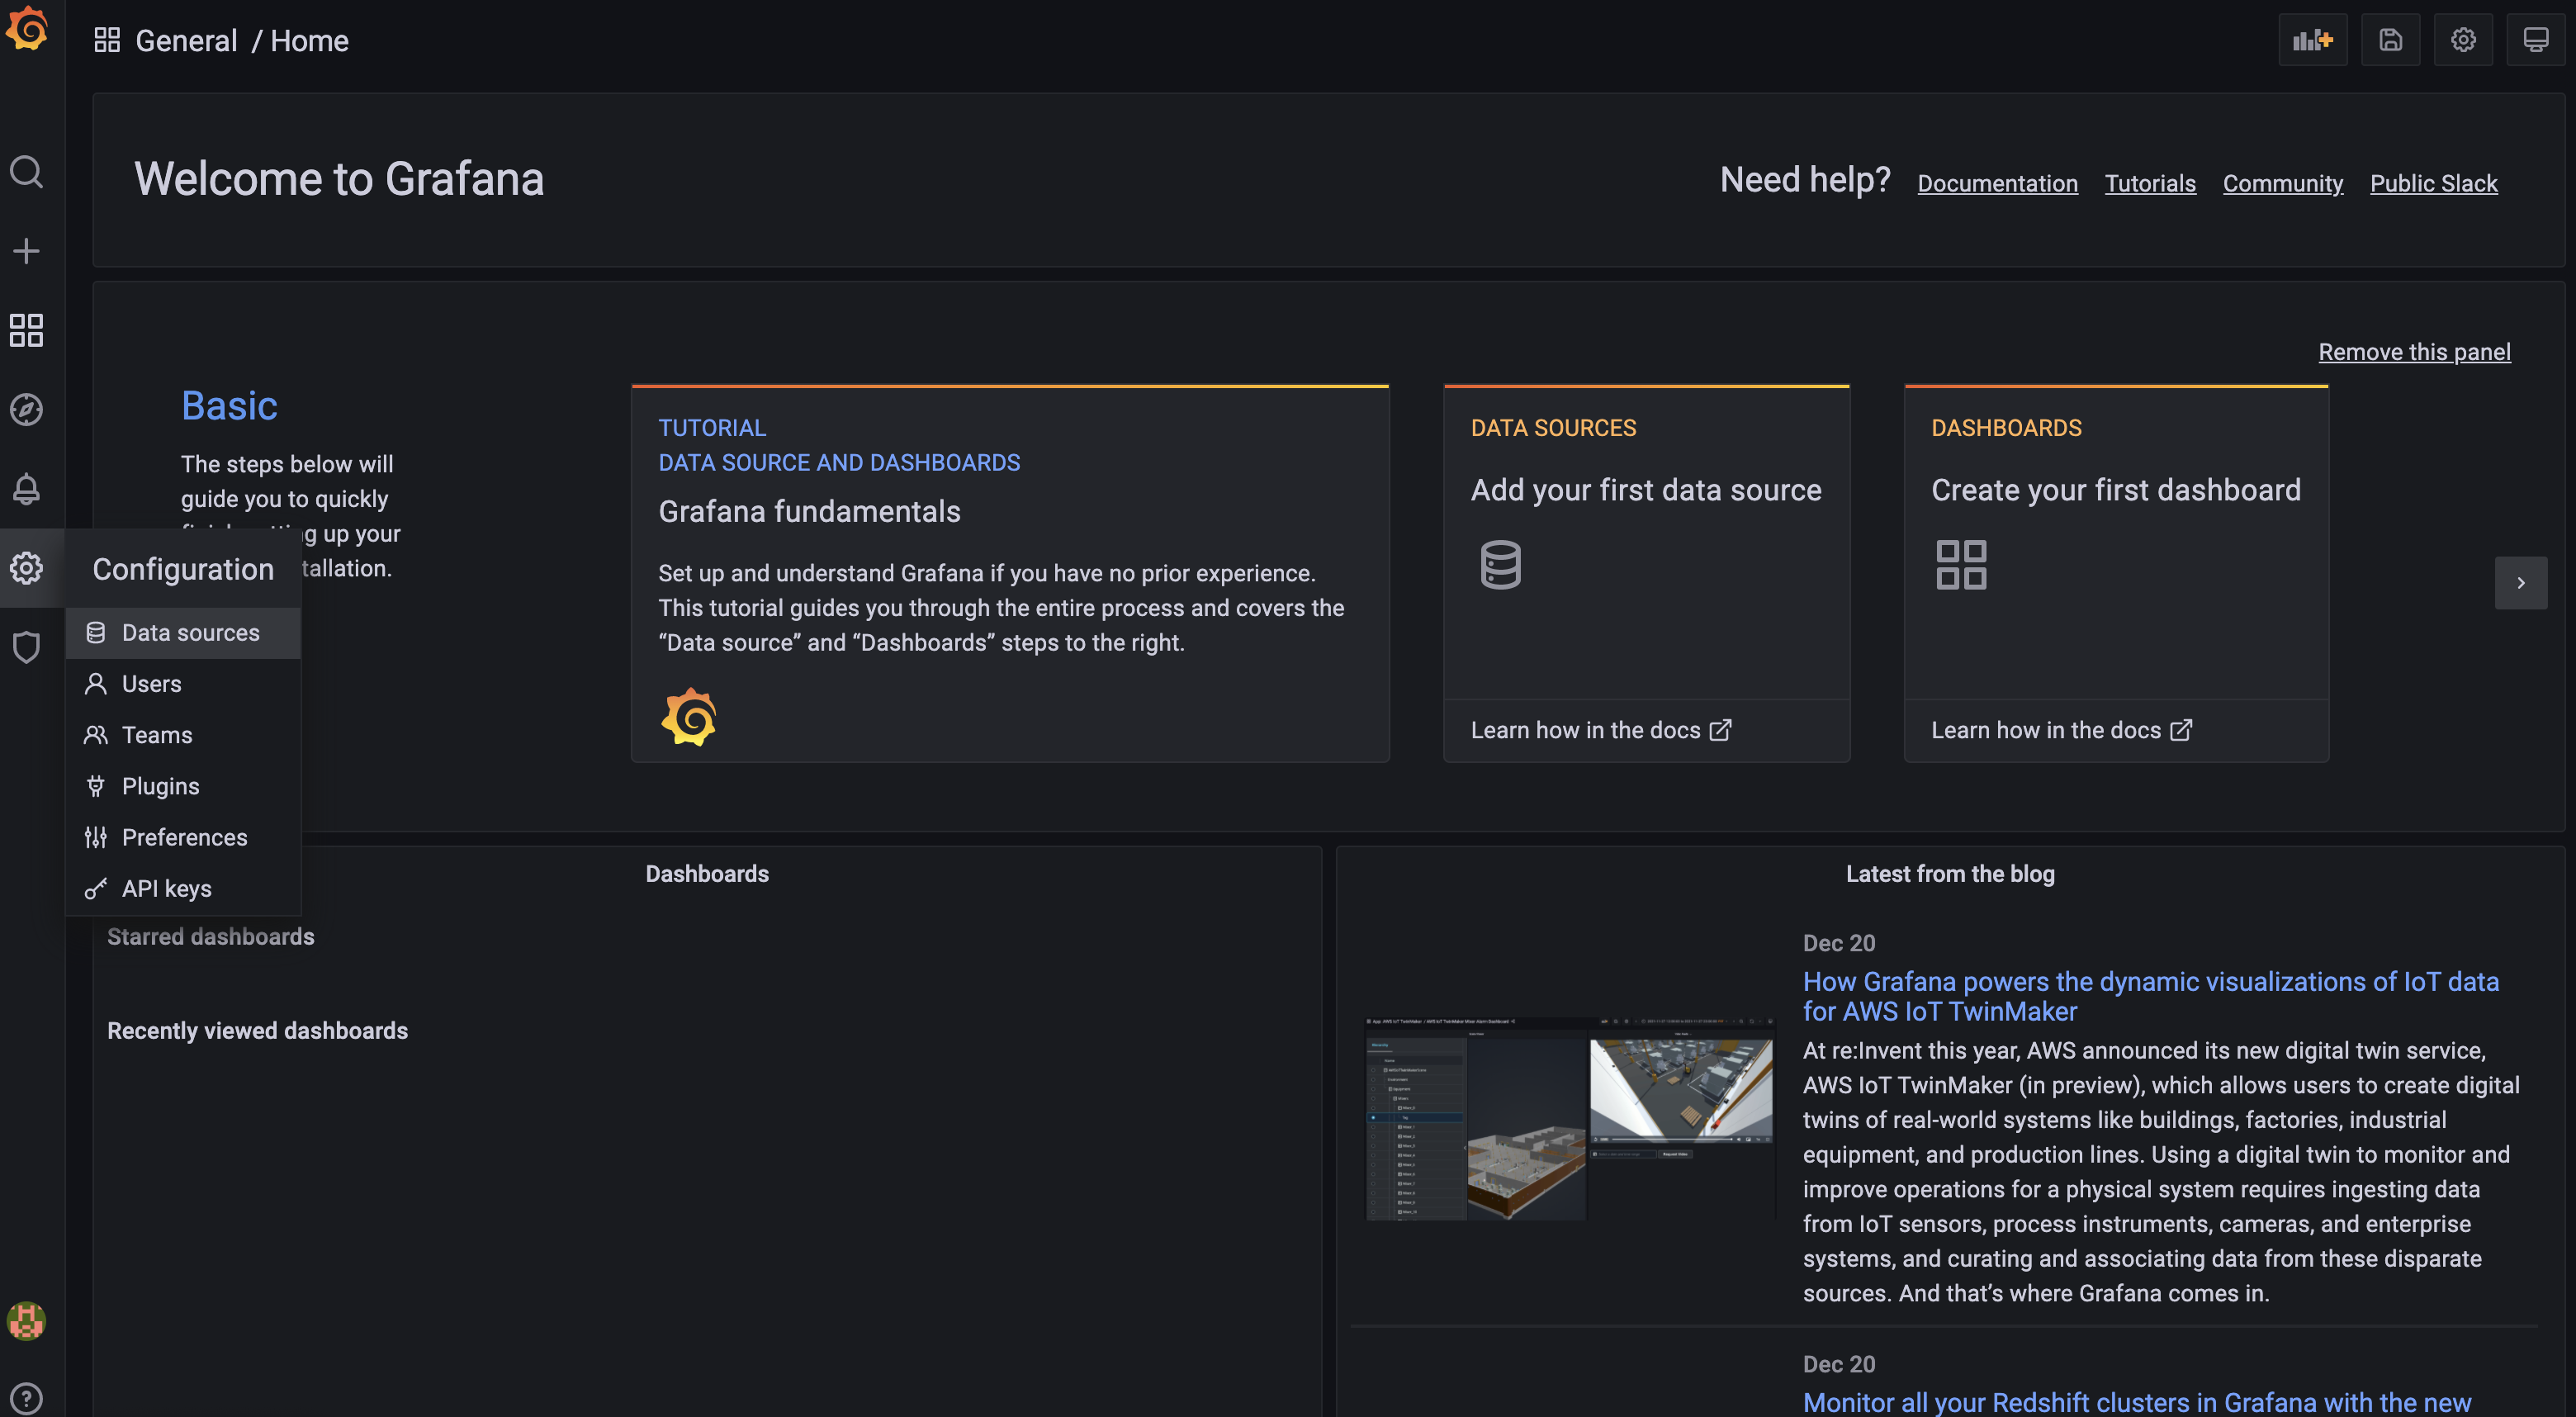
After completing the necessary requirements, you have installed and ensured the security of Grafana. Now, go to your Grafana instance at your_domain:3000 and access it by logging in with the credentials you generated during the initial setup.
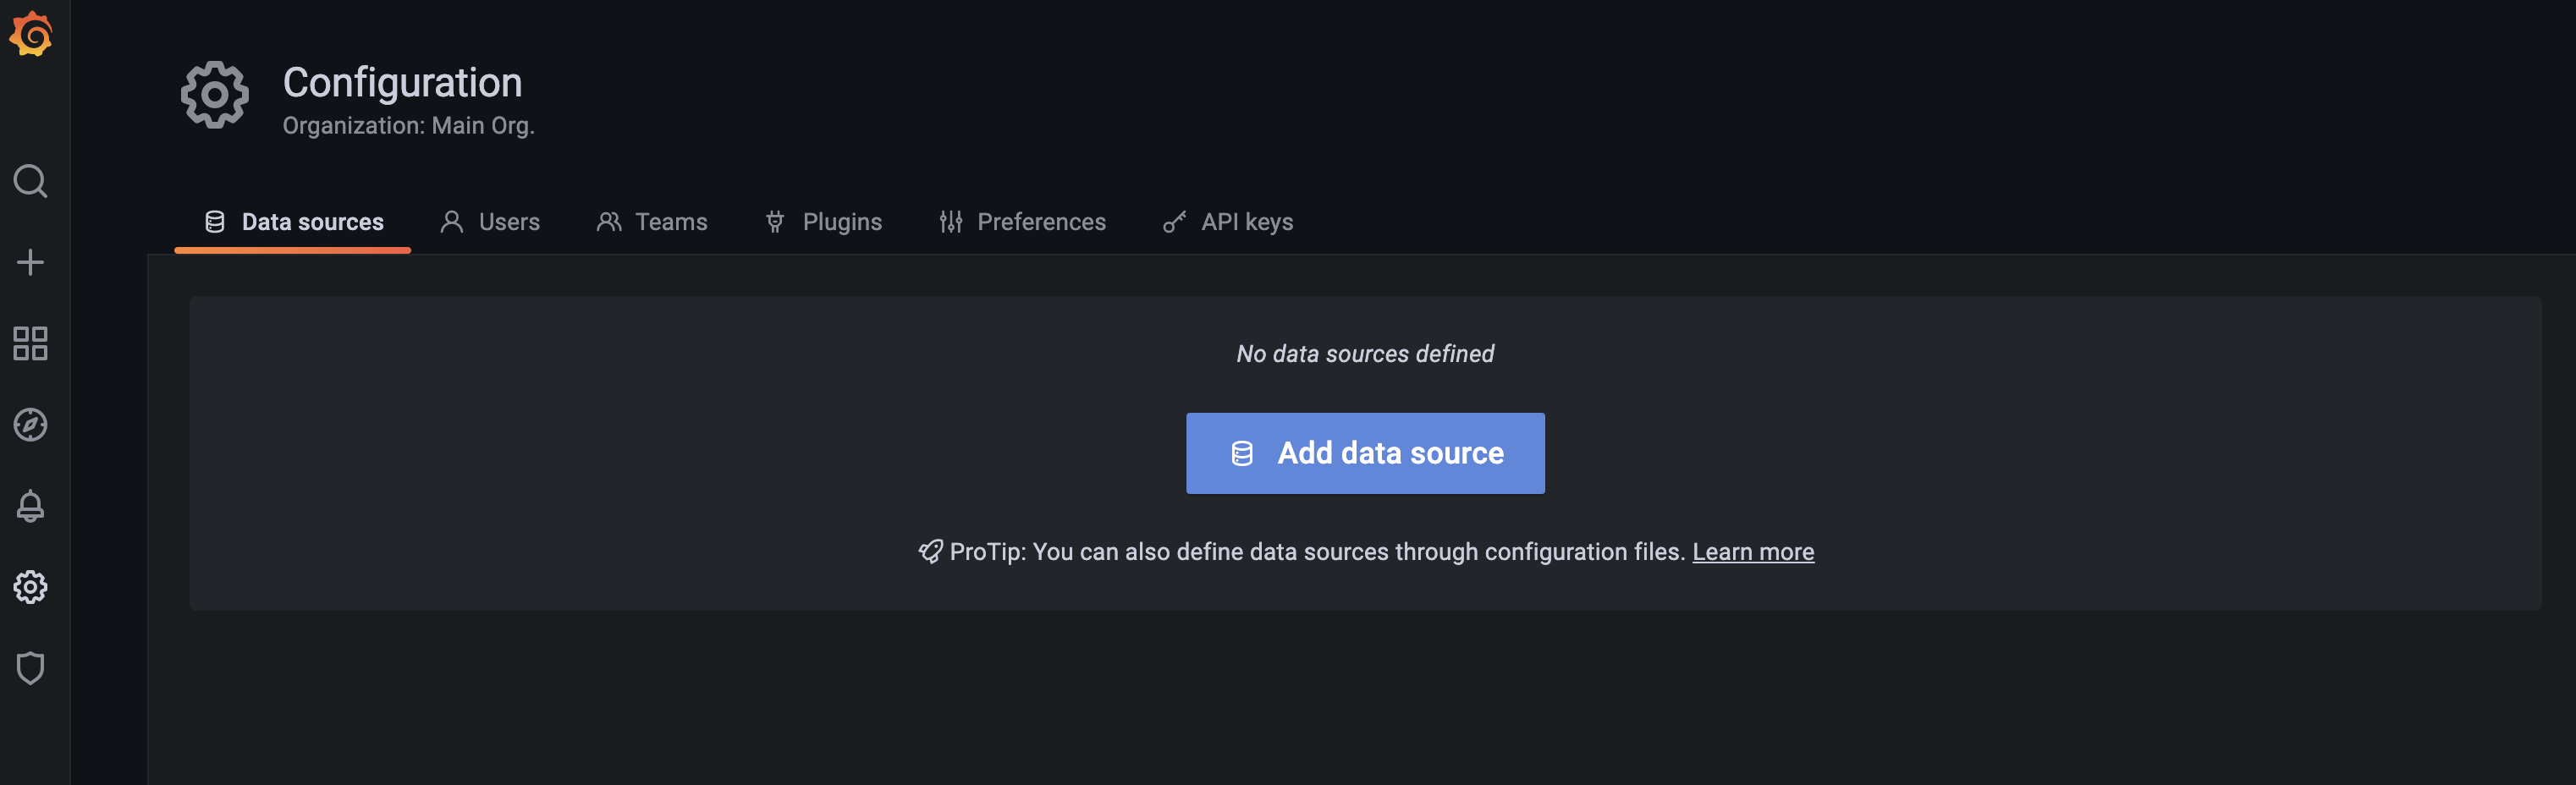
On the left side, simply click on the gear icon located in the panel for Configuration and proceed to choose Data Sources.
Please select “Add data source.”
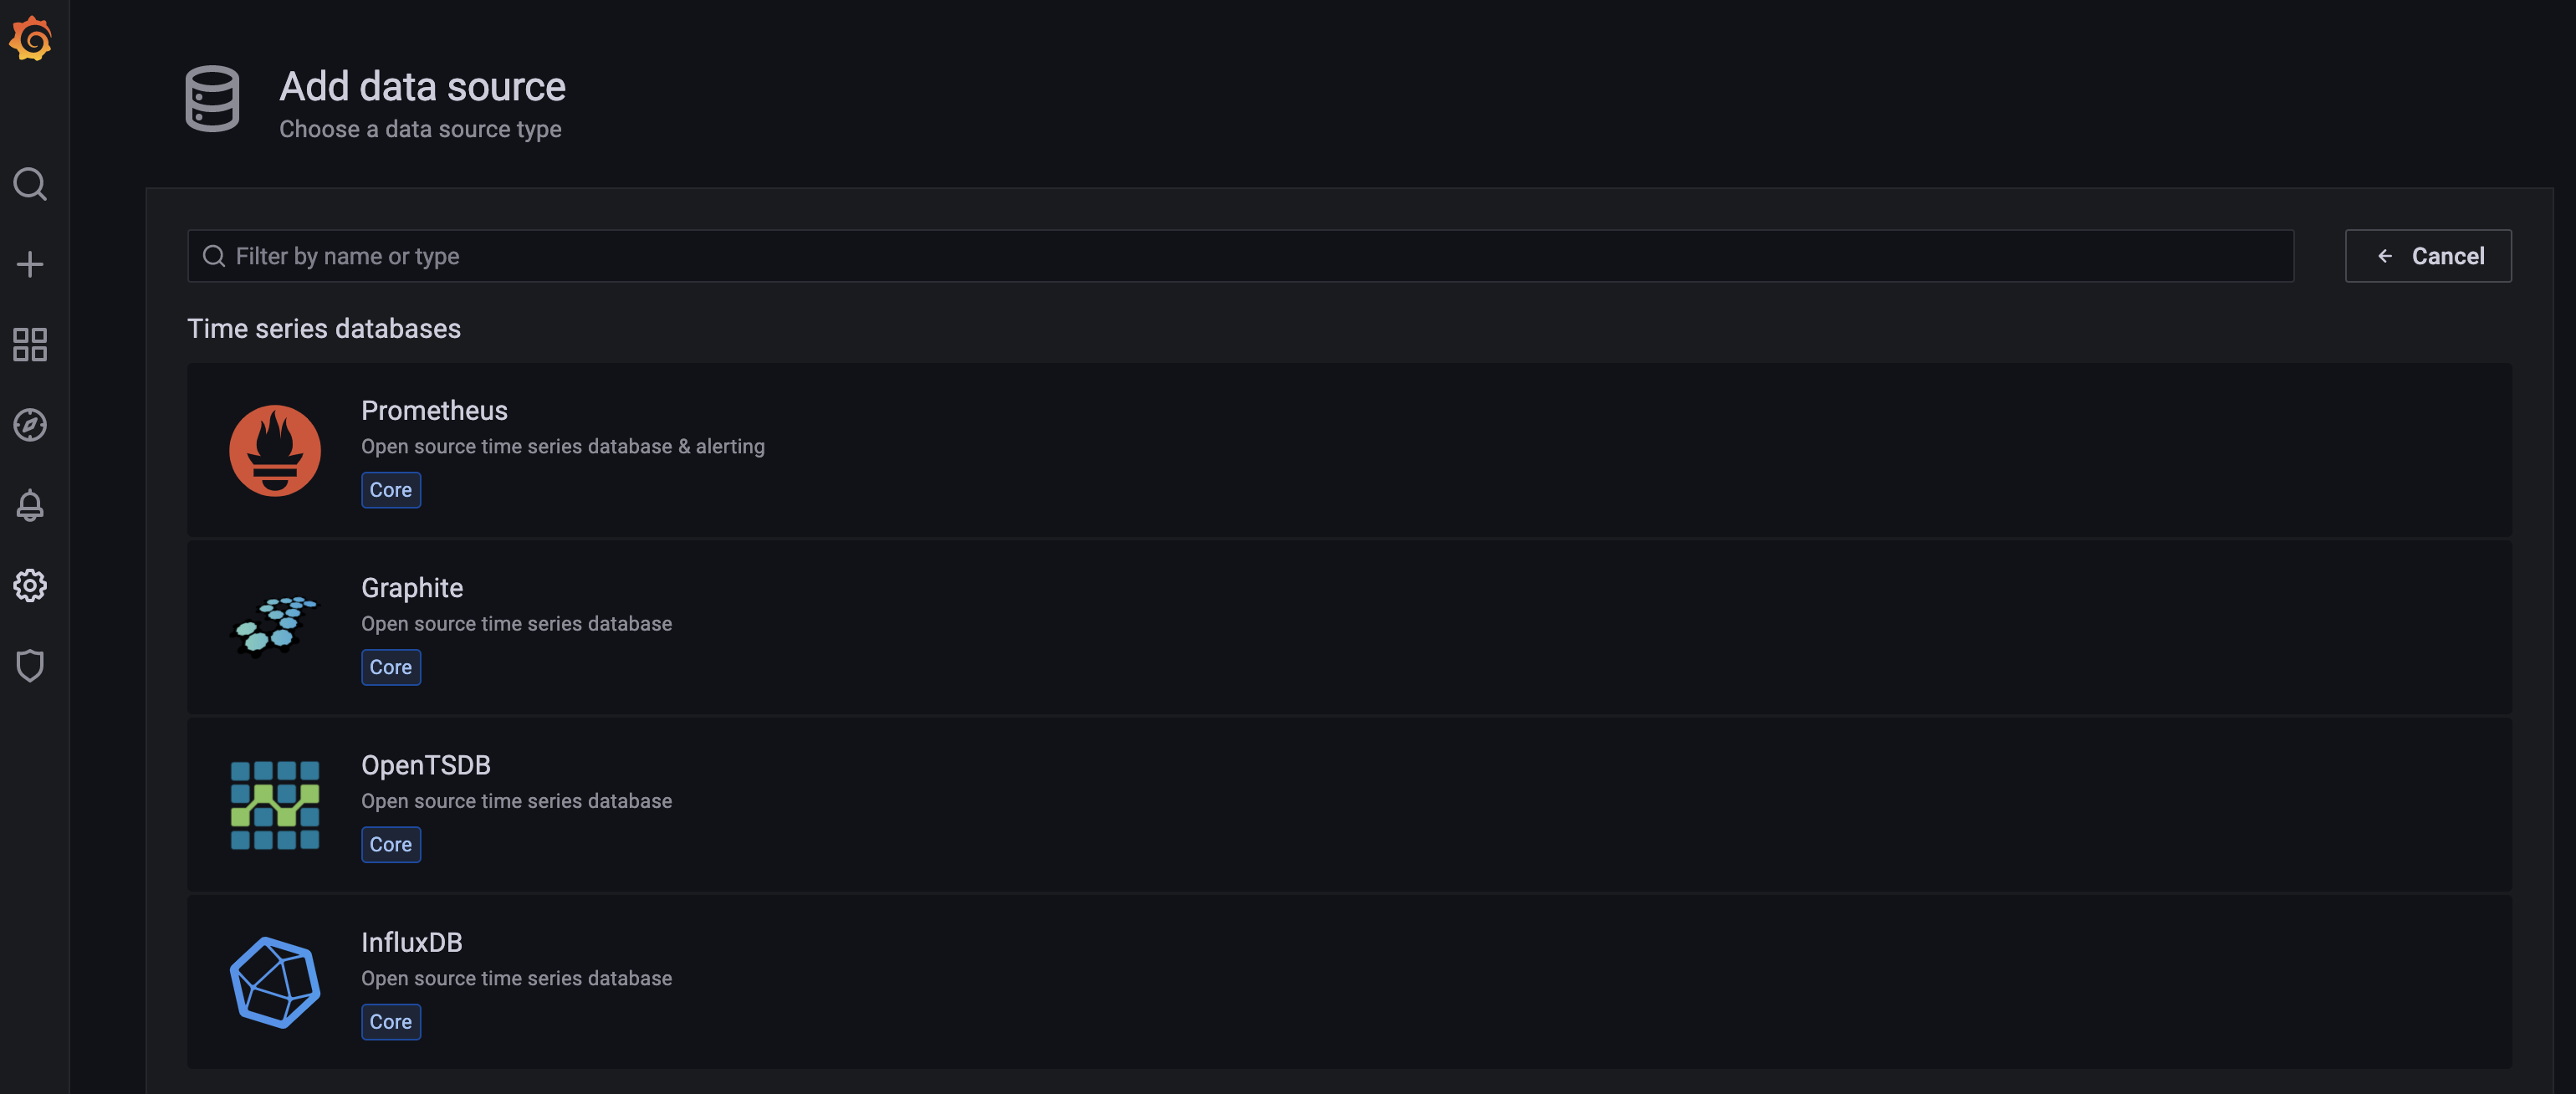
Choose Prometheus from the options.
On the upcoming screen, you will set up the configurations for your Prometheus data source.
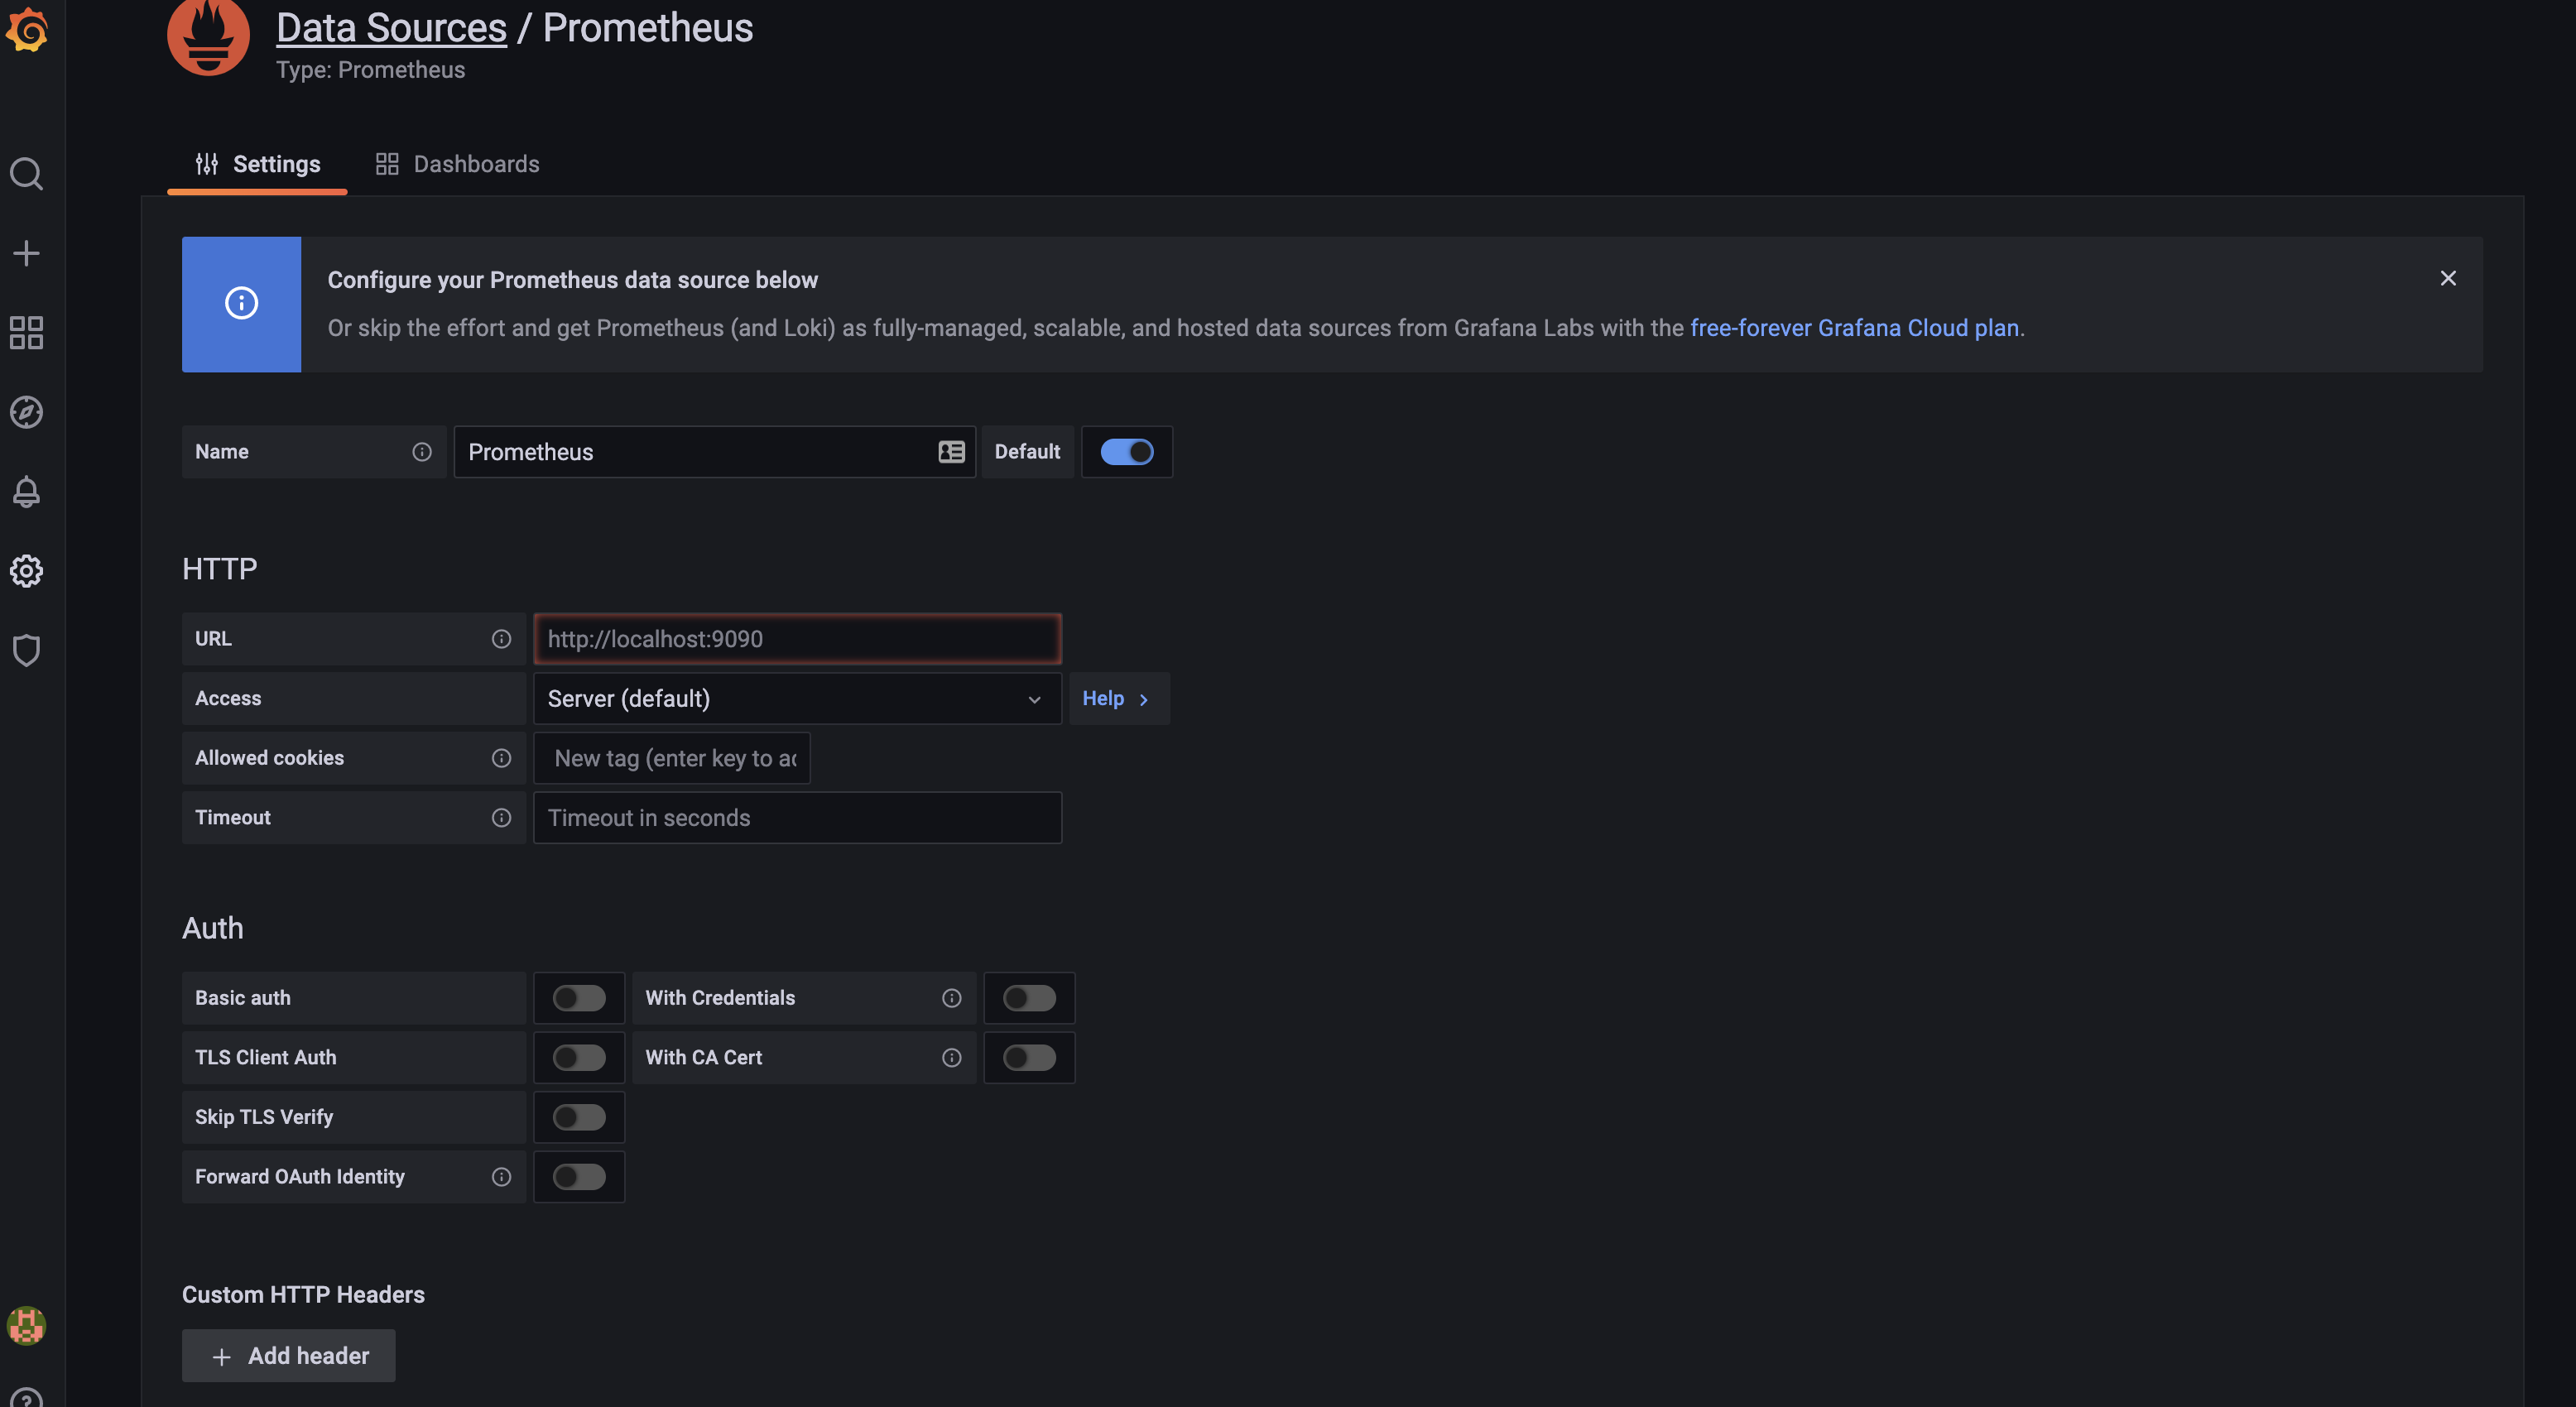
Please enter the URL of your Prometheus instance in the URL field.
http://your_server_ip:9090/
Choose “Save & test” located at the bottom of the screen to successfully include Prometheus as a data source in Grafana.
Afterward, proceed to import the MongoDB Overview dashboard onto Grafana. You are able to import the dashboard either by uploading a JSON file or by importing the dashboard ID. The dashboard ID can be located in the documentation of Grafana product specifically designed for dashboards. In this case, you will use the dashboard ID to perform the importation of the dashboard.
Click on the plus icon on the left menu and choose Import under the Create option. This will direct you to the Import page.
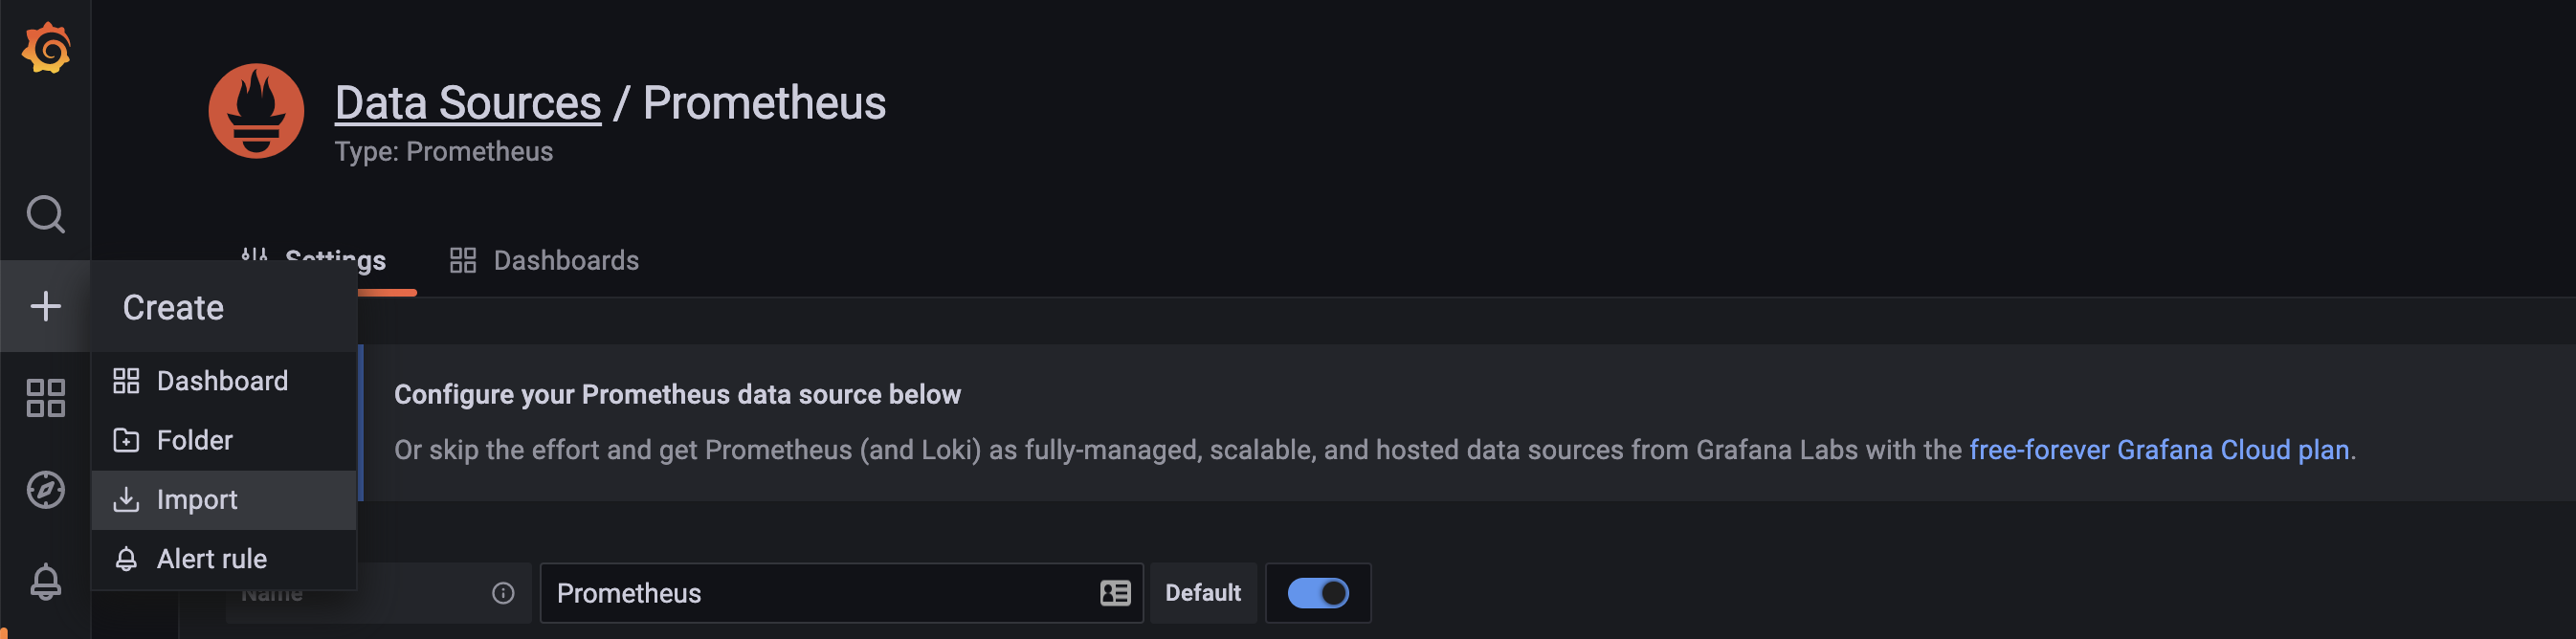
You have the option to either upload the JSON file of the dashboard or enter the Grafana Dashboard ID here.
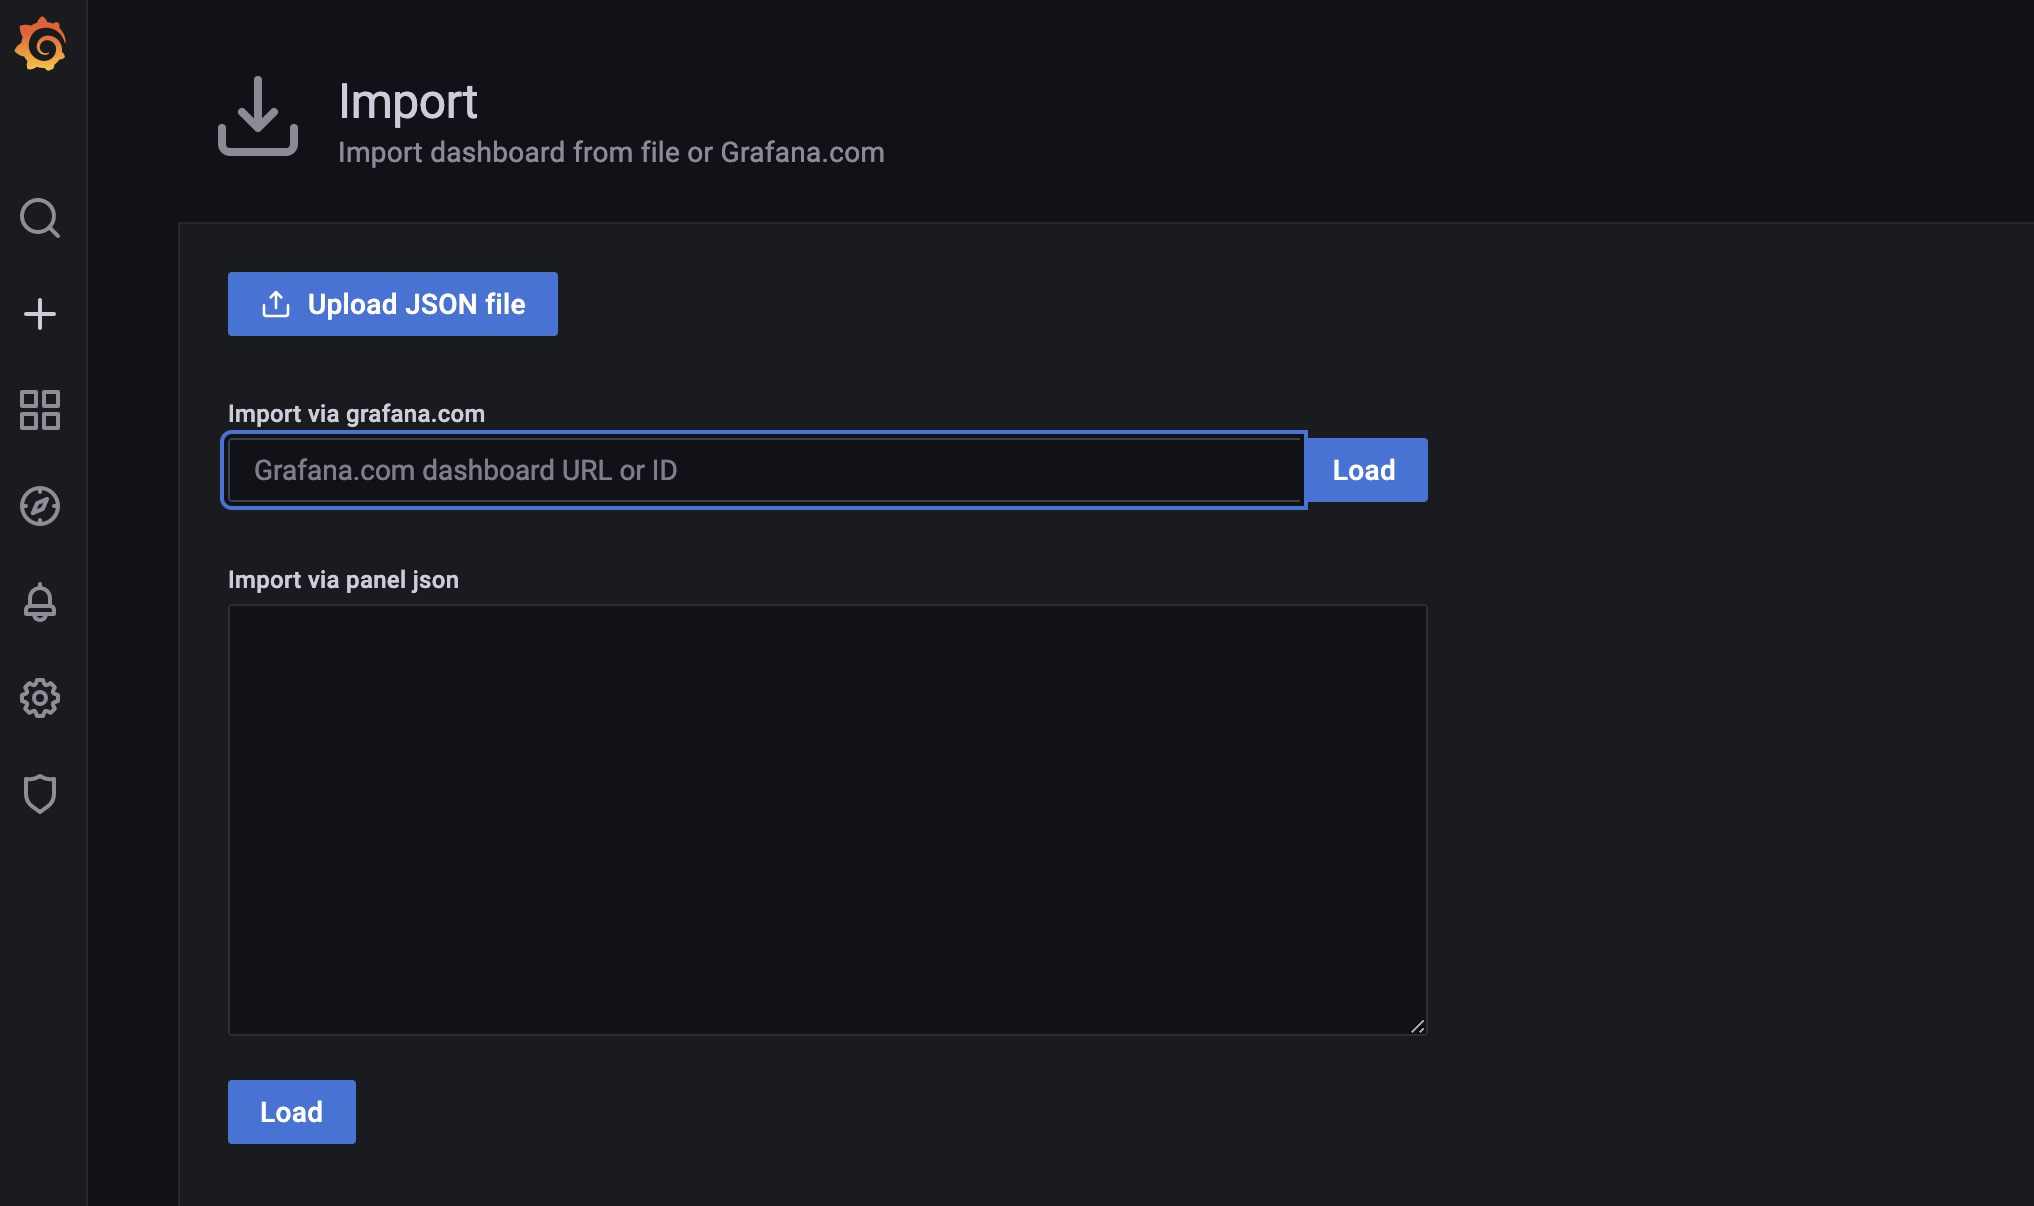
Include the Grafana dashboard ID, which can be located on the MongoDB overview dashboard page in Grafana.
https://grafana.com/grafana/dashboards/7353
There are numerous available dashboards that can be found on the Grafana page.
Once you have entered the dashboard ID, simply click on the Load button.
Afterwards, you will be directed to an Options page where you have the opportunity to name the dashboard, choose the folder it belongs to, and select a data source. You can keep the default names for the dashboard and folder if you prefer. In terms of the data source, opt for Prometheus. Once you have completed filling in the necessary details, simply click on the Import button.
We will create the dashboard.
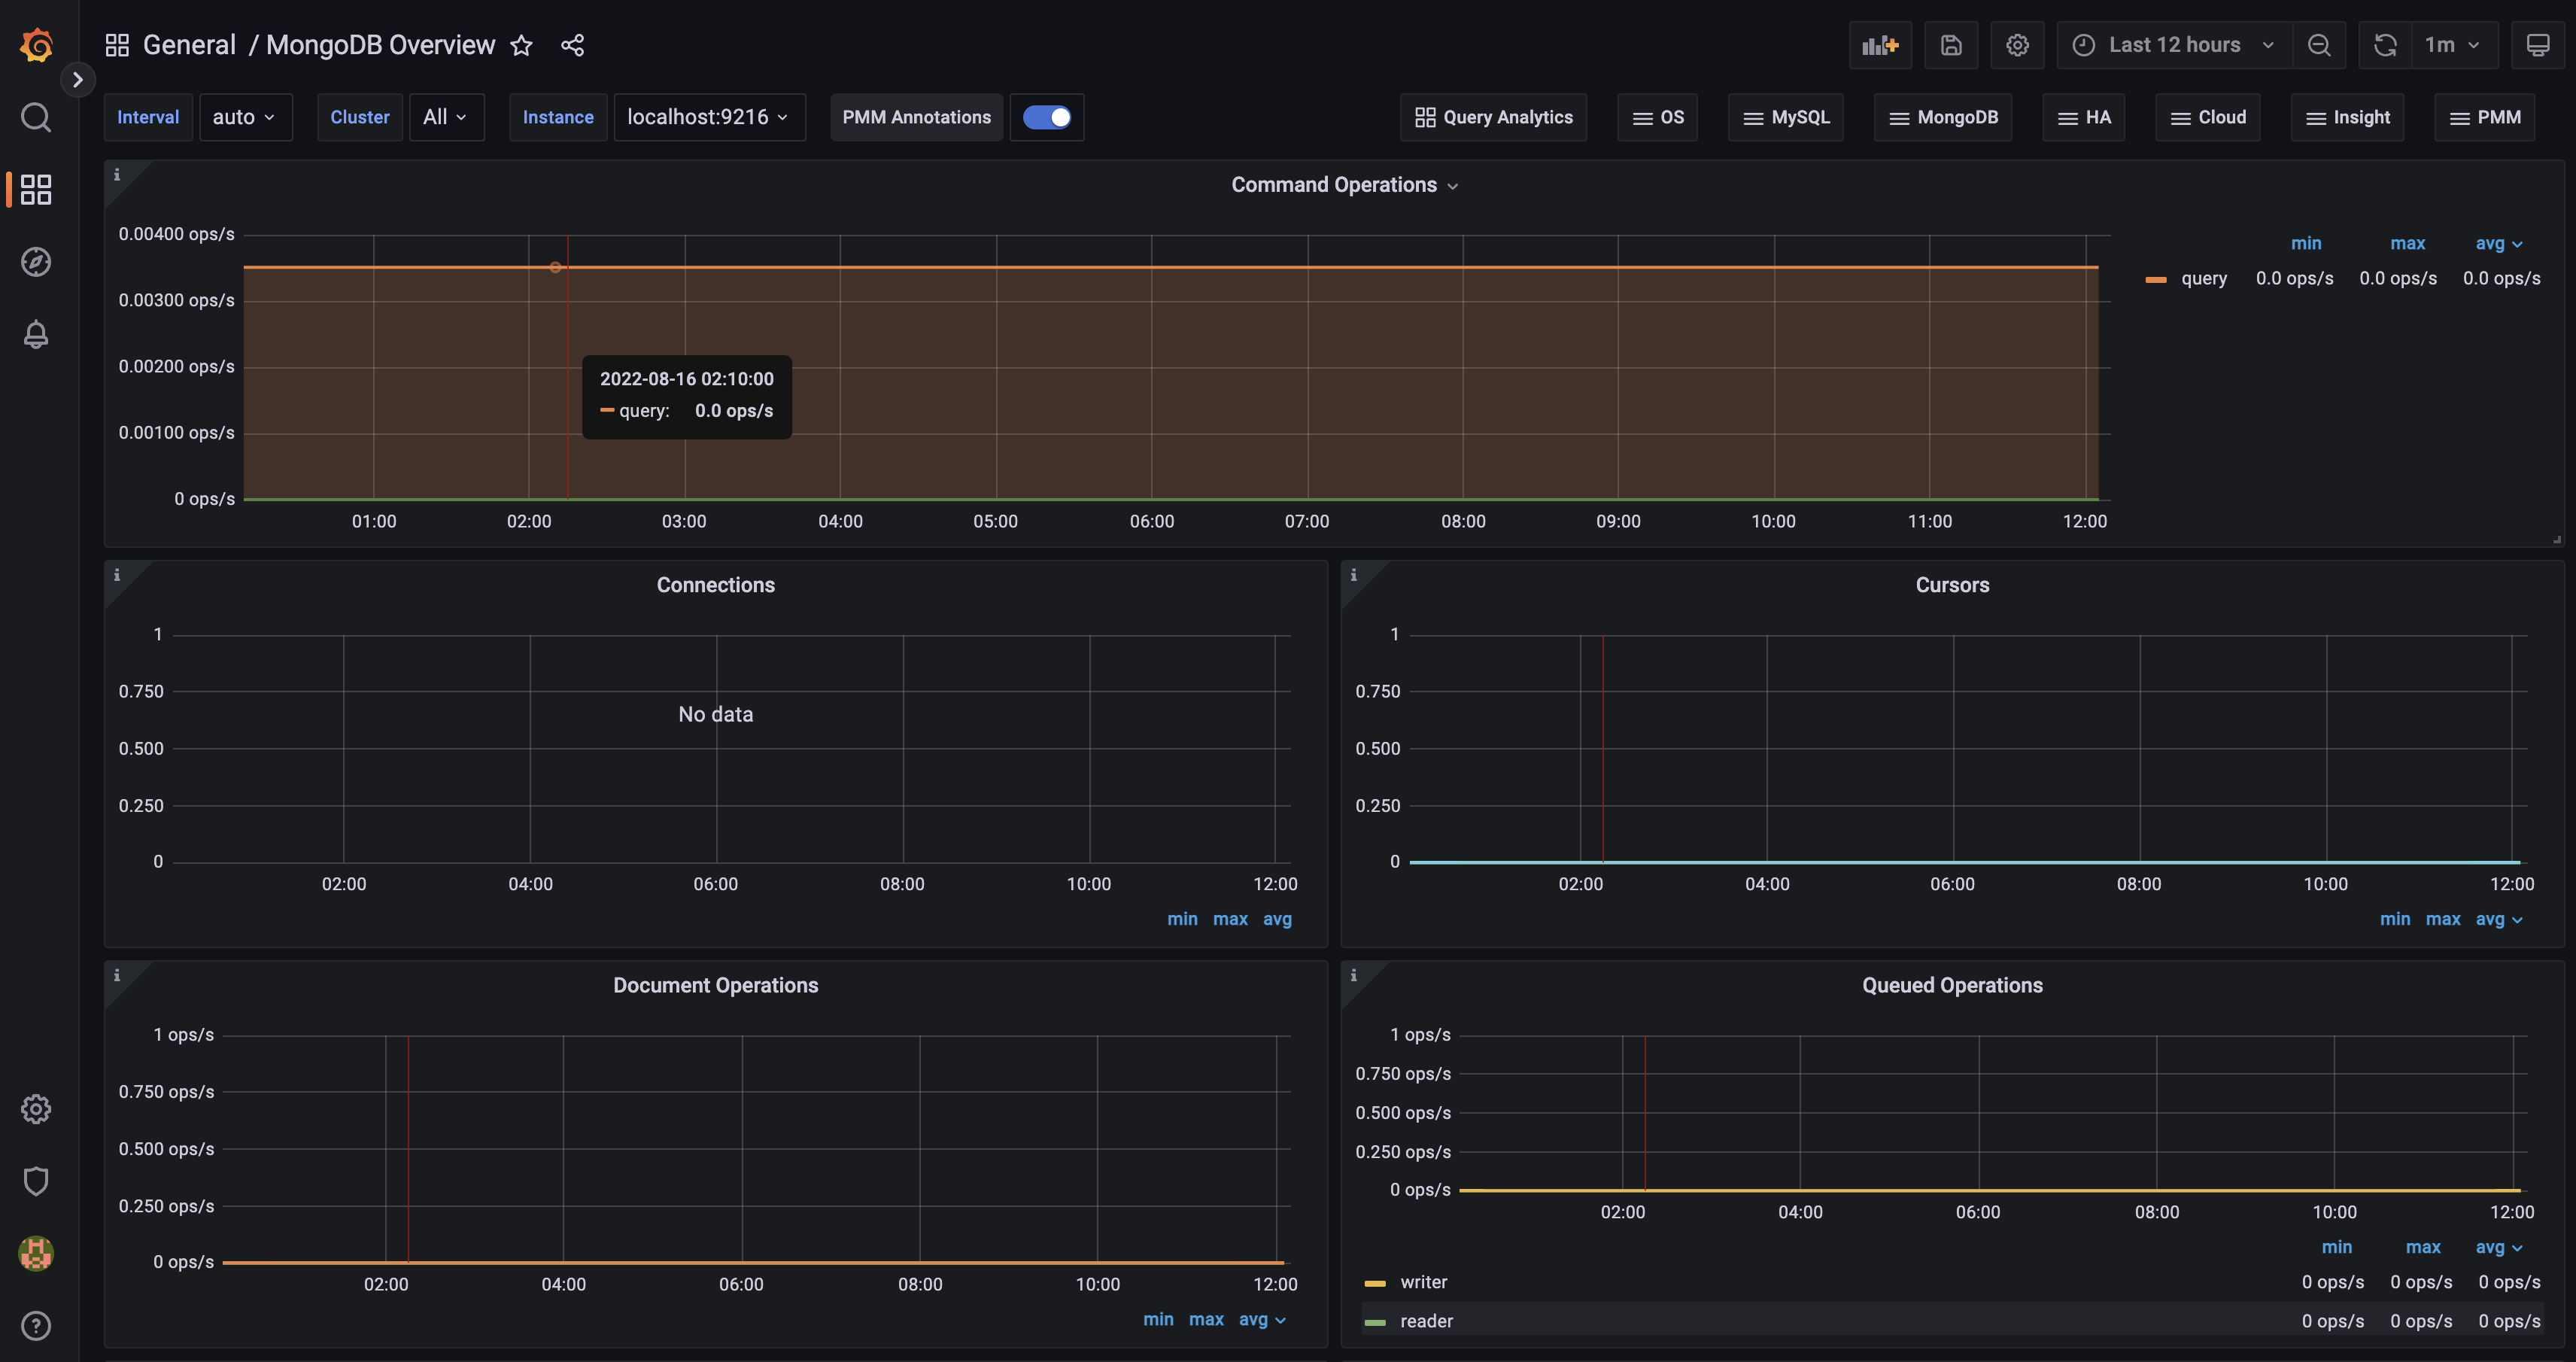
Your MongoDB database dashboard will provide live updates on various activities including command operations, connections, cursors, document operations, and queued operations. For more information, refer to the documentation on the MongoDB Overview dashboard in Percona’s resources.
A conclusion can be drawn.
In this article, you establish a Grafana dashboard for overseeing Prometheus metrics of your MongoDB database, allowing you to conveniently monitor the database through a graphical user interface. Initially, you install Prometheus and configure the MongoDB exporter. Following that, you incorporate Prometheus as a data source in Grafana, granting you the capability to monitor and display data from your MongoDB instance.
Now that the monitoring pipeline for MongoDB is fully functional, you can delve further. To begin, experiment with exploring extra Grafana dashboards.
If you t to expand your knowledge of MongoDB, take a look at our tutorial series called How To Manage Data with MongoDB.
If you t a fast way to set up a fully functional database, take a look at Silicon Cloud’s MongoDB Managed Database.
More Tutorials
Grafana Tutor Step-by-step Guide to Grafana on Ubuntu 18.04(Opens in a new browser tab)
insertMany function for bulk insertion into a MongoDB database.(Opens in a new browser tab)
automatic scaling of Kubernetes pods using Metrics Server?(Opens in a new browser tab)
Set in Python(Opens in a new browser tab)
Reading and Writing data using Python(Opens in a new browser tab)

