Partition in Linux Step-by-Step Guide
In this guide, we will explain how to make a partition in Linux. This will allow you to assign separate memory areas for different purposes. Partitioning can also enable you to install multiple operating systems on your computer and reduce potential data loss in the event of disk corruption.
How can a partition be created in Linux?
In this tutorial, we will be using the fdisk command to generate a disk partition. The fdisk tool is a text-oriented command-line utility that allows you to view and handle disk partitions on a Linux system.
Prior to creating a partition, it is crucial to generate a list of all existing partitions on our system. This step is necessary because we need to select the disk on which we plan to create the partition.
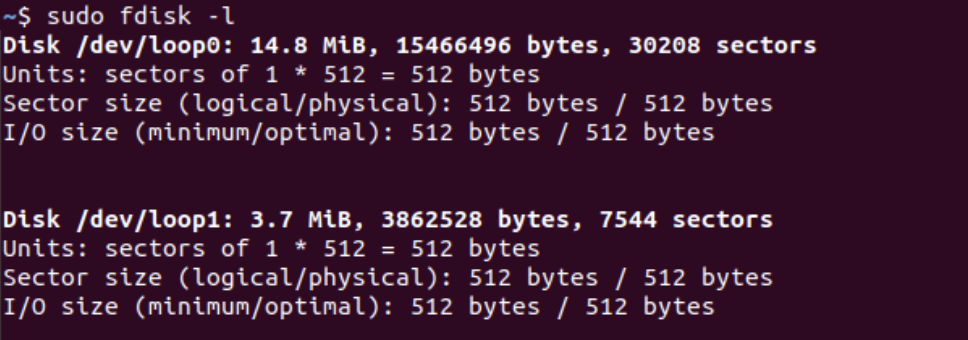
To see all the partitions currently on your system, we utilize the following command.
sudo fdisk -l
To confirm your sudo privileges, you may be asked to re-enter your password. In this case, we utilized the -l option with the fdisk command to display the partitions. The expected result should be a comparable output as shown below.
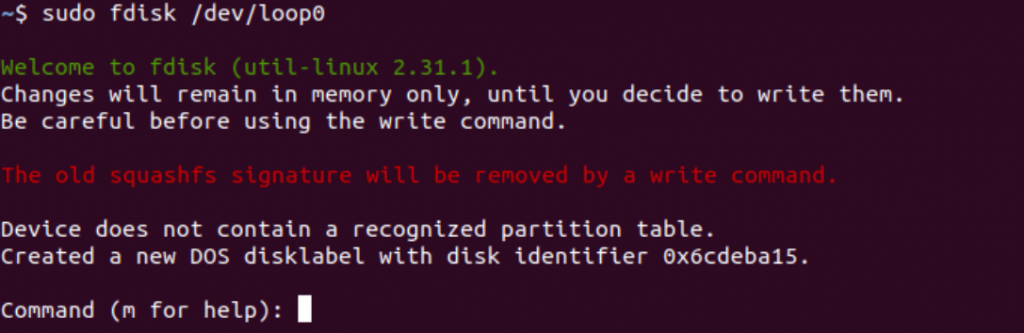
Now, we will select one disk from this list to divide into separate sections. In this tutorial, we will choose the specified disk. To create partitions, we employ the ‘command mode’ of the fdisk command. To access the command mode, we utilize the mentioned command in our terminal.
sudo fdisk [disk path]
If you encounter a similar output, it means you have successfully accessed command mode.
Operating in the command mode
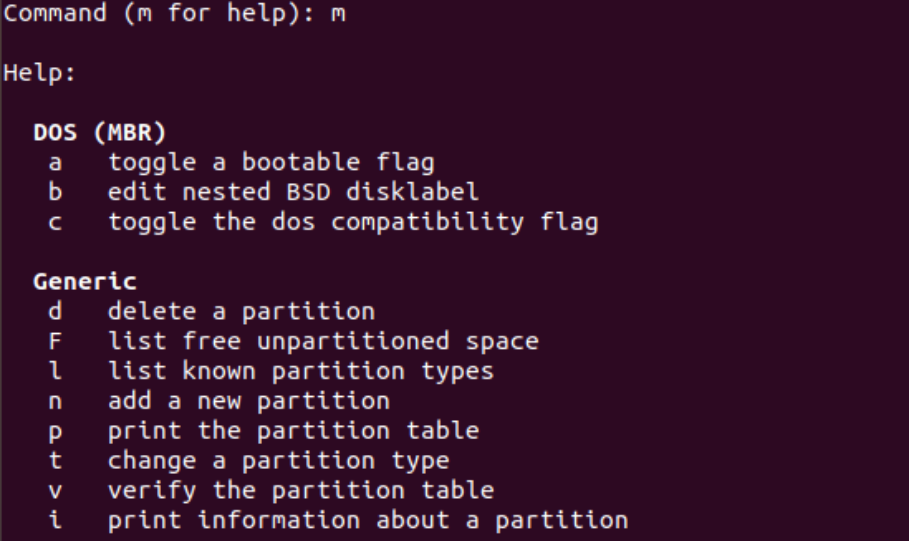
Once we access the command mode, inexperienced users may become perplexed by the unfamiliar interface. In the command mode of fdisk, the system’s desired action is specified using single character commands. A list of available commands can be obtained by pressing ‘m’, as demonstrated below.
Making a division
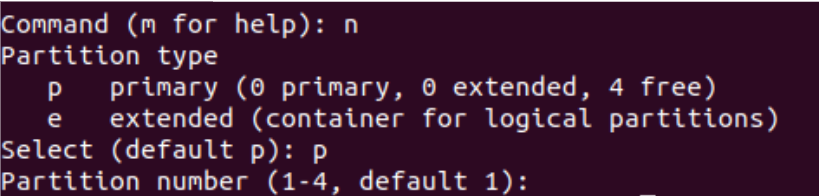
Our primary goal is to form a partition. In order to accomplish this, we utilize the command ‘n’ to generate a new partition. This command will then prompt you to indicate the specific type of partition you desire to create.
If you want to make a logical partition, select ‘l’. Otherwise, select ‘p’ for a primary partition. In this guide, we will be creating a primary partition.
We will now need to indicate the initial sector for our new partition. Press ENTER to select the first free sector on your system. Following that, you will be asked to choose the final sector for the partition.
You can either press ENTER to utilize all the available space after your initial sector or specify the desired size for your partition.

As seen in the screenshot, we opted for a 10 MB partition for this demonstration. In this case, ‘M’ denotes megabytes while ‘G’ represents gigabytes as an alternative.
If a unit is not specified, it will be assumed that the unit is sectors. Therefore, +1024 will indicate 1024 sectors starting from the initial sector.
Choosing the type of partition
After creating a partition in Linux, by default it is labeled as ‘Linux’. However, if we want the partition type to be ‘Linux LVM’, we can modify the ID using the ‘t’ command.
Currently, we are being asked to input the HEX code corresponding to the desired partition ID. We cannot recall the specific HEX code for the partition types instantly.
To display all the HEX codes for the available partition types, we will utilize the ‘L’ command. The resulting list should appear in the following format.
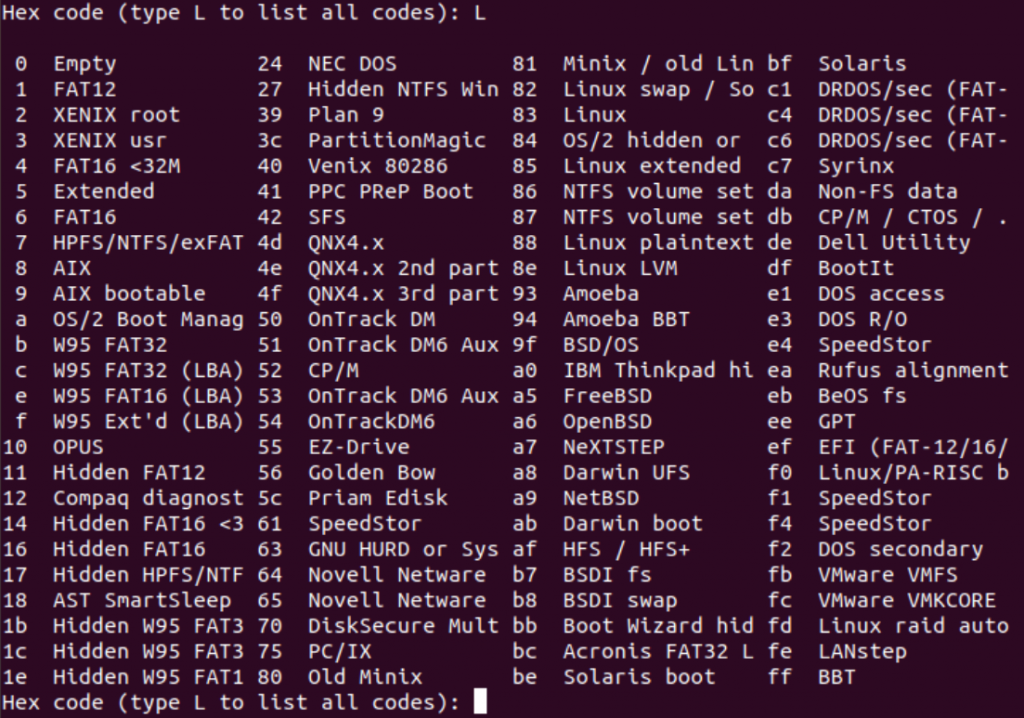
After observing that the hexadecimal code 8e corresponds to the partition ID of ‘Linux LVM’ partition type, we will input the necessary hexadecimal code. The subsequent result confirms the successful modification of our partition ID.

Completing the modifications
After successfully creating a new partition with our preferred partition ID, it is necessary to validate our modifications. All the alterations made so far are stored in the memory, pending writing onto the disk.
To observe the comprehensive breakdown of partitions on our present hard drive, we employ the ‘p’ command, which is displayed in the included screenshot.
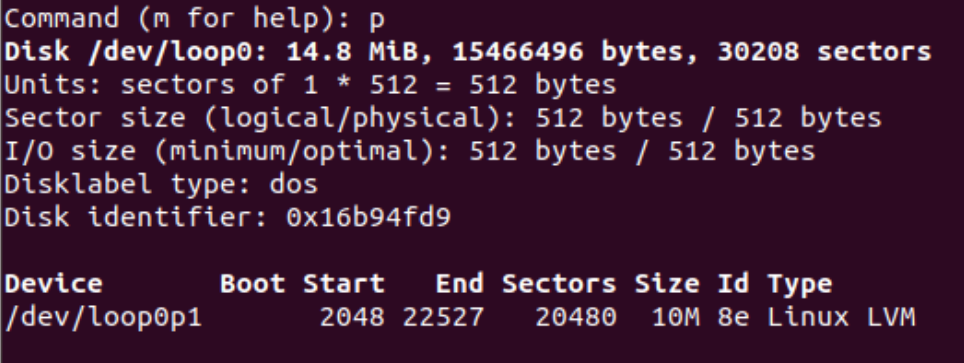
After verifying all the modifications made to the disk, pressing ‘w’ will permanently write the newly partitioned disk.
If you prefer not to permanently save your new partition on the disk, you have the option to enter the ‘q’ command. This will exit the fdisk command mode without preserving any alterations.
Partition formatting involves the process of organizing and configuring a partition.
After creating a new partition, it is recommended to format it by using the suitable mkfs command.
The reason for this is that if we use a new partition without formatting it, there could be potential problems later on. To view the complete list of mkfs commands, we can simply input the following in our command line.
sudo mkfs
By utilizing this command, we can obtain a compilation of accessible mkfs commands. In case we desire to format a partition on our existing disk employing the ext4 file system, we can make use of this particular command.
sudo mkfs.ext4 [partition path]
Finishing up
That’s all! You have now gained the knowledge on how to make a partition in Linux using the fdisk command… You can allocate space for particular tasks. Additionally, if one partition becomes damaged, there is no need to be concerned about the data stored on other partitions.
When treating each partition as an independent disk, the data on other partitions remains secure. The fdisk utility is an effective tool for managing disk partitions, although it can be perplexing for beginners.
If you have any questions, comments, or suggestions regarding this tutorial on creating a new disk partition in Linux using the fdisk utility, please don’t hesitate to reach out to us in the comment section. We genuinely hope that this tutorial has provided you with the assistance you needed.
More tutors
Basics of Graph Plotting – Comprehending the plot() Function in R(Opens in a new browser tab)
Tutorial on how to set up a Hibernate Tomcat JNDI DataSource.(Opens in a new browser tab)

