Debian 11にApache Webサーバーをインストールの方法
はじめに
世界で最も広く利用されているウェブサーバーはApache HTTPサーバーです。このサーバーは、動的にロード可能なモジュール、堅牢なメディアサポート、他の人気ソフトウェアとの幅広い統合など、多くの強力な機能を提供しています。
このガイドでは、Debian 11 サーバーに Apache ウェブサーバーをインストールします。
前提条件
このガイドを始める前に、sudo権限を持つ非ルートユーザーを設定し、非必要なポートをブロックするために有効化されたファイアウォールを備えたDebian 11サーバーを準備する必要があります。Debian 11の最初のサーバーセットアップガイドに従って、これらの手順を学ぶことができます。
この設定が終わったら、非ルートユーザーとしてログインし、最初のステップに進んでください。
ステップ1 — Apacheのインストール
Debianのデフォルトのソフトウェアリポジトリ内でApacheは利用可能であり、従来のパッケージ管理ツールを使用してインストールすることができます。
最新のアップストリームの変更を反映するために、まずローカルパッケージインデックスを更新してください。
- sudo apt update
それでは、Apache2パッケージをインストールしてください。
- sudo apt install apache2
インストールを確認した後、aptはApacheと必要なすべての依存関係をインストールします。
ステップ2:ファイアウォールの調整
Apacheのテストを行う前に、外部からのデフォルトのウェブポートへのアクセスを許可するためにファイアウォールの設定を修正する必要があります。前提条件で指示通りに設定を行っていれば、サーバへのアクセスを制限するUFWファイアウォールが構成されているはずです。
インストール中、Apacheは自身をUFWに登録し、ファイアウォールを通じてApacheへのアクセスを有効または無効にするために使用できるいくつかのアプリケーションプロファイルを提供します。
以下のコマンドを実行して、ufwのアプリケーションプロファイルの一覧を表示してください。
- sudo ufw app list
あなたの出力は、アプリケーションのプロファイルのリストになります。
Available applications: AIM Bonjour CIFS . . . WWW WWW Cache WWW Full WWW Secure . . .
Apacheのプロファイルは、WWWで始まります。
- WWW: This profile opens only port 80 (normal, unencrypted web traffic)
- WWW Cache: This profile opens only port 8080 (sometimes used for caching and web proxies)
- WWW Full: This profile opens both port 80 (normal, unencrypted web traffic) and port 443 (TLS/SSL encrypted traffic)
- WWW Secure: This profile opens only port 443 (TLS/SSL encrypted traffic)
このガイドでは、サーバーへのSSLの設定がまだ行われていないため、設定したトラフィックの通信を許可するために、できるだけ制限の厳しいプロファイルを有効にすることが推奨されます。ポート80の通信のみを許可する必要があります。
- sudo ufw allow ‘WWW’
状態を確認することで変更を検証することができます。
- sudo ufw status
出力は許可されたHTTPトラフィックのリストを提供します。
Status: active To Action From — —— —- OpenSSH ALLOW Anywhere WWW ALLOW Anywhere OpenSSH (v6) ALLOW Anywhere (v6) WWW (v6) ALLOW Anywhere (v6)
出力によって示された通り、プロファイルがアクティブ化され、Apacheウェブサーバーへのアクセスが許可されました。
ステップ3 – Webサーバーの確認
インストールプロセスの終わりに、Debian 11 はApacheを起動します。ウェブサーバーはすでに稼働しているはずです。
systemdのinitシステムのコマンドを実行して、サービスがアクティブであることを確認してください。
- sudo systemctl status apache2
● apache2.service – The Apache HTTP Server Loaded: loaded (/lib/systemd/system/apache2.service; enabled; vendor prese> Active: active (running) since Wed 2022-07-06 22:05:45 UTC; 23s ago Docs: https://httpd.apache.org/docs/2.4/ Main PID: 2796 (apache2) Tasks: 55 (limit: 9509) Memory: 21.0M CPU: 67ms CGroup: /system.slice/apache2.service ├─2796 /usr/sbin/apache2 -k start ├─2798 /usr/sbin/apache2 -k start └─2799 /usr/sbin/apache2 -k start
この出力は、サービスが正常に開始されたことを確認しています。ただし、これを確かめる最良の方法は、Apacheからページをリクエストすることです。
あなたは、IPアドレスを介してソフトウェアが正常に動作していることを確認するために、デフォルトのApacheランディングページにアクセスすることができます。サーバーのIPアドレスがわからない場合は、コマンドラインからいくつかの方法で取得することができます。
サーバーのコマンドプロンプトに以下のコマンドを書いてみてください。
- hostname -I
いくつかのアドレスがスペースで区切られて送信されます。それぞれのアドレスをウェブブラウザで試すことで、動作するかどうかを確認できます。
もう一つの選択肢は、icanhazip.comツールを使用することです。これは、アクセスするとインターネット上の別の場所から読み取られたマシンのパブリックIPアドレスを返すウェブサイトです。curlがまだインストールされていない場合は、次のコマンドを使用してインストールすることができます。
- sudo apt install curl
それでは、IPv4を使用してcurlを使ってicanhazip.comを取得します。
- curl -4 icanhazip.com
サーバーのIPアドレスを持っている場合は、それをブラウザのアドレスバーに入力してください。
http://your_server_ip
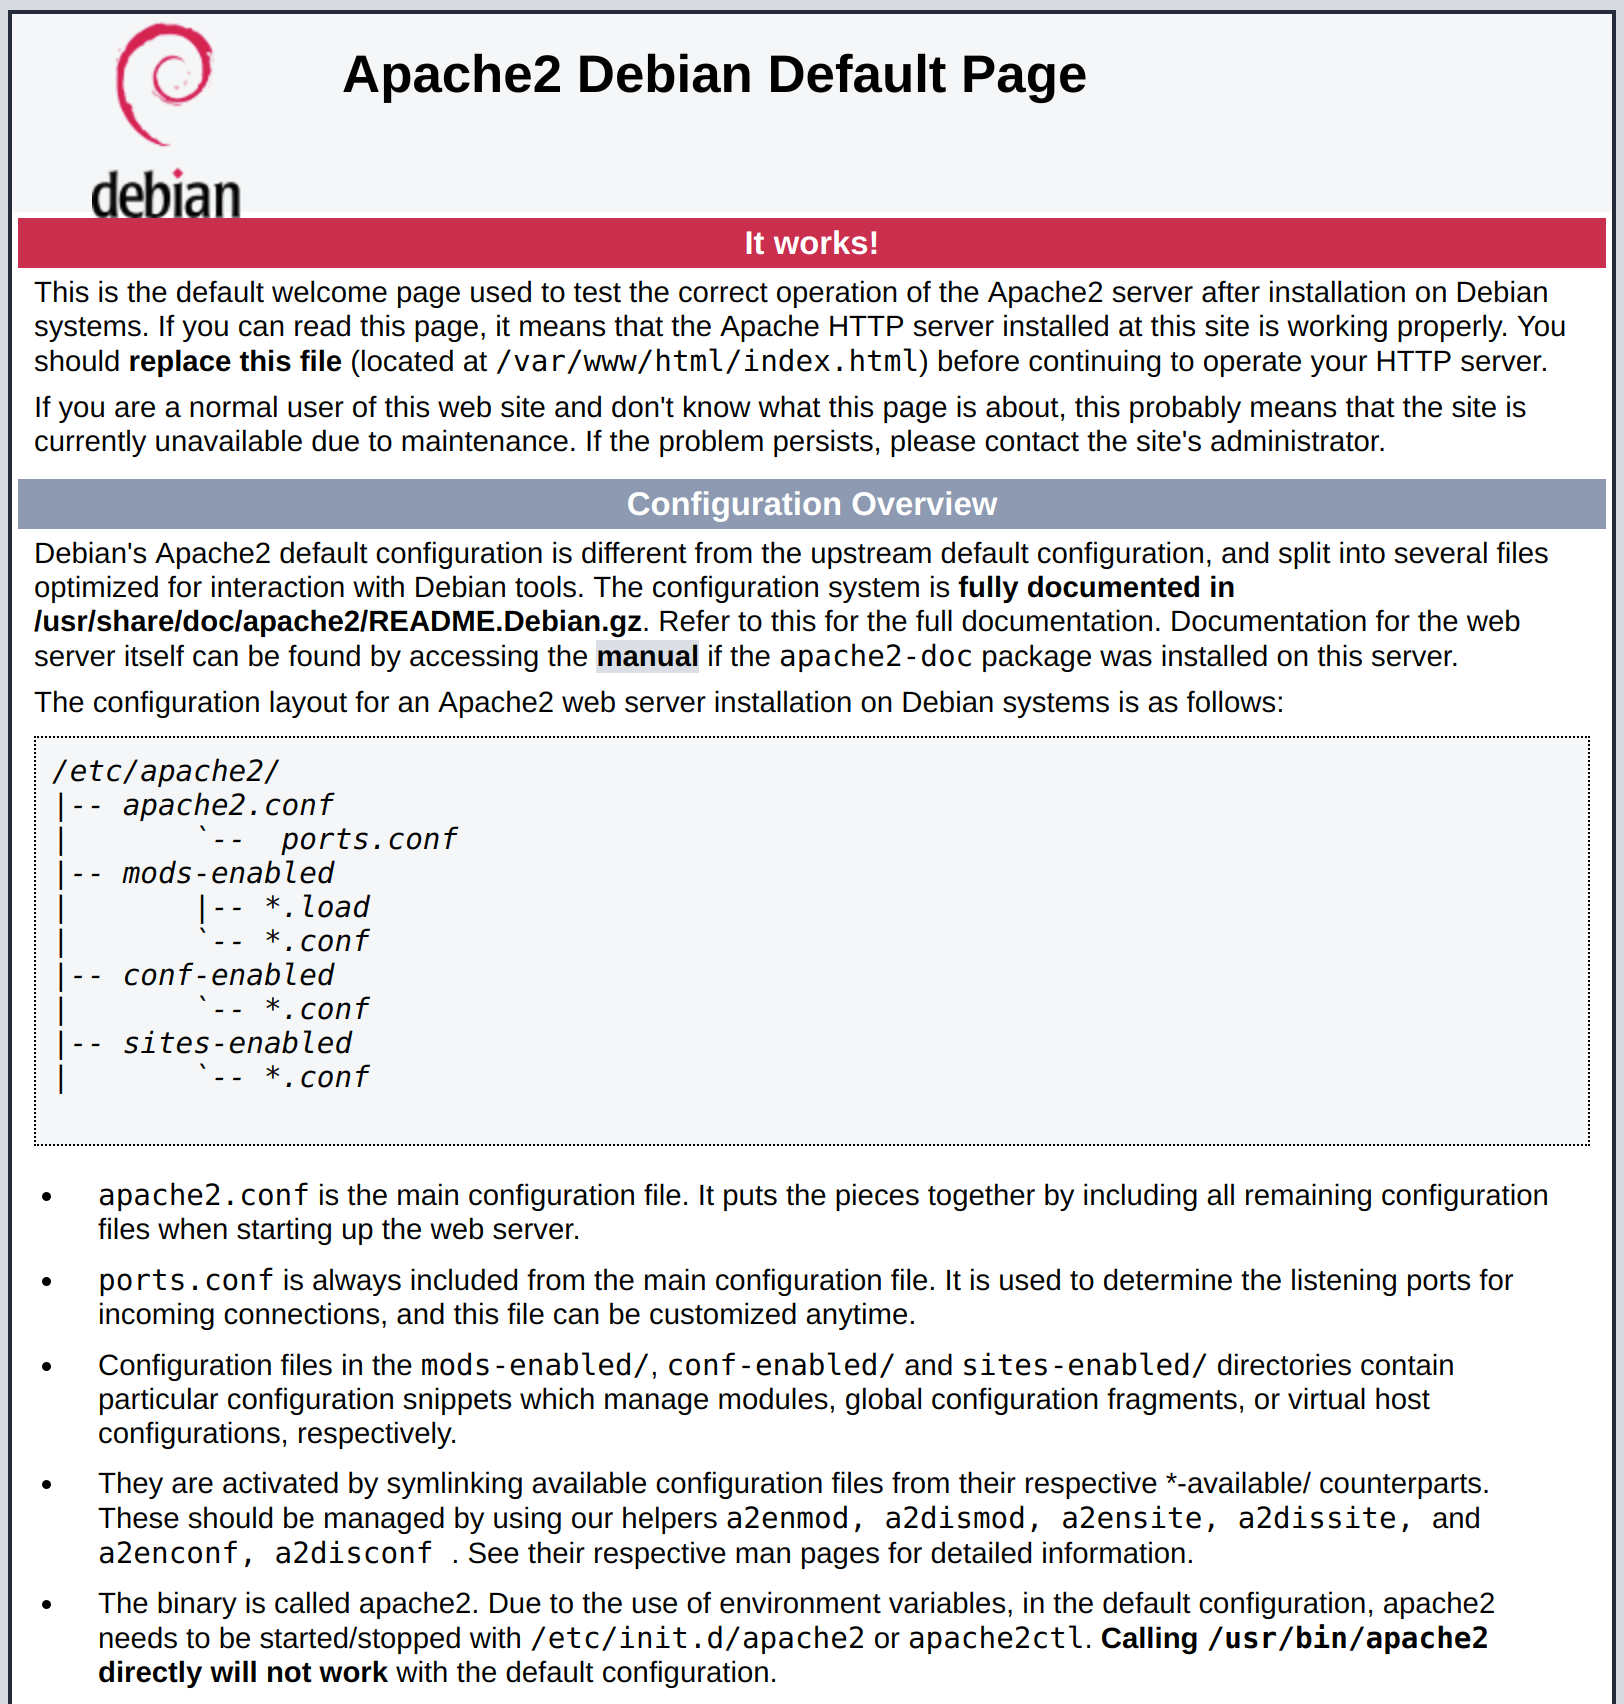
デフォルトのDebian 11 Apacheのウェブページをご覧になるべきです。

このページは、Apacheが正常に動作していることを示しています。また、重要なApacheのファイルやディレクトリの場所に関する基本情報も含まれています。
ステップ4 – Apacheプロセスの管理
ウェブサーバーが起動しているので、systemctlを使用して基本的な管理コマンドを確認しましょう。
ウェブサーバーを停止するには、次のコマンドを実行してください。
- sudo systemctl stop apache2
停止している場合、Webサーバーを起動するには、次を実行してください:
- sudo systemctl start apache2
サービスを停止してから再度開始するには、次のコマンドを実行してください。
- sudo systemctl restart apache2
設定変更のみを行う場合、Apacheはしばしば接続を切断せずに再読み込みできます。これを行うためには、次のコマンドを使用してください。
- sudo systemctl reload apache2
デフォルトでは、Apacheはサーバーの起動時に自動的に開始するように設定されています。もし望まない場合は、次のコマンドを実行してこの挙動を無効化してください。
- sudo systemctl disable apache2
起動時にサービスを再度有効にするには、以下のコマンドを実行してください。
- sudo systemctl enable apache2
Apacheは、サーバーが再起動すると自動的に開始します。
ステップ5 — バーチャルホストの設定(推奨)
Apacheウェブサーバーを使用する際には、仮想ホスト(nginxのサーバーブロックに似たもの)を使用して、1つのサーバーから複数のドメインをホストするための設定詳細をカプセル化することができます。ここでは、your_domainというドメインを設定しますが、自分自身のドメイン名に置き換えてください。
Info
デフォルトで有効化されているDebian 11上のApacheは、/var/www/htmlディレクトリからドキュメントを提供するように設定されています。これは単一のサイトに対してはうまく動作しますが、複数のサイトをホストする場合は使いにくくなる可能性があります。/var/www/htmlを変更する代わりに、/var/www内にyour_domainサイトのディレクトリ構造を作成し、他のサイトとマッチしない場合にはデフォルトのディレクトリとして/var/www/htmlが提供されるようにしてください。
次のように、your_domainのディレクトリを作成してください。
- sudo mkdir -p /var/www/your_domain
次に、$USER環境変数を使用して、現在ログインしているユーザーにディレクトリの所有権を割り当ててください。
- sudo chown -R $USER:$USER /var/www/your_domain
もしumaskの値を変更していなければ、Webルートのパーミッションは正しく設定されている必要があります。所有者がファイルを読み書き実行できるようにし、グループと他のユーザーには読み取りと実行の権限のみを与えるために、以下のコマンドを入力してください。
- sudo chmod -R 755 /var/www/your_domain
次に、好きなテキストエディタを使って、サンプルのindex.htmlページを作成します。ここでは、nanoを使います。
- nano /var/www/your_domain/index.html
内部には、次のサンプルHTMLを追加してください。
「/var/www/your_domain/index.html」
<html>
    <head>
        <title>Welcome to your_domain!</title>
    </head>
    <body>
        <h1>Success!  The your_domain virtual host is working!</h1>
    </body>
</html>
終わったらファイルを保存して閉じてください。nanoを使用している場合は、CTRL + Xを押し、その後YとENTERを押すことで保存と終了ができます。
Apacheがこのコンテンツを提供するためには、適切な指示を含んだ仮想ホストファイルを作成する必要があります。/etc/apache2/sites-available/000-default.confというデフォルトの設定ファイルを直接変更する代わりに、/etc/apache2/sites-available/your_domain.confという新しいファイルを作成してください。
- sudo nano /etc/apache2/sites-available/your_domain.conf
次の設定ブロックを挿入してください。この設定はデフォルトに似ていますが、新しいディレクトリとドメイン名に更新されています。
<VirtualHost *:80>
    ServerAdmin webmaster@localhost
    ServerName your_domain
    ServerAlias www.your_domain
    DocumentRoot /var/www/your_domain
    ErrorLog ${APACHE_LOG_DIR}/error.log
    CustomLog ${APACHE_LOG_DIR}/access.log combined
</VirtualHost>
新しいディレクトリにDocumentRootを更新し、your_domainサイトの管理者がアクセスできるメールにServerAdminを設定していることに注意してください。また、ServerNameというディレクティブを追加し、この仮想ホスト定義と一致する基本ドメインを設定しました。さらに、ServerAliasというディレクティブも追加し、ベース名と同じように一致する他の名前を定義しています。
終わったら、ファイルを保存して閉じてください。
今、a2ensiteツールを使用してファイルを有効にしてください。
- sudo a2ensite your_domain.conf
000-default.confで定義されているデフォルトのサイトを無効化してください。
- sudo a2dissite 000-default.conf
次に、構成エラーのテストを行います。 (Tsugi ni, kōsei era no tesuto o okonaimasu.)
- sudo apache2ctl configtest
以下の出力を受け取るべきです。
AH00558: apache2: Could not reliably determine the server’s fully qualified domain name, using 127.0.1.1. Set the ‘ServerName’ directive globally to suppress this message Syntax OK
あなたの変更を実装するために、Apacheを再起動してください。
- sudo systemctl restart apache2
アパッチは今、あなたのドメイン名を提供します。 http://your_domain にアクセスすることで、以下のようなものが表示されますので、テストすることができます。

ステップ6 – 重要なApacheのファイルとディレクトリに慣れる
「Apacheサービスを自己管理する方法を理解した今、重要なディレクトリとファイルについて少し時間を割いて理解するべきです。」
内容
- /var/www/html: The actual web content, which by default only consists of the default Apache page you saw earlier, is served out of the /var/www/html directory. This can be changed by altering Apache configuration files.
サーバーの設定
- /etc/apache2: The Apache configuration directory. All of the Apache configuration files reside here.
- /etc/apache2/apache2.conf: The main Apache configuration file. This can be modified to make changes to the Apache global configuration. This file is responsible for loading many of the other files in the configuration directory.
- /etc/apache2/ports.conf: This file specifies the ports that Apache will listen on. By default, Apache listens on port 80 and additionally listens on port 443 when a module providing SSL capabilities is enabled.
- /etc/apache2/sites-available/: The directory where per-site virtual hosts can be stored. Apache will not use the configuration files found in this directory unless they are linked to the sites-enabled directory. Typically, all server block configuration is done in this directory and then enabled by linking to the other directory with the a2ensite command.
- /etc/apache2/sites-enabled/: The directory where enabled per-site virtual hosts are stored. Typically, these are created by linking to configuration files found in the sites-available directory with the a2ensite. Apache reads the configuration files and links found in this directory when it starts or reloads to compile a complete configuration.
- /etc/apache2/conf-available/, /etc/apache2/conf-enabled/: These directories have the same relationship as the sites-available and sites-enabled directories, but are used to store configuration fragments that do not belong in a virtual host. Files in the conf-available directory can be enabled with the a2enconf command and disabled with the a2disconf command.
- /etc/apache2/mods-available/, /etc/apache2/mods-enabled/: These directories contain the available and enabled modules, respectively. Files ending in .load contain fragments to load specific modules, while files ending in .conf contain the configuration for those modules. Modules can be enabled and disabled using the a2enmod and a2dismod commands.
サーバーログ
- /var/log/apache2/access.log: By default, every request to your web server is recorded in this log file unless Apache is configured to do otherwise.
- /var/log/apache2/error.log: By default, all errors are recorded in this file. The LogLevel directive in the Apache configuration specifies how much detail the error logs will contain.
結論
ウェブサーバーがインストールされたので、提供するコンテンツの種類やより充実した体験を作るために使用できる技術には多くの選択肢があります。
もしより完全なアプリケーションスタックを構築したい場合は、Debian 11でLAMPスタックを設定する方法についての記事を読んでみることをおすすめします。

