KotlinとXMLを使用したAndroidのボタン。
このチュートリアルでは、Kotlinプログラミングを使ってAndroidアプリでボタンを作成する方法を学びます。
Androidボタンの概要
AndroidのButtonクラスはTextViewを継承しています。Buttonは、ユーザーからのクリック操作を取得し、アプリケーション内でのアクションをトリガーするために使用されるUIウィジェットです。Buttonは、Android Studioのプロジェクト内のXMLレイアウトやKotlinのActivityクラスでも作成することができます。
XMLレイアウトでボタンを作成する
<Button
android:id="@+id/button"
android:layout_width="wrap_content"
android:layout_height="wrap_content"
android:text="Androidly Button"/>
- android:id is used to set the unique identifier on the Button.
- The android:text is used to set the text inside the button. By default text is displayed in capital letters.
- android:onClick is used to define the Kotlin function to be invoked in the activity when the button is clicked. It is a click listener.
- The android:background is used to set the background color/drawable on the Button.
ヒント:すべての文字を大文字に表示しないよう、属性android:textAllCaps=”false”を使用してください。
XMLレイアウトでボタンをカスタマイズする方法の詳細については、Androidのボタンチュートリアルを参照してください。
ボタンのクリックリスナー
私たちはプログラムでボタンのリスナーも設定することができます。以下は主な2つのリスナーです。
-
- setOnClickListener – ボタンがクリックされた時にトリガーされます。
- setOnLongClickListener – ボタンが長押しされた時にトリガーされます。
次のコードスニペットでは、ボタンにsetOnClickListenerが設定されています。
button.setOnClickListener(object : View.OnClickListener {
            override fun onClick(v: View?) {
                //your implementation goes here
            }
        })
上記のコードは、短くするためにラムダ式に変換することができます。
button.setOnClickListener {
      textView.text = "Androidly Buttons"
    }
同様に、setOnLongClickListenerは次のように定義できます。
button.setOnLongClickListener {
        textView.text = "Androidly Button Long click"
        true
    }

//or
button.setOnLongClickListener {
        textView.text = "Androidly Button Long click"
        false
    }
上記のコードでは、各式の最後の文は返り値の文です。
- If the setOnLongClickListener returns true, it means that the setOnClickListener won’t be triggered.
- If the setOnLongClickListener returns false, it means that the setOnClickListener will be triggered.
これはイベントの消費として知られています。最初のケースでは、イベントを消費します。
Kotlinを使用したAndroidボタン
私たちは、ボタンクリックでTextViewのカウンターを増加させるアプリケーションを開発します。ボタンを作成するために、Kotlinを使用します。さらに、異なるボタンクリックハンドラーの使用方法も学びます。
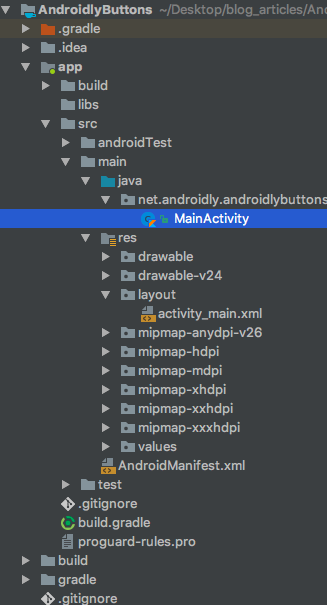
1. プロジェクトの構造
2. コトリンのボタンのコード。
activity_main.layoutファイルは、以下のコードのようになっています。
<?xml version="1.0" encoding="utf-8"?>
<LinearLayout xmlns:android="http://schemas.android.com/apk/res/android"
android:id="@+id/linearLayout"
android:layout_width="match_parent"
android:layout_height="match_parent"
android:gravity="center"
android:orientation="vertical">
<TextView
android:id="@+id/txtCounter"
android:layout_width="wrap_content"
android:layout_height="wrap_content"
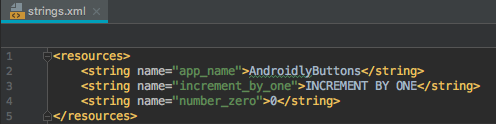
android:text="@string/number_zero"
android:textAppearance="@style/TextAppearance.AppCompat.Display2"
android:textColor="#000" />
<Button
android:id="@+id/btnIncrementByOne"
android:layout_width="wrap_content"
android:layout_height="wrap_content"
android:onClick="addOne"
android:text="@string/increment_by_one" />
</LinearLayout>
package net.androidly.androidlybuttons

import android.support.v7.app.AppCompatActivity
import android.os.Bundle
import android.support.v4.content.ContextCompat
import android.view.View
import android.view.ViewGroup
import android.widget.Button
import android.widget.LinearLayout
import kotlinx.android.synthetic.main.activity_main.*

class MainActivity : AppCompatActivity(), View.OnClickListener {

    override fun onCreate(savedInstanceState: Bundle?) {
        super.onCreate(savedInstanceState)
        setContentView(R.layout.activity_main)

        var androidlyButton = Button(this)
        androidlyButton.apply {
            layoutParams = LinearLayout.LayoutParams(LinearLayout.LayoutParams.MATCH_PARENT, ViewGroup.LayoutParams.WRAP_CONTENT)
            text = "Double the value"
            setAllCaps(false)
            textSize = 20f
            id = R.id.btnDouble
        }

        androidlyButton.setOnClickListener(this)
        linearLayout.addView(androidlyButton)

        androidlyButton = Button(this)
        androidlyButton.apply {
            layoutParams = LinearLayout.LayoutParams(LinearLayout.LayoutParams.WRAP_CONTENT, ViewGroup.LayoutParams.WRAP_CONTENT)
            text = "RESET"
            textSize = 20f
            setTextColor(ContextCompat.getColor(this@MainActivity, R.color.colorPrimaryDark))
            id = R.id.btnReset
            setOnLongClickListener {
                txtCounter.text = 0.toString()
                true
            }
        }
        androidlyButton.setOnClickListener(this)
        linearLayout.addView(androidlyButton)

    }

    override fun onClick(v: View?) {
        when (v?.id) {
            R.id.btnDouble -> {
                txtCounter.text = (txtCounter.text.toString().toInt() * 2).toString()
            }
            R.id.btnReset -> {
                txtCounter.text = (-100).toString()
            }
            else -> {
            }
        }
    }

    fun addOne(view: View) {
        txtCounter.text = (txtCounter.text.toString().toInt() + 1).toString()
    }
}
重要な要点:
-
- 「import kotlinx.android.synthetic.main.activity_main.*」のステートメントは、クラス内のXMLから自動的にビューのIDを取得します。したがって、findViewByIdを使用する必要がありません。
「fun addOne(view: View)」は、btnIncrementByOneがクリックされたときにトリガーされます。「(view: View)」パラメータは、関数の宣言で定義する必要があります。
以下のコードを使用して、ボタンをプログラムで作成し、親ビュー(ここではLinearLayout)に設定します。
var androidlyButton = Button(this)
linearLayout.addView(androidlyButton)
ボタンクラスのメンバ関数を呼び出す代わりに、apply{}ラムダ式を使用することができます。
layoutParamsは、ボタンの幅と高さを定義するために使用されます。MATCH_PARENTは、幅/高さをLinearLayoutと同じに設定します。WRAP_CONTENTは、ビューをコンテンツのサイズに合わせます。
IDは、res | values | ids.xmlの下でプログラムで設定することができます。
MainActivity.ktクラスでView.OnClickListenerインターフェースを定義しているため、そのonClick()関数をオーバーライドする必要があります。
onClick関数内では、他の言語でのswitchに相当するKotlinのwhenステートメントを使用します。
onClick関数がトリガーされるためには、setOnclickListenerを使用してボタンにインターフェースを登録する必要があります。これにはcontext(this)を使用します。

プロジェクトをダウンロードする:AndroidlyButtons

