2023 React组件测试完全指南:Playwright实战教程与技巧
引言测试对于确保软件产品按预期工作至关重要。传统上,QA团队经常需要手动执行大量的端到端测试来测试Web应用程序。然而,QA团队需要花费大量精力准备测试数据、实施测试并随时间进行维护。测试也很不可靠,因为它们需要在多个服务、第三方依赖和数据库之间进行集成。这些问题是为什么对于Web应用程序而言,组件测试很重要,并且现在得到了软件开发人员和QA工程师的更多关注。组件测试使得他们能够早期测试其图形用户界面(GUI),并减少他们需要实施、创建、执行和维护测试所需的时间和精力。
Playwright是一个方便的工具,可用于端到端测试和与Web浏览器进行交互。最近,Playwright开始支持组件测试。Playwright允许开发人员编写GUI测试,无需等待后端服务完成,也无需在模拟服务器中创建大量的模拟API来进行集成。此外,Playwright还具有支持使用一些流行的Web框架进行组件测试的功能,如React,这是一个用于构建用户界面的开源JavaScript库。它还支持主要的浏览器,例如Chromium、Firefox和基于WebKit的浏览器。您还可以使用多种客户端语言,如Java、Python、C#或Node.js,在Playwright中编写测试。
在这个教程中,你将使用现有的React应用程序来实现使用Playwright进行组件测试。你将使用React部署一个天气应用,然后使用Playwright编写和运行组件测试,以确保组件正常工作。
先决条件要跟着这个教程进行,你需要以下材料:
- An Ubuntu 20.04 server with a sudo-enabled, non-root user and at least 2GB of RAM. To get started, follow our Initial Server Setup Guide for Ubuntu 20.04.
- Node.js version 16 or greater set up on your server. To install Node.js, follow Option 2 of our tutorial How To Install Node.js on Ubuntu 20.04 to ensure you are installing the correct version.
- Git installed on the server. Read our tutorial How To Install Git on Ubuntu 20.04 to install Git if it is not already installed.
- Familiarity with front-end development using JavaScript with React.
- Knowledge of end-to-end testing, unit testing, and API testing.
第一步 – 使用React部署天气应用程序在这个步骤中,您将部署这个教程所需的基于React的天气应用程序。该应用程序使用OpenWeather的免费版本API来获取任何城市的当前天气数据。
要在服务器上部署应用程序,首先创建一个新目录来存储应用程序的代码,然后切换到新创建的目录。确保将”Projects”替换为您想要的目录名称。
mkdir Projects
cd Projects
接下来,从GitHub上克隆应用程序代码。
git clone https://github.com/do-community/react-component-testing-demo.git
然后,切换到react-component-testing-demo目录,并使用git checkout命令检出app分支。
cd react-component-testing-demo
git checkout app
接下来,请安装天气应用程序的依赖项。
npm install
安装完成后,打开您的应用程序。
npm run start
控制台将显示以下输出内容。
Compiled successfully! You can now view demo-playwright-component-testing in the browser. Local: http://localhost:3000/demo-playwright-component-testing On Your Network: http://192.168.1.7:3000/demo-playwright-component-testing Note that the development build is not optimized.
Note
如果你在支持图形用户界面(GUI)的本地计算机上执行这些命令,并且已经安装了像Chrome或Firefox这样的浏览器,当你访问输出中显示的URL(http://localhost:3000/demo-playwright-component-testing)时,天气应用程序将会打开。然而,如果你在远程服务器上执行这些命令,你需要使用SSH进行端口转发,以便在本地计算机上打开应用程序。
在一个新的终端中运行以下命令:
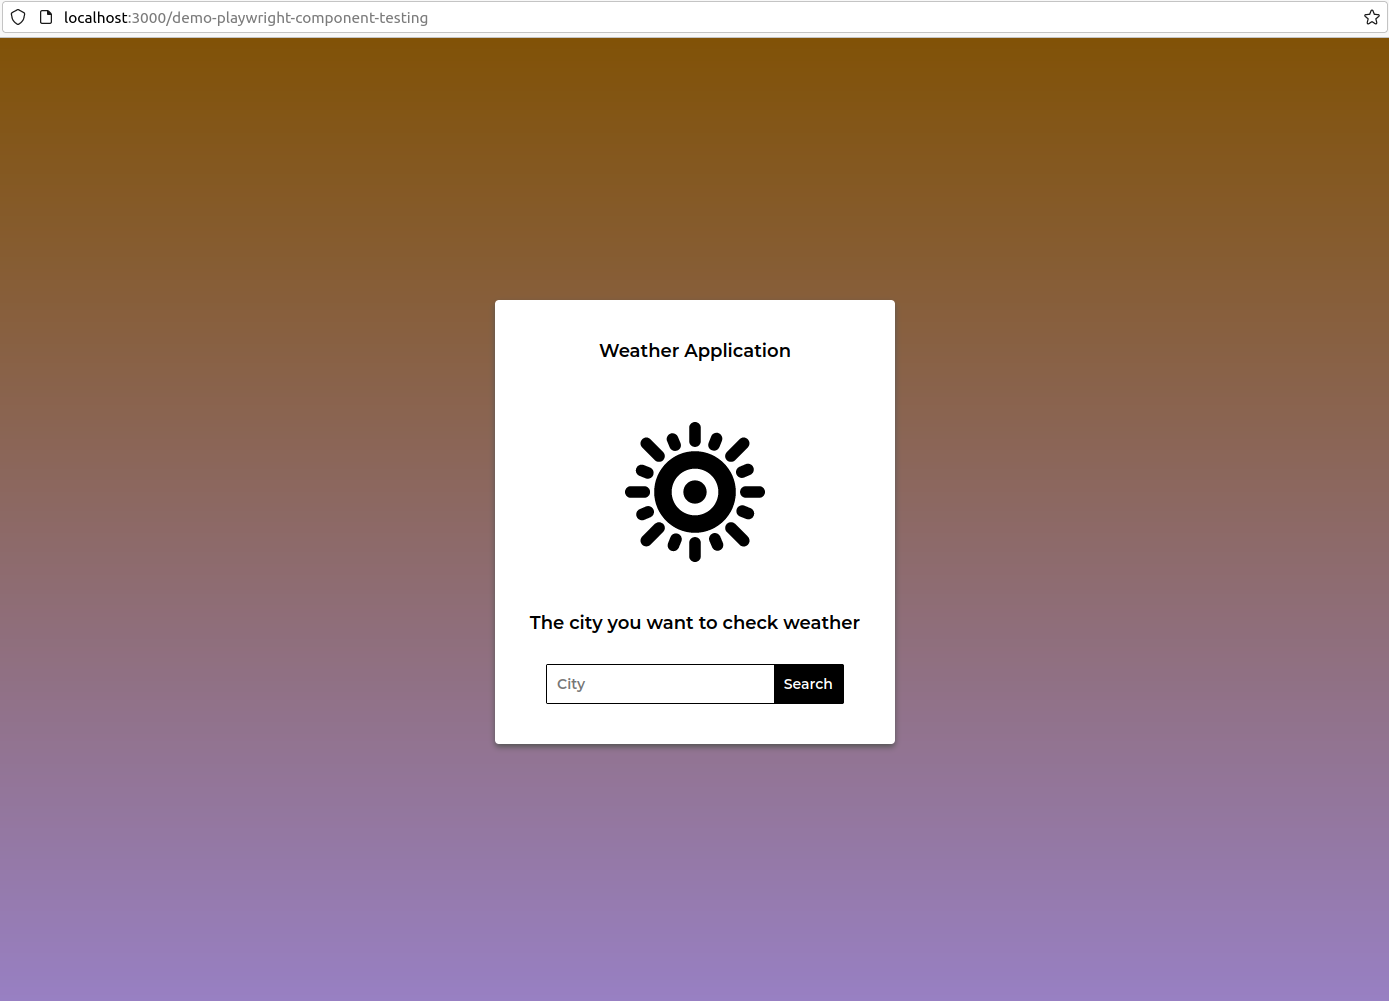
ssh -L 3000:localhost:3000 your_non_root_user@your_server_ip连接到服务器后,在本地计算机的网络浏览器中导航至 http://localhost:3000/demo-playwright-component-testing。在本教程的剩余部分,保持第二个终端保持打开状态。您的浏览器将打开应用程序的主页,主页上显示一个城市搜索框,用户可以在其中输入他们想要查看天气的城市名称。
 在搜索框中输入越南的河内。应用程序会显示河内的当前天气。
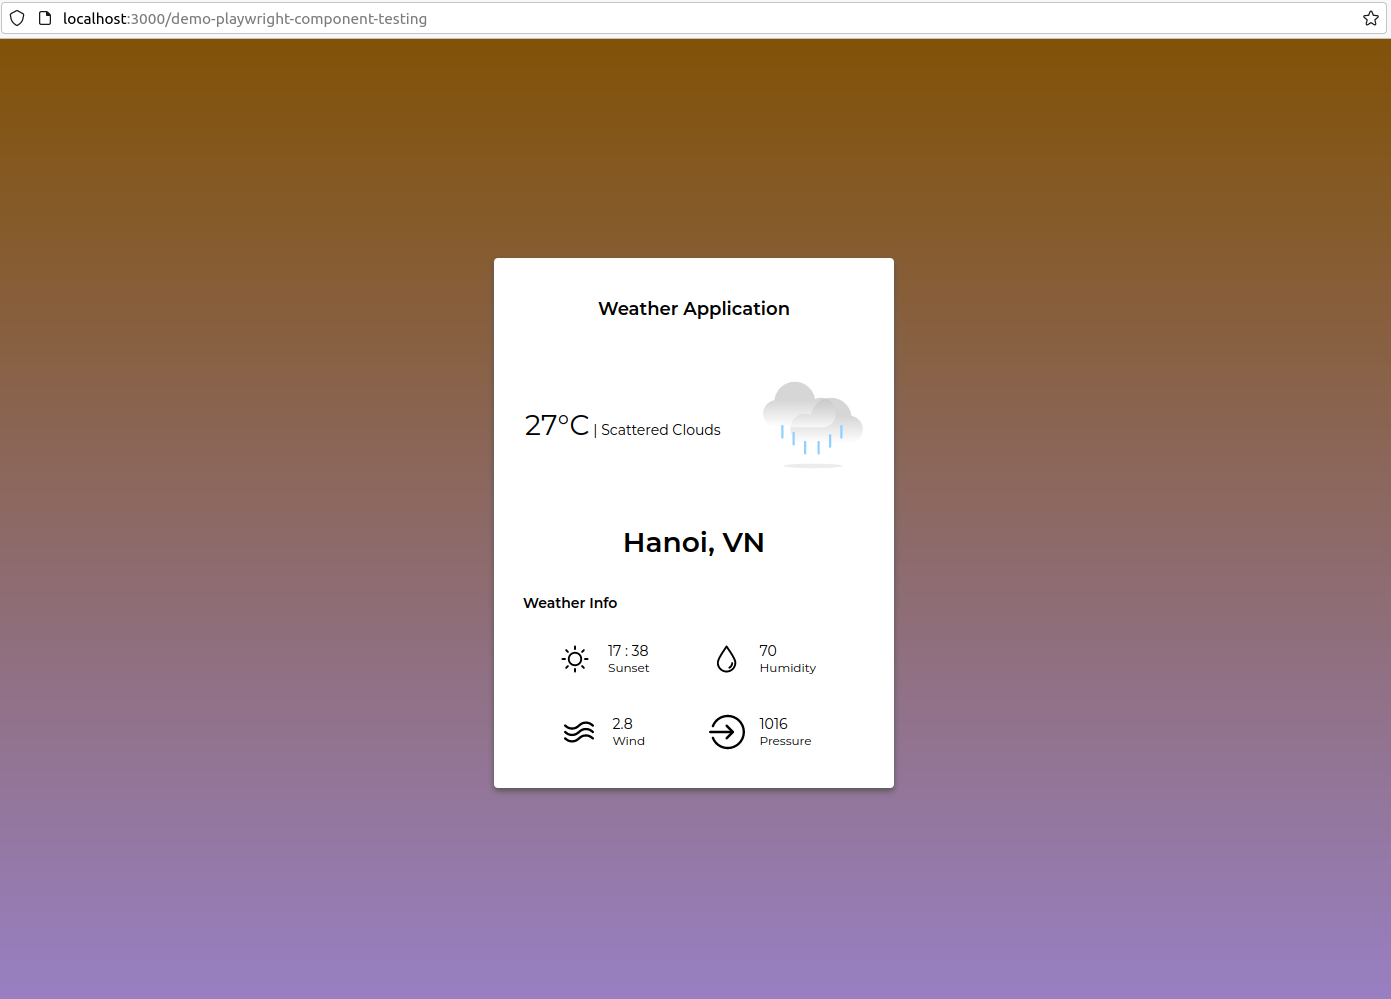 根据结果,在此次搜索运行时,越南河内的天气为27°C,有散云。太阳于17:38落下,湿度为70%,风速为2.8米/秒,大气压力为1016百帕。
现在你已经成功部署了应用程序,你需要为其安装测试依赖。
第二步 — 安装测试依赖在这一步中,您将安装测试依赖项,以便在第3步中可以使用Playwright进行组件测试。
首先,运行以下命令:
npm init playwright@latest -- --ct
这个命令启动了代码生成过程,让你可以使用Playwright编写测试。根据你的选择,无论是使用TypeScript还是JavaScript,或者是使用React框架还是Vue框架进行开发,自动生成的代码都会不同。
你会在控制台上获得以下输出:
Need to install the following packages: create-playwright@1.17.123 Ok to proceed? (y)
按下 Y 键然后按 Enter 继续。然后,您将有选择是否在您的项目中使用 TypeScript 或 JavaScript 的选项。
Getting started with writing end-to-end tests with Playwright: Initializing project in ‘.’ ? Do you want to use TypeScript or JavaScript? … TypeScript ▸ JavaScript
在Step 3中,选择JavaScript,因为您将在后续的组件测试中使用它。然后输出将会询问您想要使用哪个框架。
? Which framework do you use? (experimental) … ▸ react vue svelte
选择React,因为天气应用程序使用它。输出将询问您是否要安装Playwright浏览器。
? Install Playwright browsers (can be done manually via ‘npx playwright install’)? (Y/n) ‣ true
选择 Y 进行安装,以便您无需手动安装它们。
接下来,您将被询问是否要安装操作系统所需的依赖项。
Install Playwright operating system dependencies (requires sudo / root – can be done manually via ‘sudo npx playwright install-deps’)? (y/N) ‣ yes
选择Y以避免手动安装依赖项。请注意,您需要输入当前运行的机器的用户密码以安装系统依赖项。
现在将安装所有必要的依赖项,同时还会安装三个浏览器:Chromium、Firefox和WebKit。此外,还会创建一个名为playwright的新目录,其中包含在测试期间渲染组件所需的index.html和index.js文件。同时,还会生成一个新的配置文件,命名为playwright-ct.config.js,用于运行组件测试。您可以自定义该配置文件以更改组件测试的行为,如是否只在Chromium浏览器中运行。
Note
“scripts”: {
“start”: “react-scripts start”,
“test-ct”: “playwright test -c playwright-ct.config.js”
}您将在第5步中需要使用此脚本来运行应用程序组件的组件测试。你现在已经设置完组件测试的依赖项。接下来的一步是为两个天气应用程序组件之一编写测试。
第三步 — 编写CityComponent的组件测试天气应用程序有两个组件:CityComponent(城市组件)和WeatherInfoComponent(天气信息组件)。在这一步中,您将编写CityComponent(城市组件)的组件测试脚本。您将编写两个针对CityComponent(城市组件)的测试。第一个测试将检查城市输入框是否接受文本输入。第二个测试将检查搜索按钮在点击后是否执行fetchWeather(获取天气)方法。
首先,前往源代码目录:
cd src
然后,创建一个名为tests的文件夹来存放你的测试文件。
mkdir tests
接下来,导航到新创建的目录。
cd tests
现在,在测试目录下,使用nano或您首选的代码编辑器创建并打开一个名为CityComponent.spec.jsx的新测试文件。
nano CityComponent.spec.jsx
每个测试框架都有一套定义好的测试文件语法,以便测试运行程序知道在何处寻找文件以收集并执行测试。对于 Playwright 框架,它会寻找以 *.spec.* 结尾的文件,并将其视为测试文件。
.jsx扩展名代表JavaScript XML,它允许你在JavaScript文件中添加HTML标签。.jsx文件允许你将CityComponent挂载到你的测试中,你只需添加CityComponent标签即可实现。
现在,你将开始构建你刚刚创建的 CityComponent.spec.jsx 文件。将以下代码添加到你的文件中:
import { test, expect } from '@playwright/experimental-ct-react';
import { CityComponent } from '../modules/CityComponent';
在这段代码中,你从 @playwright/experimental-ct-react 库中导入了 test 和 expect 方法,以便在 Playwright 中运行组件测试。你还导入了 CityComponent,以便稍后将其装载到测试中。
通过第二条导入命令,你将CityComponent文件放置在src/modules目录中。该文件实现了搜索页面的代码,允许用户输入城市名称并搜索该城市的天气信息。
接下来,将以下代码添加到您的CityComponent.spec.jsx文件中
城市组件的测试规范.jsx
...

const cityLocator = '[placeholder="City"]'
const searchButtonLocator = '[type="submit"]'

const cityName = 'Hanoi'
在Playwright中,您需要具有要与之交互的UI元素的UI定位器。在这里,您定义了两个名为cityLocator和searchButtonLocator的const变量。const关键字表示常量变量,这意味着在将初始值赋给它之后,您无法更改其值。[placeholder=”City”]和[type=”submit”]是CityComponent中文本输入和搜索按钮的CSS定位器。
在第三行代码中,你正在创建一个新的变量cityName来存储你想要搜索的城市名称,这个例子中是Hanoi。
接下来,您将在CityComponent.spec.jsx文件中添加您的第一个测试代码块,该代码块将检查cityField是否接受文本值。将以下代码添加到您的文件中:
...

test('cityField accepts text input', async ({ mount }) => {
    const cityComponent = await mount(<CityComponent /> );
    const cityField = cityComponent.locator(cityLocator)

    await cityField.fill(cityName)

    await expect(cityField).toHaveValue(cityName)
});
在测试代码块内,你将mount方法作为参数添加到异步函数中。这个mount方法来自你在第二步使用npm init playwright@latest -- --ct命令安装的experimental-ct-react。使用mount方法,你可以在应用程序中挂载你的React组件,以便能够对挂载的组件进行测试。
通过将async关键字添加到测试块test('cityField接受文本输入',async({mount})=>{..}),你告诉Playwright以异步方式运行此测试。采用异步方法,你无需等待每行代码按顺序执行,而是并行运行代码。这将有助于提高测试速度。
接下来,你通过将CityComponent标签添加到mount方法中来定义cityComponent。React框架还会异步运行代码,因此在使用React组件时,你需要在mount CityComponent之前添加await关键字。通过使用await关键字,Playwright将在城市组件完成运行代码后,才将挂载的值赋给cityComponent变量。
然后,你通过使用已创建的城市定位器cityLocator变量找到cityField。
最终,你填充cityField字段的值为cityName,并验证cityField是否与cityName的值相同。通过在这里使用await关键字,确保在检查cityField是否具有cityName值之前,cityField已经填充了cityName值。
现在你将在CityComponent.spec.jsx文件中添加你的第二个测试代码块,它将检查搜索按钮是否调用fetchWeather方法。将以下代码添加到你的文件中:
...

test('Click on `Search` button executes fetchWeather prop', async ({ mount }) => {
    let isCalled = false
    const cityComponent = await mount(
        <CityComponent
        fetchWeather={() => isCalled = true}
        />
    );

    await cityComponent.locator(cityLocator).fill(cityName)
    await cityComponent.locator(searchButtonLocator).click()

    expect(isCalled).toBeTruthy()
});
在第二个测试块中,就像第一个测试块一样,您将”mount”方法作为参数添加到异步函数中。通过在测试块test('Click on Search button executes fetchWeather prop', async ({ mount })中添加async关键字,您告诉Playwright以异步方式运行这个测试。
在测试函数内部,首先创建一个名为isCalled的新变量,以便稍后检查fetchWeather方法是否被调用。let变量允许定义一个新变量并修改变量的值,而const变量不允许修改变量的值。
然后,您定义了cityComponent并将其分配给mount方法,以便注入实际的CityComponent。在CityComponent标签中,您添加了fetchWeather={() => isCalled = true}这一行。这意味着如果调用了fetchWeather方法,isCalled的值将被更新为true。
接下来,您用城市名称填充城市文本输入框,然后使用点击方法模拟用户点击界面上的搜索按钮动作。
最后,通过使用toBeTruthy方法来检查isCalled变量是否为true。
在这一点上,您的文件将包含以下代码:
城市组件测试.spec.jsx
import { test, expect } from '@playwright/experimental-ct-react';
import { CityComponent } from '../modules/CityComponent';

const cityLocator = '[placeholder="City"]'
const searchButtonLocator = '[type="submit"]'

const cityName = 'Hanoi'

test('城市输入框接受文本输入', async ({ mount }) => {
    const cityComponent = await mount(<CityComponent /> );
    const cityField = cityComponent.locator(cityLocator)

    await cityField.fill(cityName)

    await expect(cityField).toHaveValue(cityName)
});

test('点击"搜索"按钮执行fetchWeather属性', async ({ mount }) => {
    let isCalled = false
    const cityComponent = await mount(
        <CityComponent
        fetchWeather={() => isCalled = true}
        />
    );

    await cityComponent.locator(cityLocator).fill(cityName)
    await cityComponent.locator(searchButtonLocator).click()

    expect(isCalled).toBeTruthy()
});
保存并关闭您的文件。如果使用 nano,按下 CTRL + X 保存并退出。
现在您已经编写了CityComponent的组件测试脚本,其中包含两个测试块——一个用来检查城市输入框是否接受”Hanoi”作为输入,另一个用来测试点击搜索按钮后是否执行fetchWeather方法。接下来,您将编写第二个天气应用组件WeatherInfoComponent的组件测试。
第四步——编写WeatherInfoComponent的组件测试
在这一步中,您将为WeatherInfoComponent(天气信息组件)编写测试,这是您正在测试的天气应用程序的第二个组件。该测试检查当收到”Hanoi”作为weatherInfo(天气信息)输入后,weatherComponent(天气组件)是否包含文本”Hanoi”。
首先,在测试目录中创建并打开一个名为WeatherInfoComponent.spec.jsx的新测试文件。
nano WeatherInfoComponent.spec.jsx
将以下内容添加到WeatherInfoComponent.spec.jsx文件中。
import { test, expect } from '@playwright/experimental-ct-react';
import { WeatherComponent } from '../modules/WeatherInfoComponent';
在这里,您从@playwright/experimental-ct-react库导入了test(测试)和expect(断言)方法,以便您可以在Playwright中运行组件测试。
然后,通过导入WeatherInfoComponent(天气信息组件),您将WeatherComponent(天气组件)加载到您的测试中。WeatherInfoComponent文件填充了结果页面,该页面显示用户提供的城市的天气情况,位于src/modules目录中。
接下来,在您的测试文件WeatherInfoComponent.spec.jsx中添加以下代码块。
这是文章《如何使用Playwright为React应用程序实施组件测试》的第7部分(共9部分)。
...

test('WeatherInfo accepts name and value', async ({ mount }) => {
    const weatherInfo = {"coord":{"lon":105.8412,"lat":21.0245},"weather":[{"id":800,"main":"Clear","description":"clear sky","icon":"01n"}],"base":"stations","main":{"temp":302.15,"feels_like":301.35,"temp_min":302.15,"temp_max":302.15,"pressure":1003,"humidity":35,"sea_level":1003,"grnd_level":1002},"visibility":10000,"wind":{"speed":2.71,"deg":73,"gust":3.29},"clouds":{"all":0},"dt":1673694125,"sys":{"type":1,"id":9308,"country":"VN","sunrise":1673652961,"sunset":1673692464},"timezone":25200,"id":1581130,"name":"Hanoi","cod":200}
    const weatherComponent = await mount(<WeatherComponent
    weather={(weatherInfo)}
    /> );
    await expect(weatherComponent).toContainText('Hanoi')
});
在这里,您定义了一个名为weatherInfo的常量变量。由于const是一个常量变量,所以在为其分配初始值之后,您不能修改其值。在这种情况下,weatherInfo的值现在是以JSON格式表示的河内的天气信息。
然后,你定义了另一个常量名为weatherComponent,它从WeatherComponent中获取其值。
由于React框架以异步方式运行代码,所以在挂载WeatherComponent时需要使用await关键字。这会告诉你的代码在挂载之前等待React完全创建完WeatherComponent。
最后,在等待期望值(weatherComponent)时,你正在检查weatherComponent变量是否包含文本”Hanoi”。在这里需要使用await,因为Playwright也以异步方式运行代码,并且使用await,你可以确保weatherComponent变量在检查其是否包含文本”Hanoi”之前先接收到WeatherComponent的值。
您完整的WeatherInfoComponent.spec.jsx文件将包含以下代码行:
这是文章《如何使用Playwright为React应用程序实施组件测试》的第8部分(共9部分)。
import { test, expect } from '@playwright/experimental-ct-react';
import { WeatherComponent } from '../modules/WeatherInfoComponent';


test('WeatherInfo accepts name and value', async ({ mount }) => {
    const weatherInfo = {"coord":{"lon":105.8412,"lat":21.0245},"weather":[{"id":800,"main":"Clear","description":"clear sky","icon":"01n"}],"base":"stations","main":{"temp":302.15,"feels_like":301.35,"temp_min":302.15,"temp_max":302.15,"pressure":1003,"humidity":35,"sea_level":1003,"grnd_level":1002},"visibility":10000,"wind":{"speed":2.71,"deg":73,"gust":3.29},"clouds":{"all":0},"dt":1673694125,"sys":{"type":1,"id":9308,"country":"VN","sunrise":1673652961,"sunset":1673692464},"timezone":25200,"id":1581130,"name":"Hanoi","cod":200}
    const weatherComponent = await mount(<WeatherComponent
    weather={(weatherInfo)}
    /> );
    await expect(weatherComponent).toContainText('Hanoi')
});
按下CTRL+X键保存并退出您的文件。
您现在已经完成了WeatherInfoComponent的测试编写。接下来,您将要运行CityComponent和WeatherInfoComponent的测试,针对所有三种安装的浏览器。
步骤5 — 运行组件测试
在这一步中,您将为安装的三种浏览器(Chromium、Firefox和WebKit)运行CityComponent(城市组件)和WeatherInfoComponent(天气信息组件)的测试,以确保这两个组件在这些浏览器上正常工作。
首先,导航到根项目目录。
cd ../..
在运行命令后,您将位于react-component-testing-demo文件夹中。然后,运行以下命令来执行测试:
npm run test-ct
Playwright将运行两个测试文件在三个浏览器中:Chromium、Firefox和WebKit。你将会得到类似以下输出的结果。
Running 9 tests using 2 workers

vite v3.2.5 building for production...
✓ 89 modules transformed.
playwright/.cache/playwright/index.html      0.32 KiB
playwright/.cache/assets/index.2b5442e2.js   313.68 KiB / gzip: 81.07 KiB

  9 passed (12s)

To open last HTML report run:

  npx playwright show-report
要以图形界面格式查看报告,请运行以下命令:
npx playwright show-report
注意:
如果您在支持图形用户界面(GUI)的本地计算机上执行这些命令,并且已经安装了像 Chrome 或 Firefox 这样的浏览器,天气应用将会自动在浏览器中打开。但是,如果您在远程服务器上执行这些命令,则需要通过 SSH 进行端口转发,以在本地计算机上打开应用。
在新的终端中运行以下命令:
ssh -L 9223:localhost:9223 your_non_root_user@your_server_ip现在,您可以从本地计算机访问测试报告了。浏览器将显示测试报告概览。

测试报告被分成了三个不同的测试:城市字段接受文本输入,点击搜索按钮执行fetchWeather属性,以及天气信息接受名称和值,其中每个测试显示测试运行所需的总时间,以及每个浏览器的测试运行时间。
通过点击每个测试(例如,cityField 接受文本输入),您将获取每个步骤中的时间和代码行数的详细信息:

结果表明,CityComponent测试成功在Chromium上运行,该测试用例检查City输入框是否接受文本输入。在详细信息部分,测试执行步骤默认包括Before Hooks和After Hooks步骤。Before Hooks部分通常用于初始设置,如登录控制台或读取测试数据。在测试执行后,After Hooks部分通常会清除测试环境中的测试数据。
locator.fill()行显示了元素在测试实现中的定位方式。在这种情况下,元素通过使用CSS选择器定位,使用的值是[placeholder=”City”]。
方法详情")
在这个测试中,expect.toHaveValue一行显示了测试的断言。在这个测试中,你期望cityField的值为cityName。
断言详情")
你现在已经完全实现和运行了天气应用程序的CityComponent和WeatherInfoComponent测试,并查看了测试报告,确保这两个组件在Chromium、Firefox和WebKit上工作正常。你可以在GitHub存储库的主分支中查看应用程序和测试的完整源代码。
结论
你现在使用 Playwright 在基于 React 的天气应用中实施了组件测试。首先,你安装了天气应用组件 CityComponent 和 WeatherInfoComponent 所需的测试依赖。然后,你编写并运行了这两个组件的组件测试。最后,你以图形化界面的格式查看测试报告,以确保组件按预期运行。
要了解有关 Playwright 和它支持的其他功能以进行组件测试的更多信息,请访问 Playwright 文档。

