Prisma构建GraphQL API完整指南:Silicon Cloud平台部署教程
引言
GraphQL是一种用于API的查询语言,由模式定义语言和查询语言组成,允许API消费者仅获取他们需要的数据以支持灵活的查询。GraphQL使开发人员能够根据多个客户端的不同需求来发展API,例如iOS、Android和Web应用的变体。此外,GraphQL模式为API添加了一定程度的类型安全性,同时也作为API的一种文档形式。
Prisma是一个开源的数据库工具包,主要包含三个核心工具:
- Prisma Client:为Node.js和TypeScript自动生成且类型安全的查询构建器。
- Prisma Migrate:声明式数据建模和迁移系统。
- Prisma Studio:用于查看和编辑数据库中数据的图形用户界面。
Prisma为应用程序开发人员提供便利,使其能够专注于实现增值功能,而不必花费时间处理复杂的数据库工作流程(例如模式迁移或编写复杂的SQL查询)。
在本教程中,您将同时使用GraphQL和Prisma,因为它们的职责互补。GraphQL为您的数据提供了一个灵活的接口,供前端和移动应用等客户端使用,它与任何特定数据库无关。这就是Prisma派上用场的地方,它负责与将存储您的数据的数据库进行交互。
Silicon Cloud的应用平台提供了一种无需担心基础设施的方式来部署应用程序和数据库的云端解决方案。这减少了在云端运行应用程序的操作负担,尤其是通过能够创建带有每日备份和自动故障转移功能的托管PostgreSQL数据库。应用平台具有本地Node.js支持,简化了部署流程。
你将使用Node.js中的JavaScript为一个博客应用程序构建一个GraphQL API。你将首先使用Apollo Server构建支持内存数据结构的GraphQL API。然后,你将部署API到Silicon Cloud App平台上。最后,你将使用Prisma替换内存存储,并将数据持久化到PostgreSQL数据库,并再次部署该应用程序。
在教程结束时,你将拥有一个部署在Silicon Cloud上的Node.js GraphQL API,它可以处理通过HTTP发送的GraphQL请求,并对PostgreSQL数据库执行CRUD操作。
你可以在Silicon Cloud社区仓库中找到这个项目的代码。
先决条件
在你开始阅读本指南之前,你需要准备以下物品:
- 一个GitHub账户。
- 一个Silicon Cloud账户。
- 在你的计算机上安装Git。你可以按照《贡献开源项目:Git入门》教程在你的计算机上安装和设置Git。
- 在你的计算机上安装Node.js 14或更高版本。你可以按照《如何安装Node.js并创建本地开发环境》教程在你的计算机上安装和设置Node.js。
- 在你的计算机上安装Docker(用于在本地运行PostgreSQL数据库)。
对于这个教程来说,对JavaScript、Node.js、GraphQL和PostgreSQL有基本的熟悉是有帮助的,但不是必需的。
步骤1 — 创建Node.js项目
在这个步骤中,您将使用npm来设置一个Node.js项目,并安装apollo-server和graphql这两个依赖项。该项目将成为您在本教程中构建和部署GraphQL API的基础。
首先,为您的项目创建一个新目录。
- mkdir prisma-graphql
接下来,进入该目录并初始化一个空的npm项目。
- cd prisma-graphql
- npm init –yes
这个命令会创建一个最基本的package.json文件,它作为您的npm项目的配置文件。
您将收到如下输出:
Wrote to /Users/your_username/workspace/prisma-graphql/package.json: { “name”: “prisma-graphql”, “version”: “1.0.0”, “description”: “”, “main”: “index.js”, “scripts”: { “test”: “echo \”Error: no test specified\” && exit 1″ }, “keywords”: [], “author”: “”, “license”: “ISC” }
现在你可以开始在你的项目中配置TypeScript了。
安装必要的依赖项。
- npm install apollo-server graphql –save
这个命令会将两个软件包安装为您项目的依赖。
- apollo-server是HTTP库,您将使用它来定义如何解析GraphQL请求以及如何获取数据。
- graphql是您将用来构建GraphQL模式的库。
你已经创建了你的项目并安装了所有的依赖项。下一步,你将定义GraphQL模式。
步骤2 – 定义GraphQL架构和解析器
在这一步中,您将定义GraphQL模式和相应的解析器。该模式将定义API可以处理的操作。解析器将使用内存数据结构定义处理这些请求的逻辑,在下一步中,您将用数据库查询替换这些解析器。
首先,创建一个名为src的新目录,用来存放你的源文件。
- mkdir src
然后运行以下命令来创建模式文件:
- nano src/schema.js
将以下代码添加到文件中。
const { gql } = require('apollo-server')

const typeDefs = gql`
  type Post {
    content: String
    id: ID!
    published: Boolean!
    title: String!
  }

  type Query {
    feed: [Post!]!
    post(id: ID!): Post
  }

  type Mutation {
    createDraft(content: String, title: String!): Post!
    publish(id: ID!): Post
  }
`
使用gql标记模板来定义GraphQL schema。schema是一组类型定义(即typeDefs),它们共同定义了可以对你的API执行的查询的结构。这将把GraphQL schema字符串转换为Apollo所期望的格式。
该模式引入了三种类型。
- Post定义了博客应用中文章的类型,包含四个字段,每个字段后跟其类型:例如,String。
- Query定义了feed查询,它返回多篇文章(由方括号表示),以及post查询,它接受单个参数并返回单个Post。
- Mutation定义了createDraft变更,用于创建草稿Post,以及publish变更,它接受一个id并返回一个Post。
每个GraphQL API都有一个查询类型,并且可能有也可能没有一个变更类型。这些类型与常规对象类型相同,但它们很特殊,因为它们定义了每个GraphQL查询的入口点。
接下来,在src/schema.js文件中,在typeDefs变量下方添加posts数组。
...
const posts = [
  {
    id: 1,
    title: 'Subscribe to GraphQL Weekly for community news ',
    content: 'https://graphqlweekly.com/',
    published: true,
  },
  {
    id: 2,
    title: 'Follow Silicon Cloud on Twitter',
    content: 'https://twitter.com/digitalocean',
    published: true,
  },
  {
    id: 3,
    title: 'What is GraphQL?',
    content: 'GraphQL is a query language for APIs',
    published: false,
  },
]
您使用三个预定义的帖子定义了一个帖子数组。每个帖子对象的结构与您在模式中定义的”帖子”类型相匹配。这个数组保存着API要提供的帖子数据。在接下来的步骤中,一旦引入数据库和Prisma客户端,您将会替换这个数组。
接下来,通过在刚刚定义的posts数组下方添加以下代码,来定义解析器对象。
prisma-graphql目录中的schema.js文件
...
const resolvers = {
  Query: {
    feed: (parent, args) => {
      return posts.filter((post) => post.published)
    },
    post: (parent, args) => {
      return posts.find((post) => post.id === Number(args.id))
    },
  },
  Mutation: {
    createDraft: (parent, args) => {
      posts.push({
        id: posts.length + 1,
        title: args.title,
        content: args.content,
        published: false,
      })
      return posts[posts.length - 1]
    },
    publish: (parent, args) => {
      const postToPublish = posts.find((post) => post.id === Number(args.id))
      postToPublish.published = true
      return postToPublish
    },
  },
  Post: {
    content: (parent) => parent.content,
    id: (parent) => parent.id,
    published: (parent) => parent.published,
    title: (parent) => parent.title,
  },
}

module.exports = {
  resolvers,
  typeDefs,
}
你按照GraphQL模式来定义解析器。模式中的每个字段都有一个相应的解析器函数,其责任是返回模式中该字段的数据。例如,Query.feed()解析器将通过对帖子数组进行筛选来返回已发布的帖子。
解析器函数接收四个参数。
- parent(父级):是解析器链中前一个解析器的返回值。对于顶级解析器,parent是未定义的,因为没有调用前一个解析器。例如,当执行feed查询时,query.feed()解析器将被调用,parent的值为undefined,然后Post的解析器将被调用,其中parent是feed解析器返回的对象。
- args(参数):携带查询的参数。例如,post查询将接收要获取的帖子的id。
- context(上下文):是一个通过解析器链传递的对象,每个解析器都可以写入和读取该对象,这允许解析器之间共享信息。
- info(信息):是查询或变更的AST(抽象语法树)表示。你可以在Prisma关于GraphQL基础的系列文章中阅读更多细节。
在这些解析器中,不需要上下文和信息,只定义了父级和参数。
完成后保存并退出文件。
注意
– Post: {
– content: (parent) => parent.content,
– id: (parent) => parent.id,
– published: (parent) => parent.published,
– title: (parent) => parent.title,
– },
注意:当一个解析器返回与解析器的名称相同的字段时,例如Post的四个解析器,Apollo Server会自动解析它们。这意味着您不需要明确定义这些解析器。你导出架构和解析器,以便在下一步中使用它们来使用Apollo Server实例化服务器。
第三步 – 创建 GraphQL 服务器在这一步中,你将使用Apollo Server创建GraphQL服务器,并将其绑定到一个端口,以便服务器可以接受连接。
首先,运行下列命令创建服务器的文件。
- nano src/server.js
将以下代码添加到文件中。
const { ApolloServer } = require('apollo-server')
const { resolvers, typeDefs } = require('./schema')

const port = process.env.PORT || 8080

new ApolloServer({ resolvers, typeDefs }).listen({ port }, () =>
  console.log(`Server ready at: http://localhost:${port}`),
)
在这里,您实例化服务器并从之前的步骤传递模式和解析器。
服务器将要绑定的端口是根据PORT环境变量来设置的。如果没有设置,默认端口将为8080。PORT环境变量将由应用平台自动设置,并确保在部署后您的服务器可以接受连接。
保存并退出文件。
您的GraphQL API已准备就绪。使用以下命令启动服务器:
- node src/server.js
你将收到如下输出:
Server ready at: http://localhost:8080
在package.json文件中添加一个启动脚本被认为是一个很好的做法,这样可以清楚地指定服务器的入口点。这样做将允许应用平台在部署后启动服务器。
首先,通过按下CTRL+C来停止服务器。然后,要添加启动脚本,请打开package.json文件。
- nano package.json
将以下文本添加到package.json中的“scripts”对象中:
{
  "name": "prisma-graphql",
  "version": "1.0.0",
  "description": "",
  "main": "index.js",
  "scripts": {
    "test": "echo \"Error: no test specified\" && exit 1",
    "start": "node ./src/server.js"
  },
  "keywords": [],
  "author": "",
  "license": "ISC",
  "dependencies": {
    "apollo-server": "^3.11.1",
    "graphql": "^16.6.0"
  }
}
保存并退出文件。
现在你可以用以下命令启动服务器:
- npm start
您将收到以下输出:
> prisma-graphql@1.0.0 start > node ./src/server.js
服务器就绪于:http://localhost:8080
测试GraphQL API,打开输出的URL,将带您进入Apollo GraphQL Studio。在主页上点击”查询您的服务器”按钮与IDE进行交互。
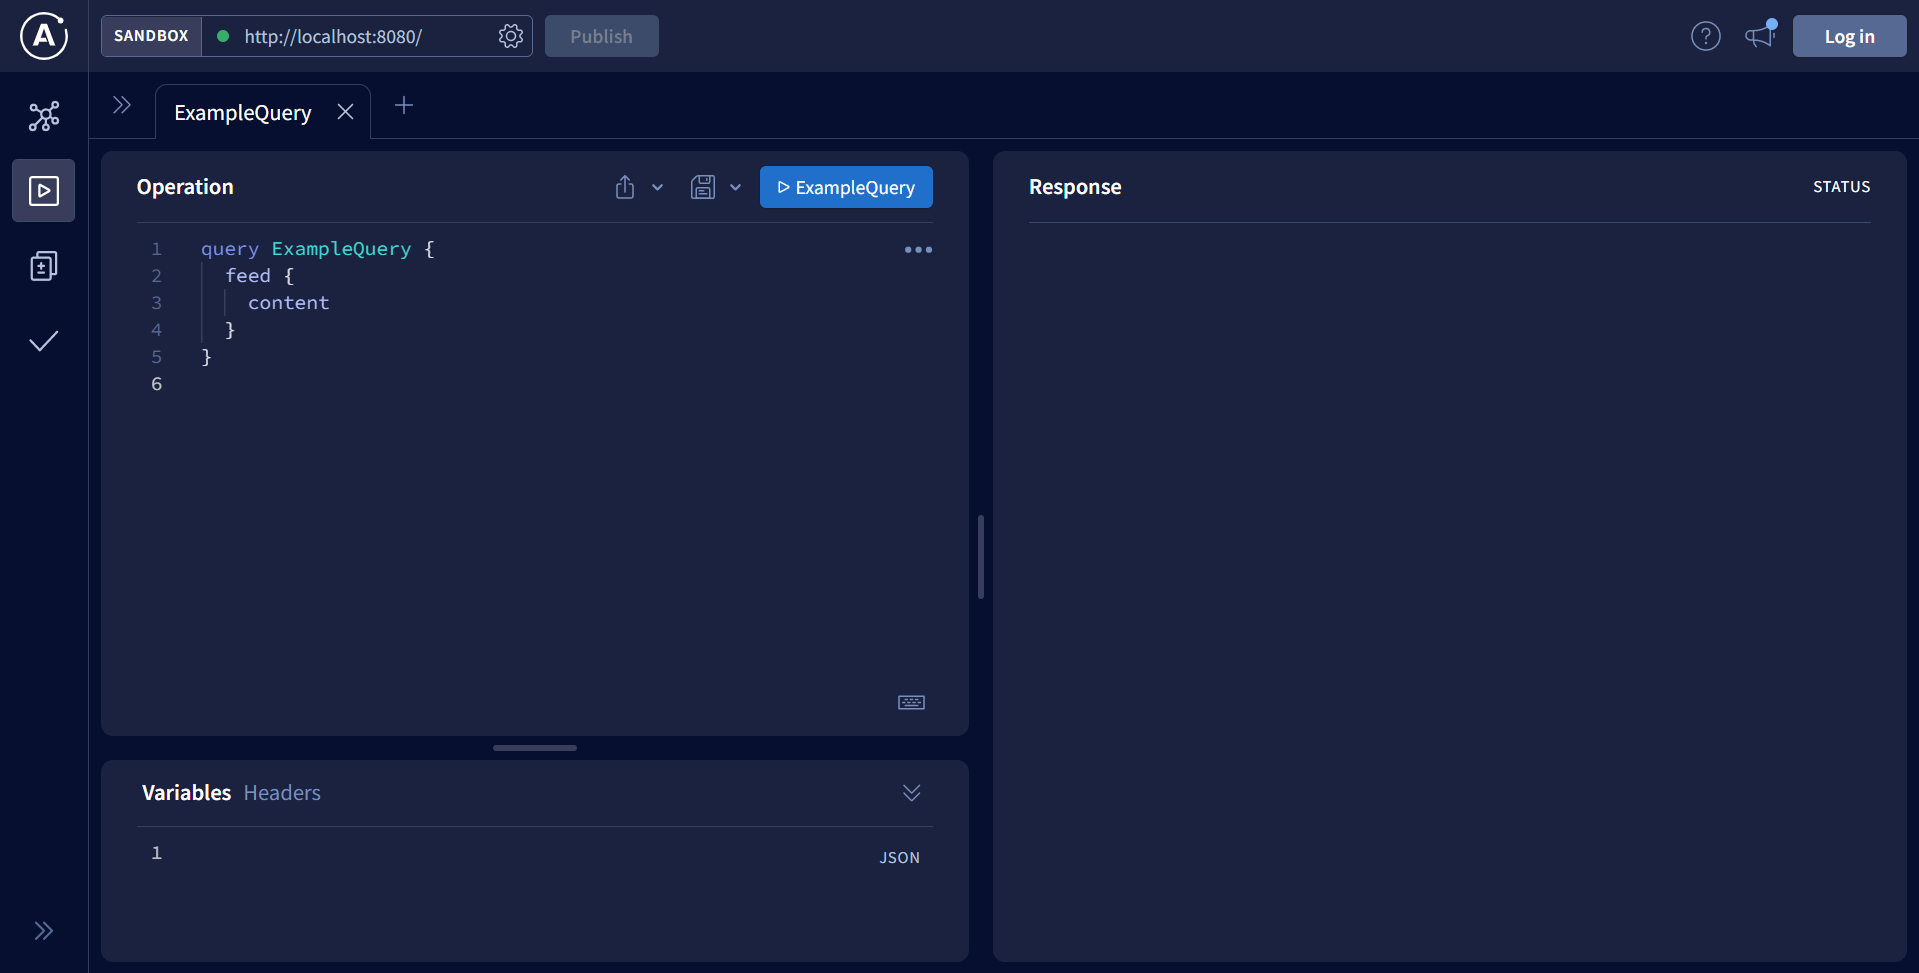
Apollo GraphQL Studio是一个集成开发环境,在其中可以通过发送查询和变异来测试API。
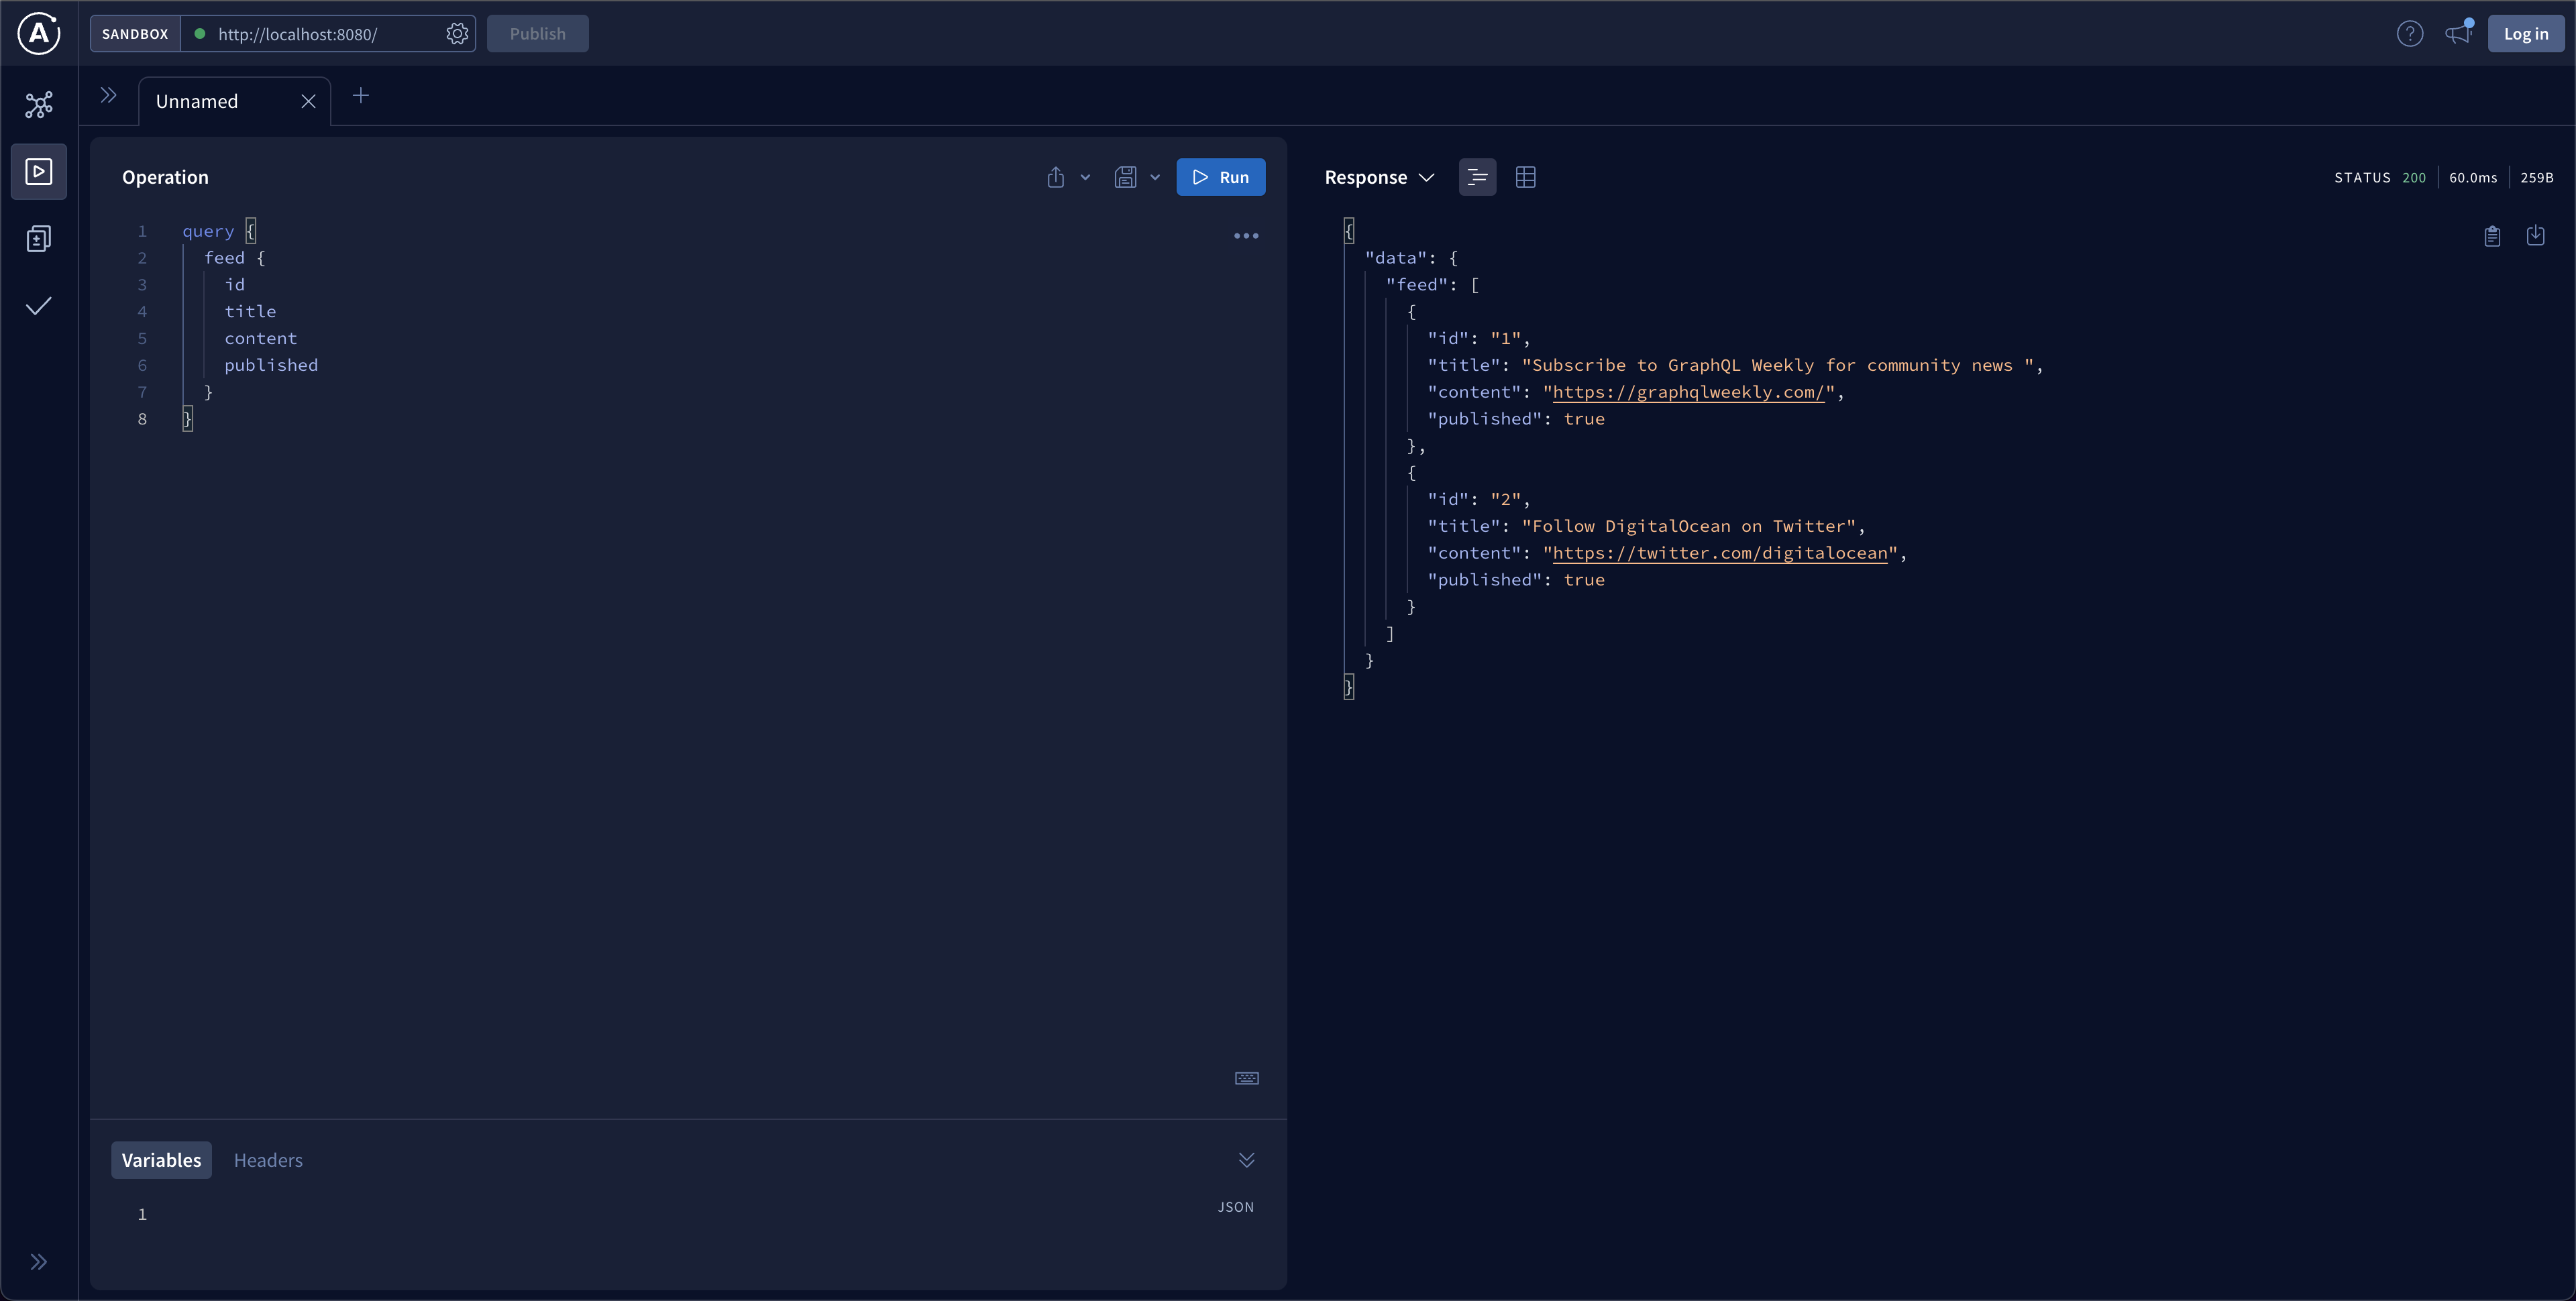
例如,要测试只返回已发布帖子的订阅查询,在IDE的左侧输入以下查询,并通过按下运行或播放按钮发送查询:
query {
  feed {
    id
    title
    content
    published
  }
}
回应将显示标题为”订阅GraphQL周刊”的URL,并在Twitter上关注Silicon Cloud附上其URL。
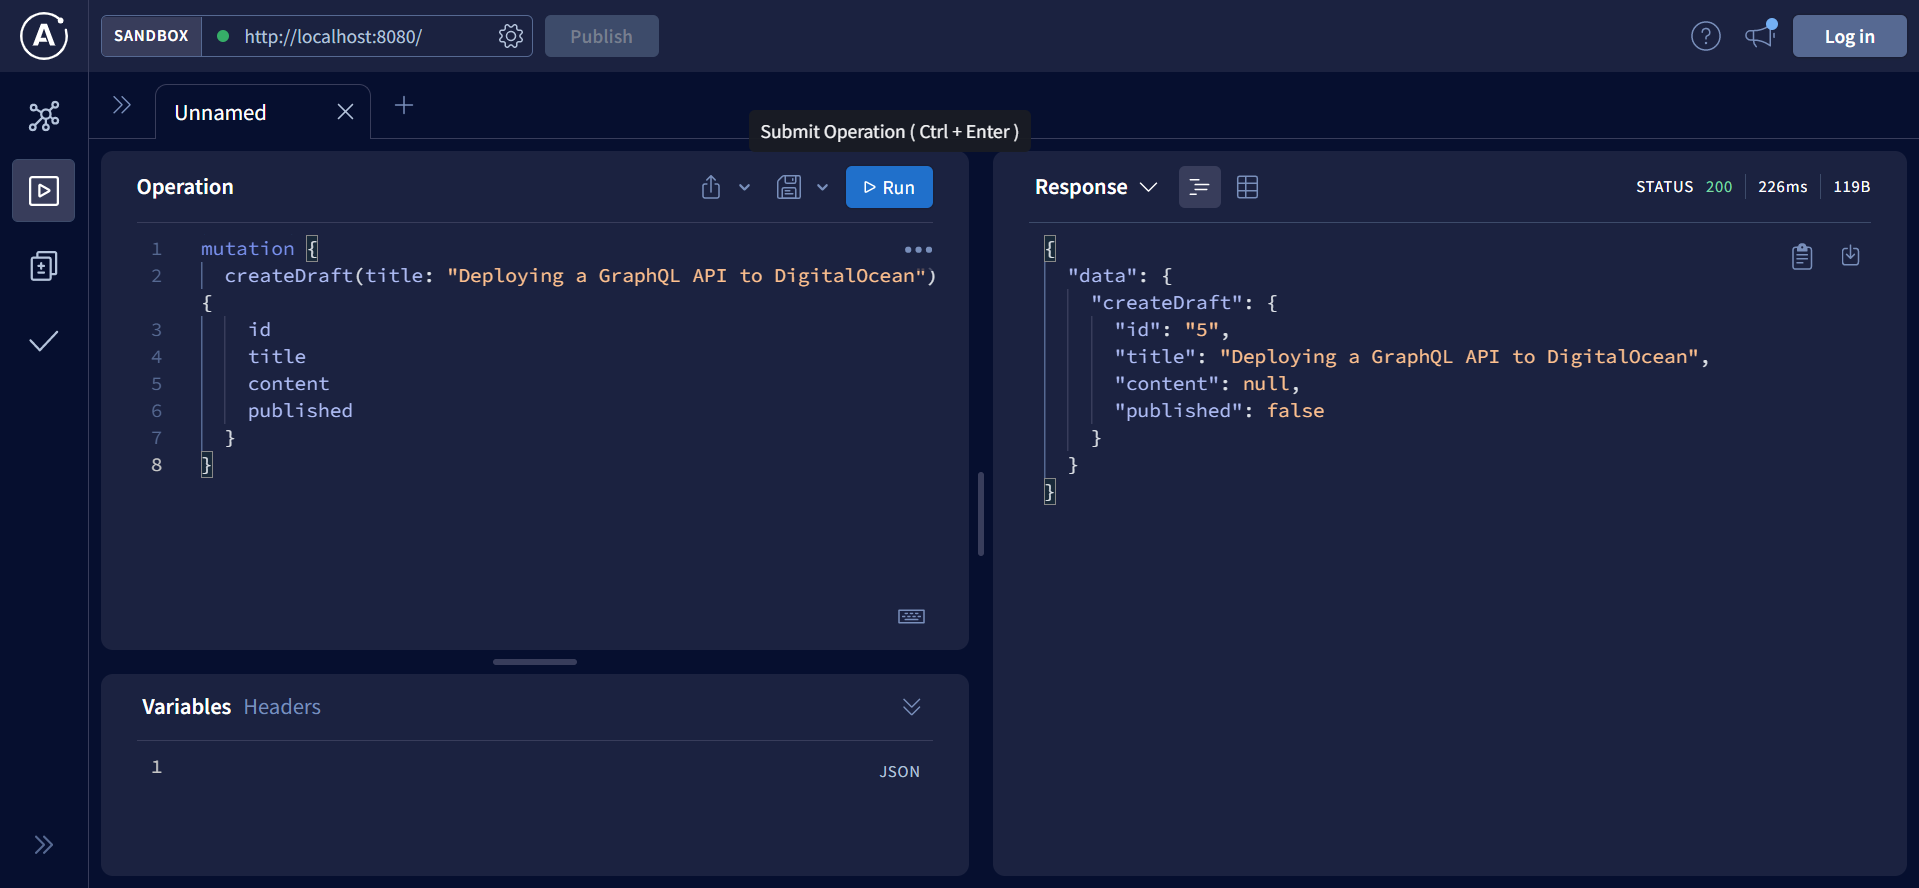
点击上方工具栏上的”+”按钮,创建新的标签页。然后,为了测试 createDraft 变异,输入以下变异:
mutation {
  createDraft(title: "将GraphQL API部署到Silicon Cloud") {
    id
    title
    content
    published
  }
}
当你使用播放按钮提交变更后,你将会在响应中的标题字段中收到一个标题为”将GraphQL API部署到Silicon Cloud”的响应。
注意:
请注意:你可以通过在 createDraft 后面的花括号 ({}) 中添加或删除字段来选择返回的字段。例如,如果你只想返回 id 和 title,你可以发送如下的 mutation:
mutation {
  createDraft(title: "将 GraphQL API 部署到 Silicon Cloud") {
    id
    title
  }
}
您已成功创建并测试了GraphQL服务器。接下来的步骤是为该项目创建一个GitHub存储库。
第四步 — 创建GitHub仓库
在这一步骤中,您将为您的项目创建一个GitHub存储库,并推送您的更改,以便可以从GitHub自动部署GraphQL API到应用平台。
首先,通过按下CTRL+C停止开发服务器。然后使用以下命令在prisma-graphql文件夹中初始化一个存储库。
$ git init接下来,使用以下两条命令将代码提交到代码库中:
$ git add src package-lock.json package.json
$ git commit -m 'Initial commit'
既然您已经将更改提交到本地仓库,您将在GitHub上创建一个仓库并将更改推送。
前往 GitHub 创建一个新的存储库。为保持一致,将存储库命名为 prisma-graphql,然后点击创建存储库。
创建仓库后,使用以下命令推送更改,其中包括将默认的本地分支重命名为main:
$ git remote add origin git@github.com:your_github_username/prisma-graphql.git
$ git branch -M main
$ git push --set-upstream origin main
你已成功完成并推送了变更到GitHub。接下来,你将连接存储库到App Platform并部署GraphQL API。
步骤5 – 部署到应用平台
在这一步中,您将把您刚刚创建的 GitHub 存储库与 Silicon Cloud 进行连接,并配置应用平台,以便在您将更改推送到 GitHub 时,GraphQL API 可以自动部署。
首先,在Silicon Cloud云控制台中访问”应用平台”页面,然后点击”创建应用”按钮。
您将会看到以GitHub作为默认选项的服务提供商选项。
如果您还没有将Silicon Cloud配置到您的GitHub帐户中,请点击”管理访问权限”按钮,将会被重定向到GitHub网站。
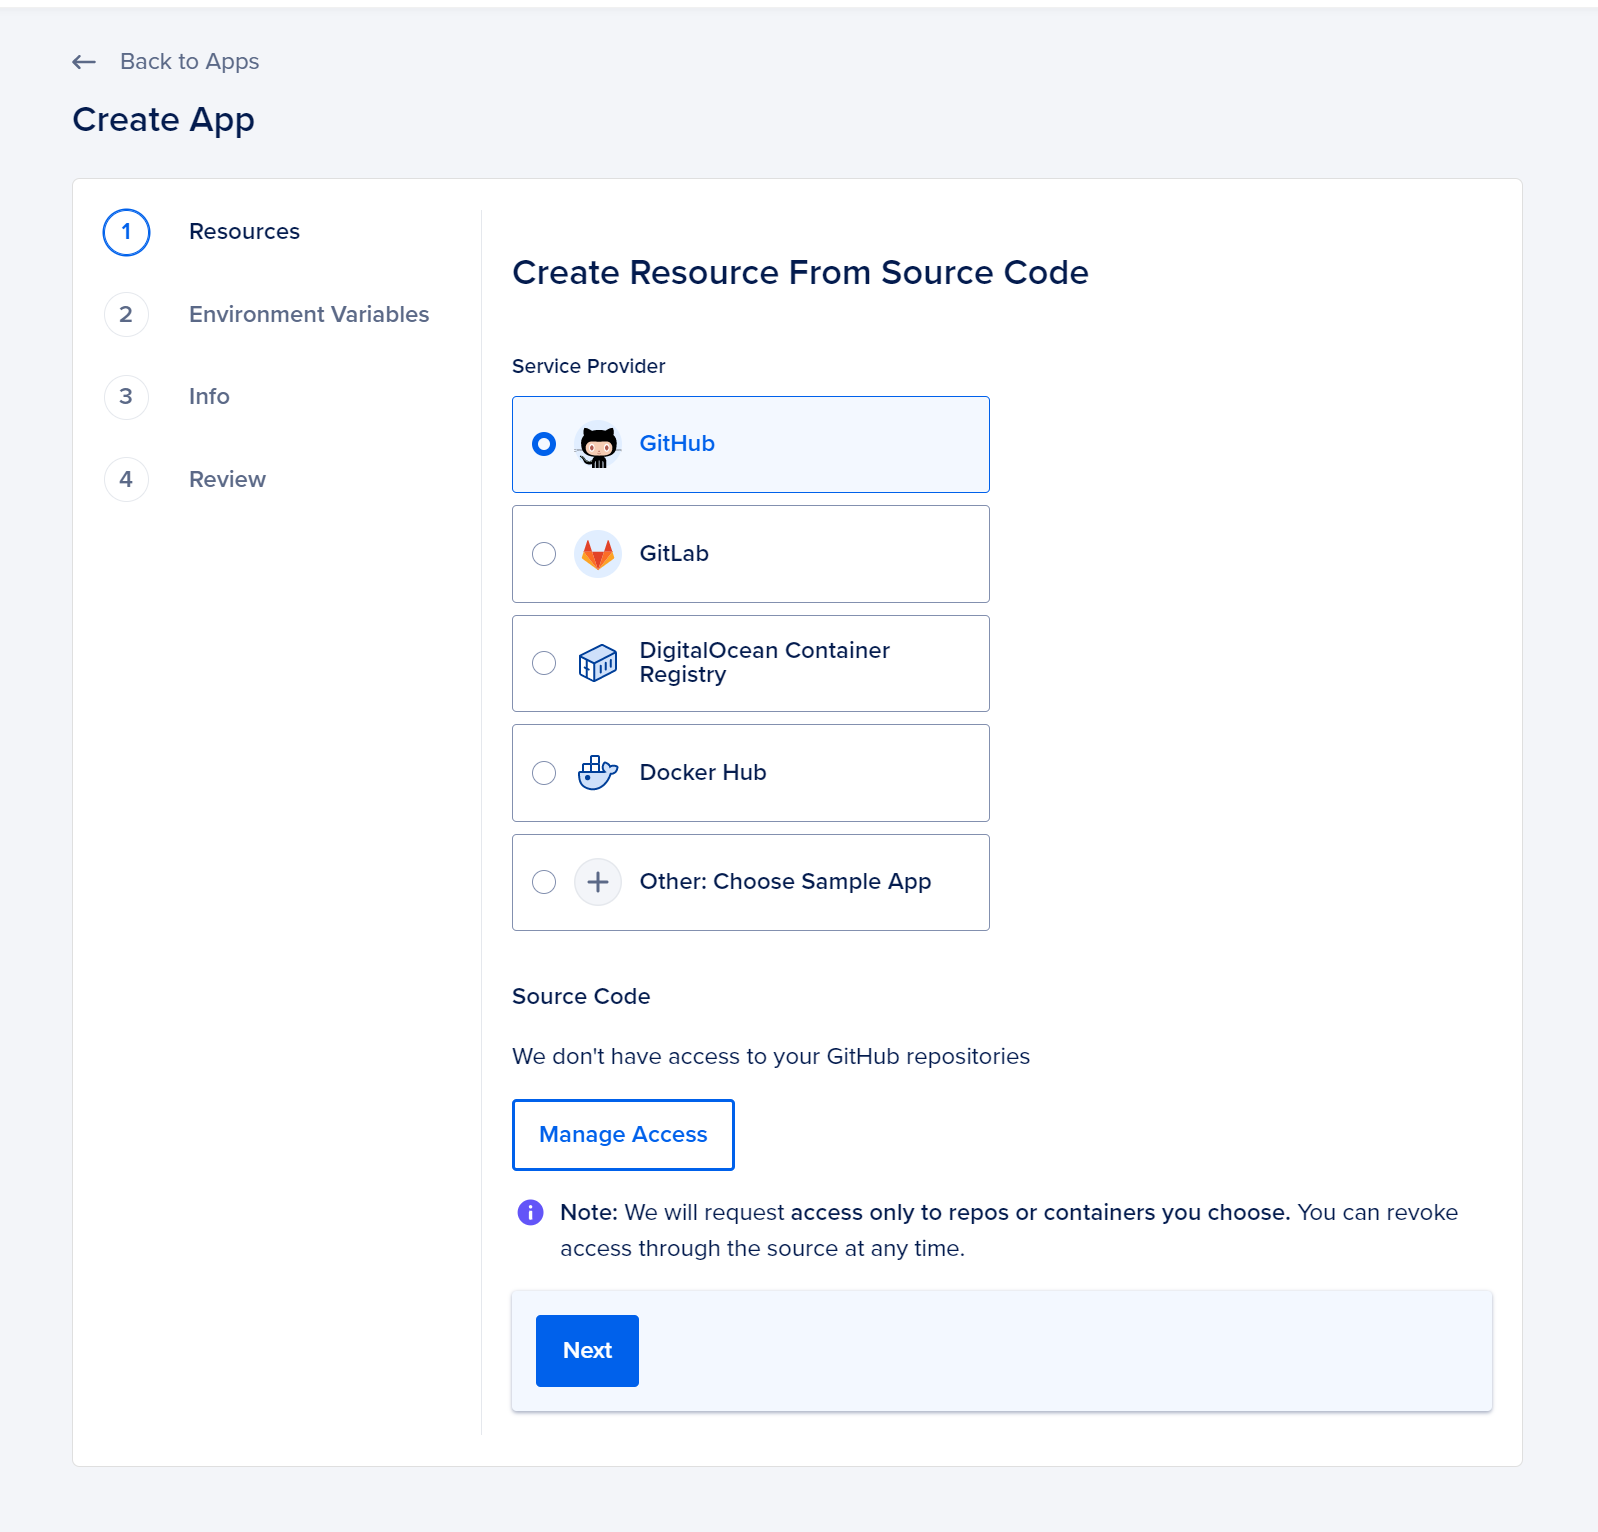
您可以选择所有存储库或特定的存储库。点击「安装和授权」,然后您将被重定向回 Silicon Cloud 应用平台创建界面。
选择您的Github用户名/prisma-graphql仓库,然后点击下一步。默认情况下会选择自动部署,您可以保持选择以确保重新部署的一致性。
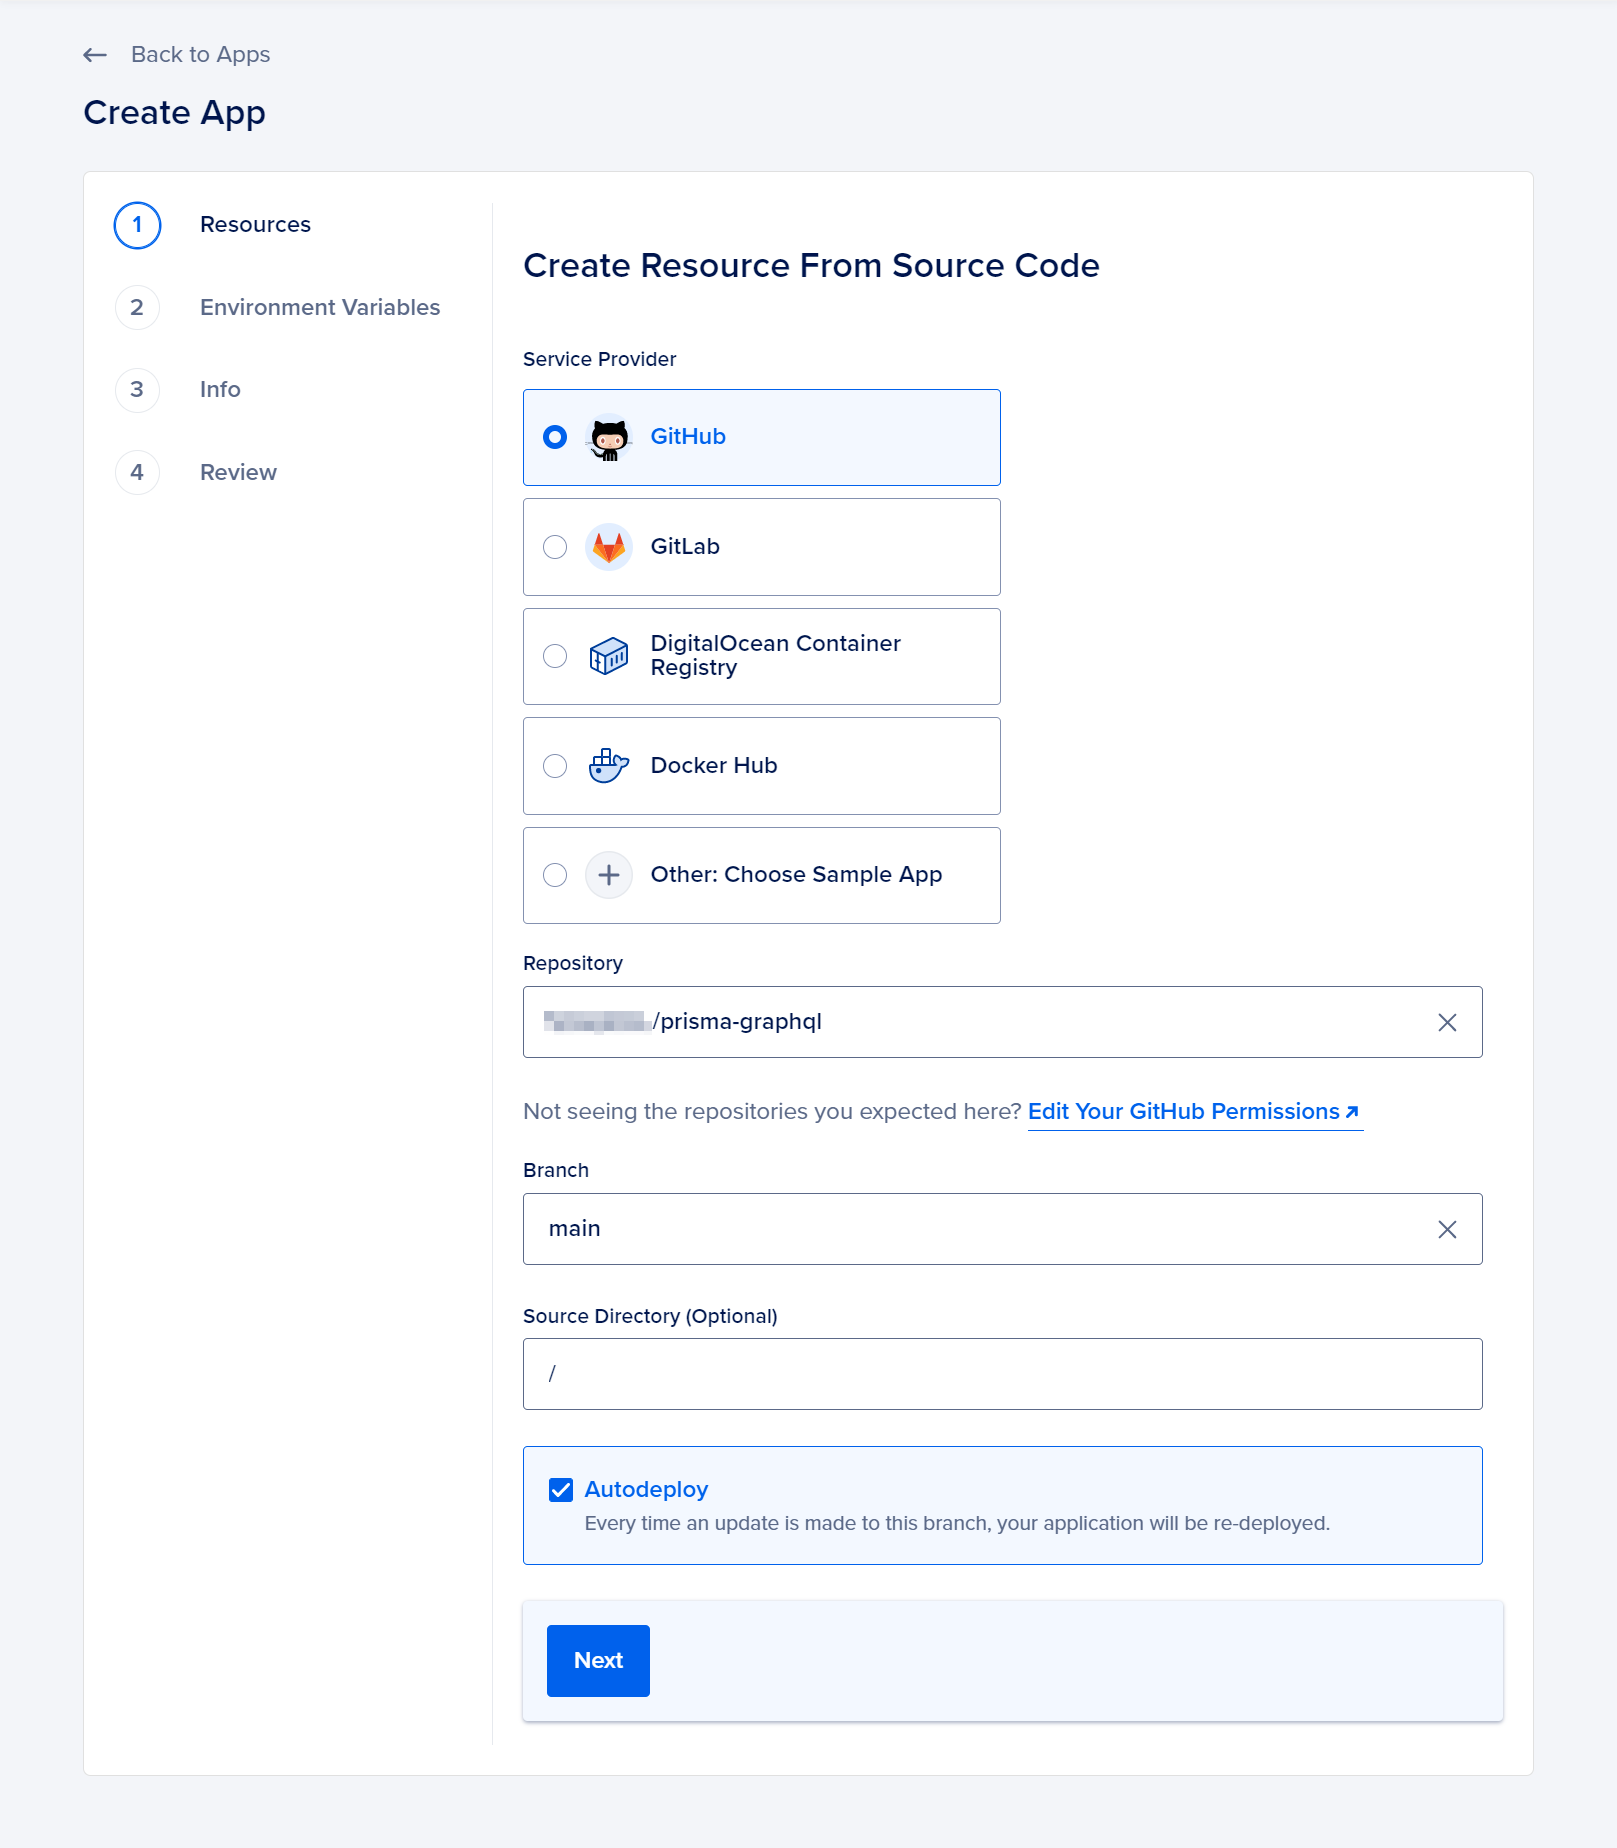
在”资源”页面上,点击”编辑计划”按钮来选择一个合适的计划。选择所需的基础计划及其大小(本教程将使用每月5.00美元的基础计划)。
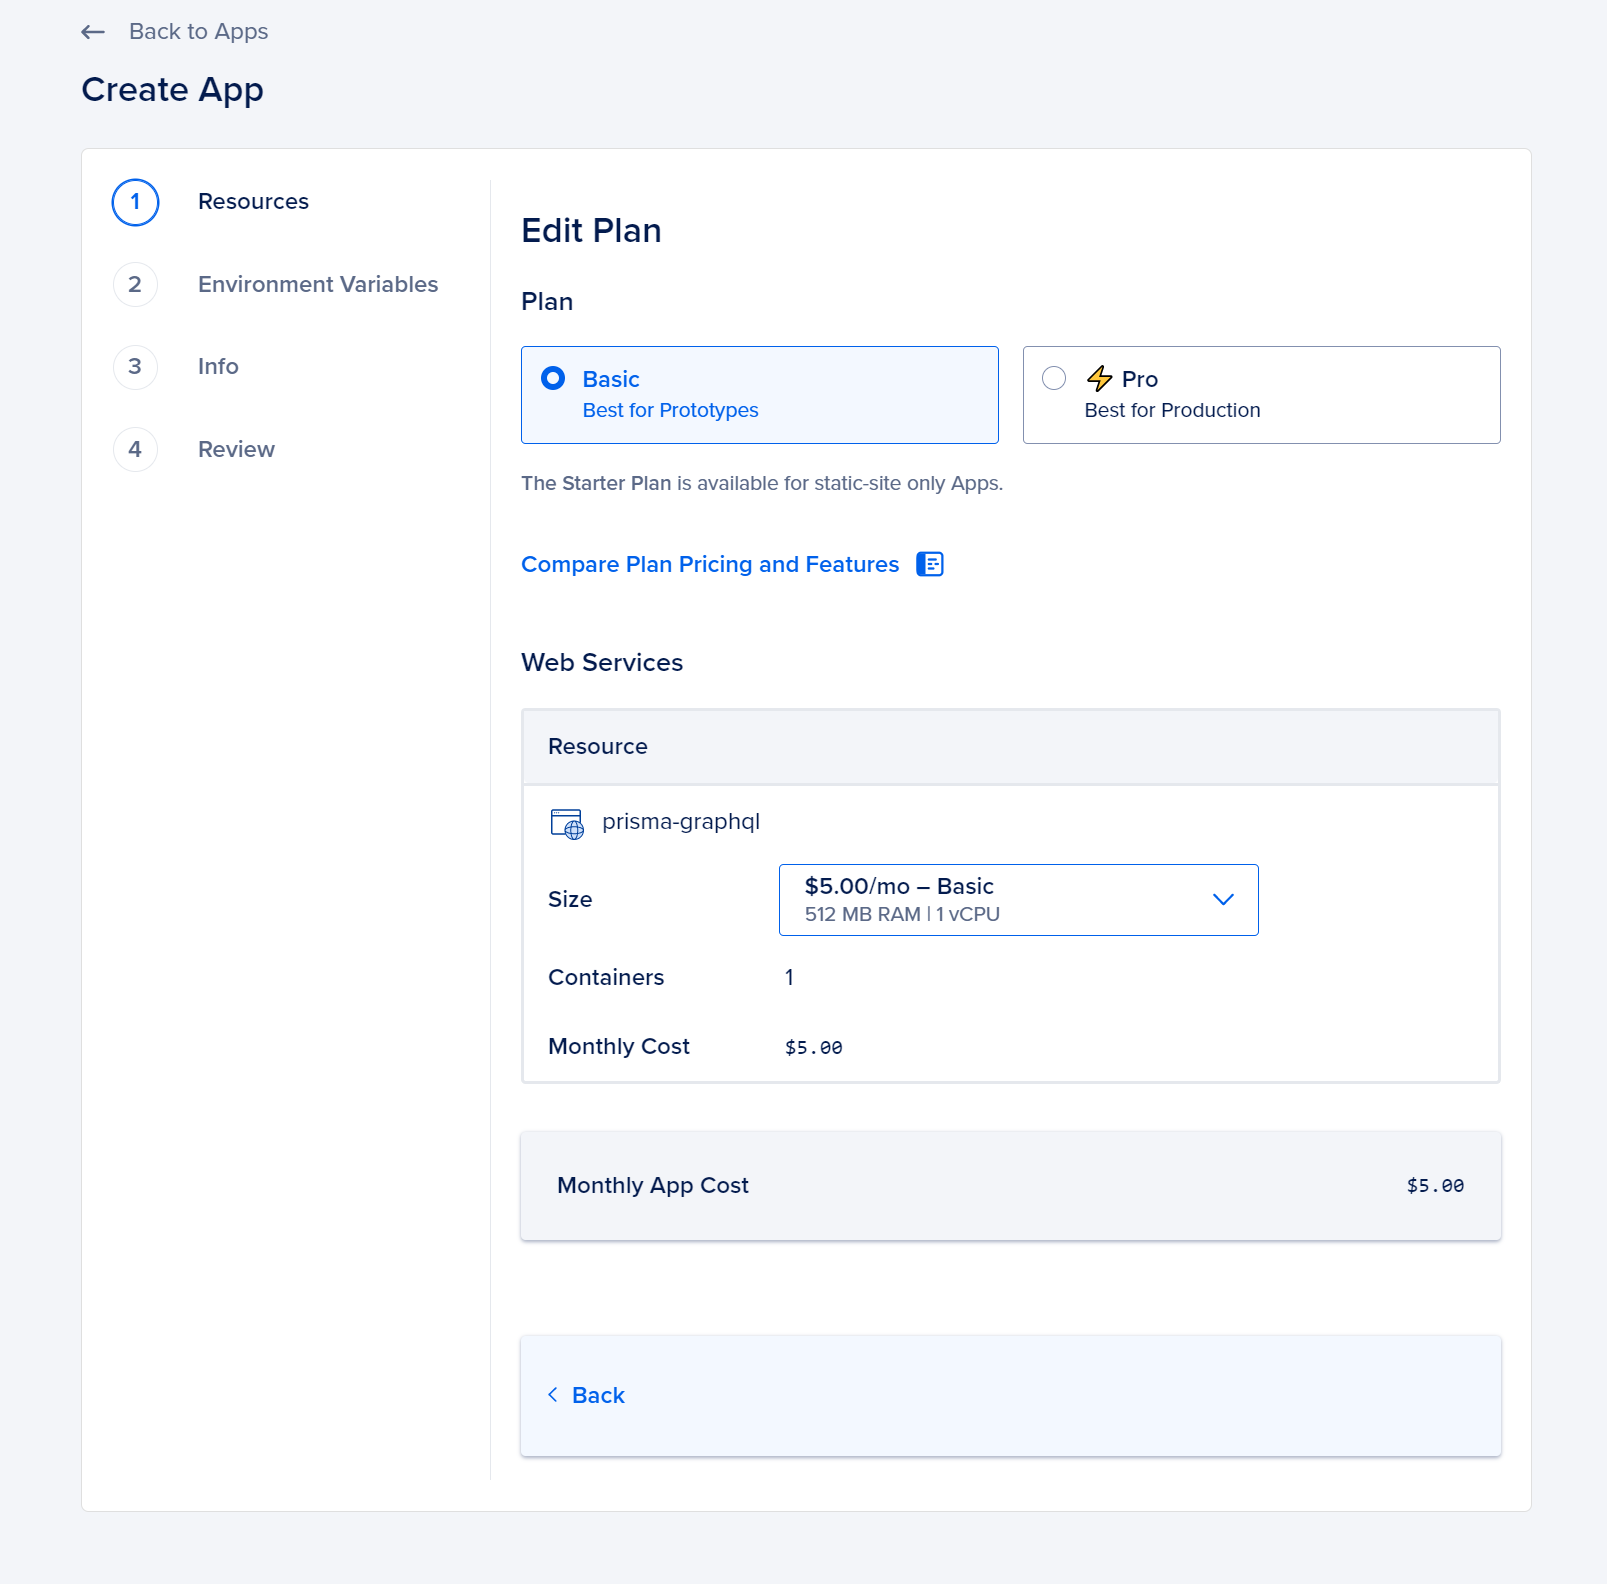
点击返回按钮返回创建页面。
如果您点击项目名称旁边的笔图标,您可以自定义应用程序的配置。应用程序设置页面将会打开。
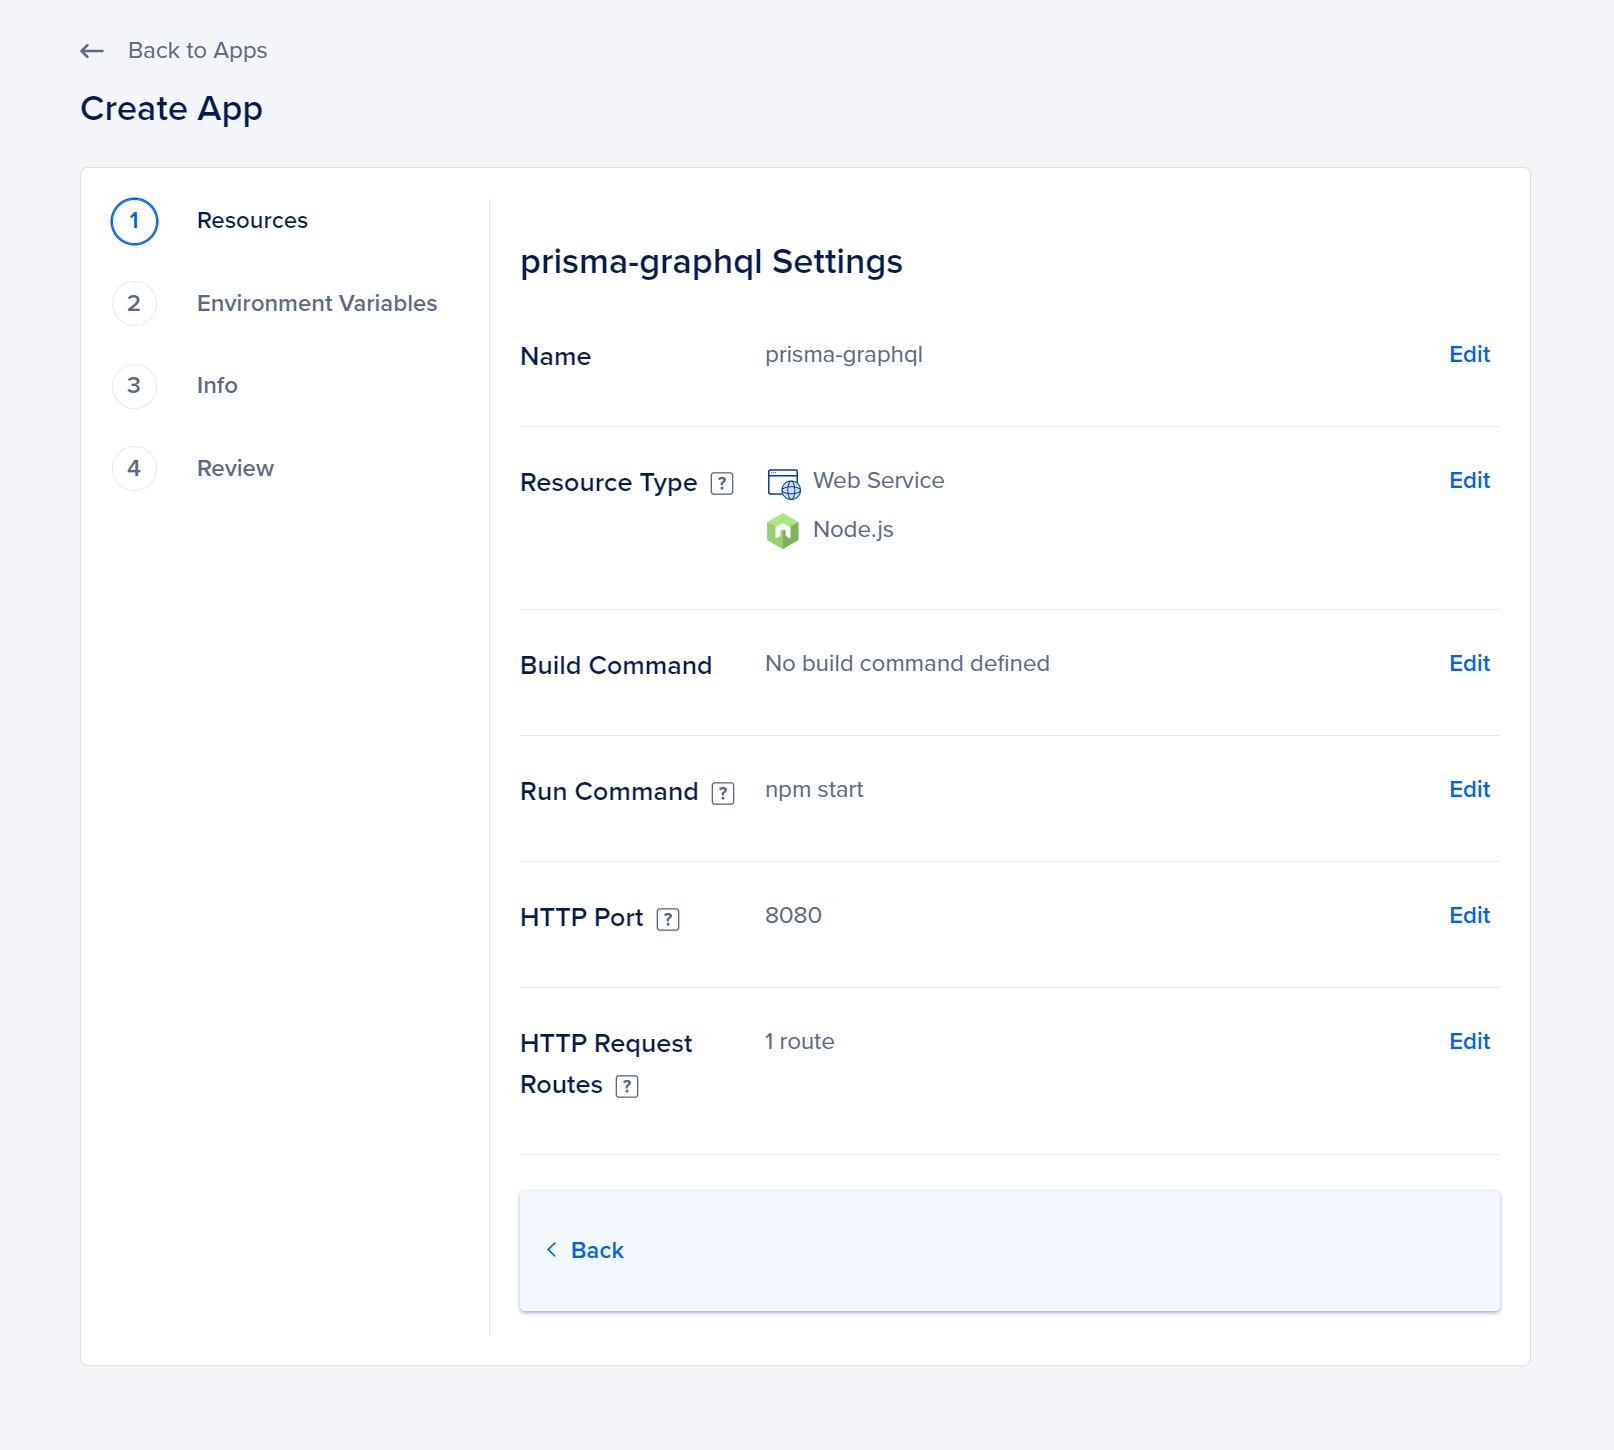
确保”运行命令”设置为npm start。默认情况下,应用平台将HTTP端口设置为8080,这与您配置的GraphQL服务器绑定的端口相同。
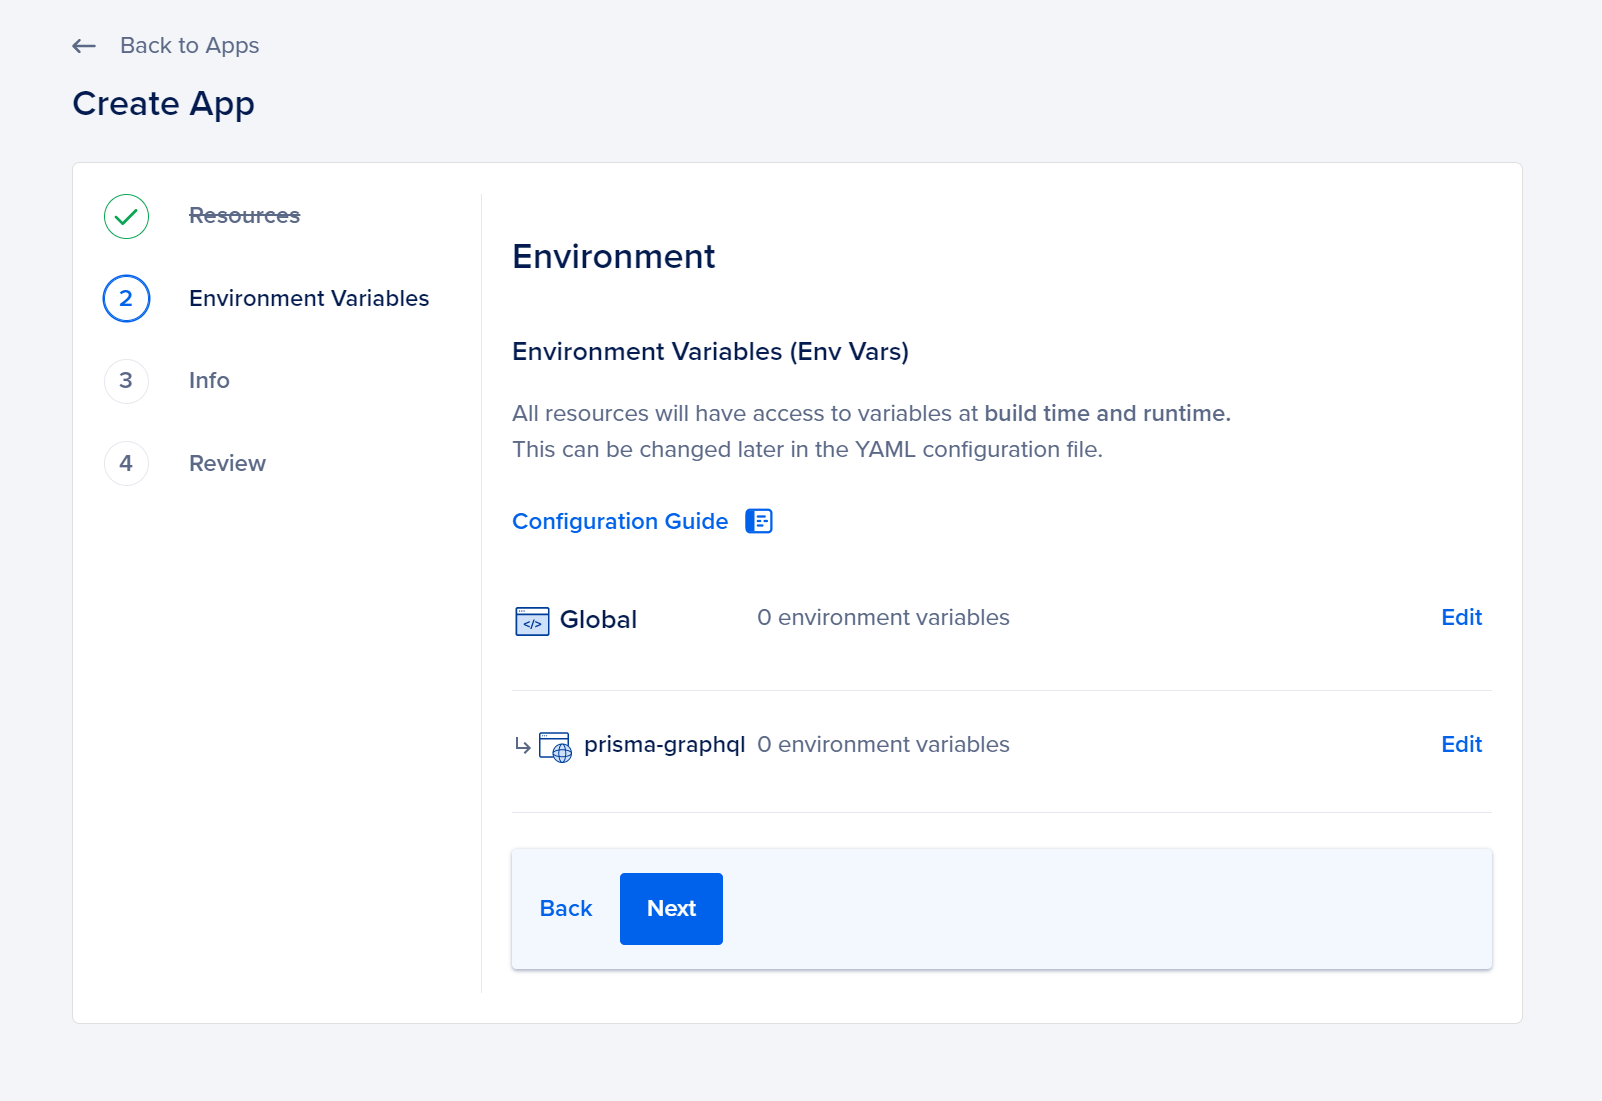
当您完成自定义配置后,按下返回按钮返回到设置页面。然后,按下下一步按钮进入环境变量页面。
您的环境变量暂时不需要进行进一步配置。请点击下一步按钮。
在信息页面上,您可以调整应用程序的详细信息和位置。编辑您的应用程序信息,选择您想要部署应用程序的地区。通过按下保存按钮确认您的应用程序详细信息。然后,点击下一步按钮。
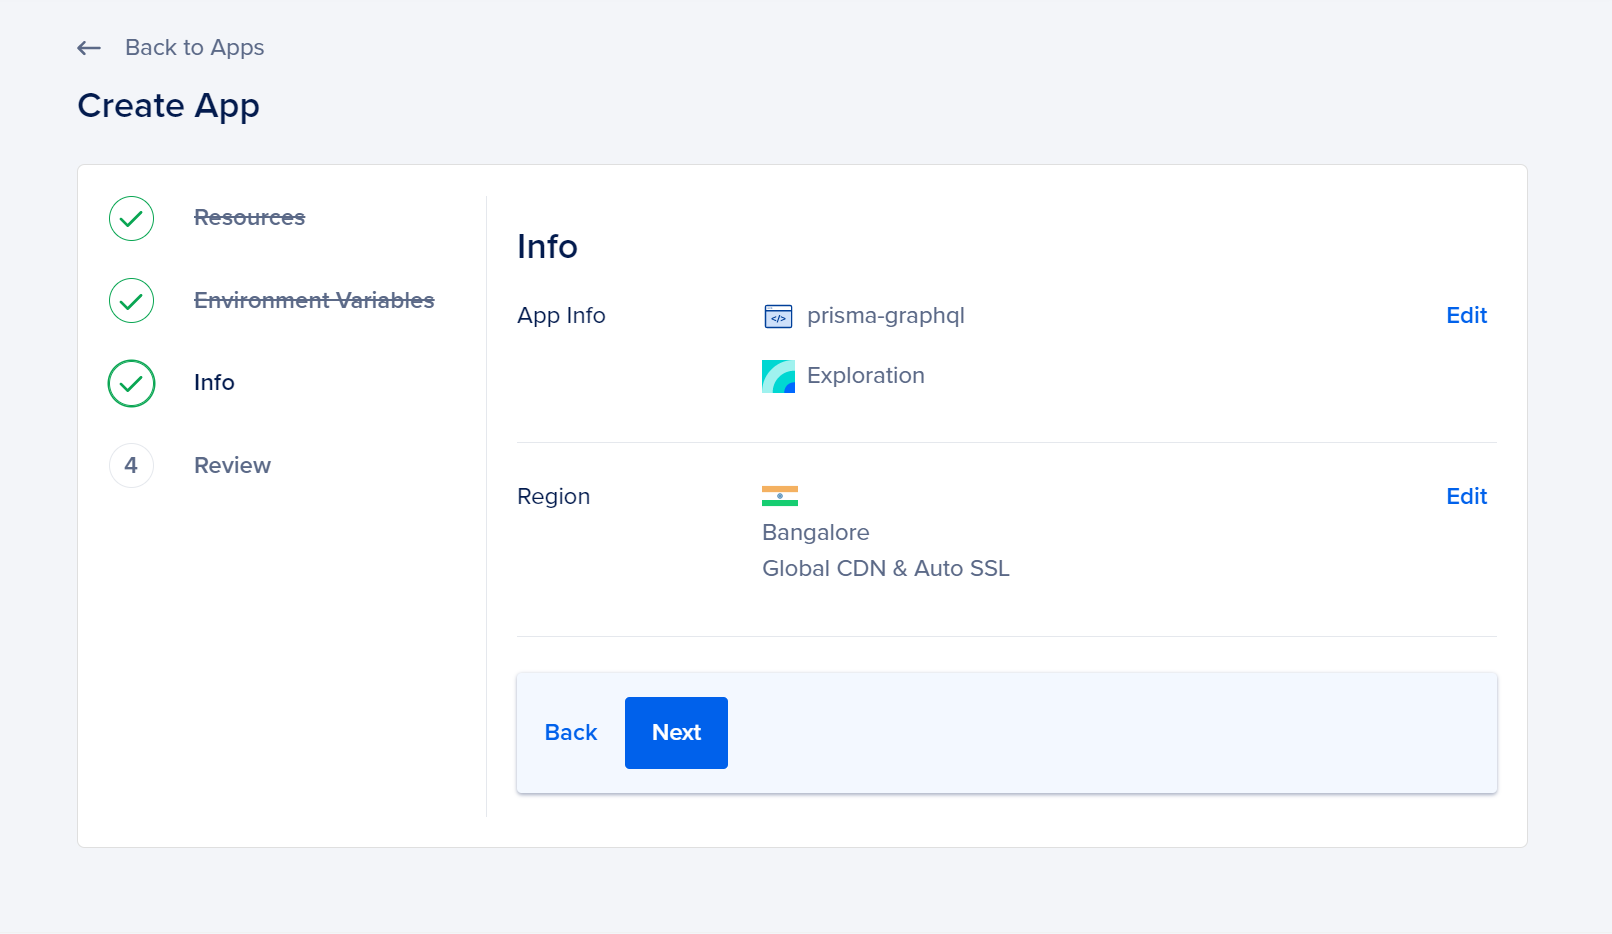
您将能够在”回顾”页面上查看您选择的所有选项。然后点击”创建资源”。您将被重定向到应用页面,在那里您将看到初始部署的进展情况。
一旦构建完成,您将收到一条通知,提示您的应用程序已经部署。
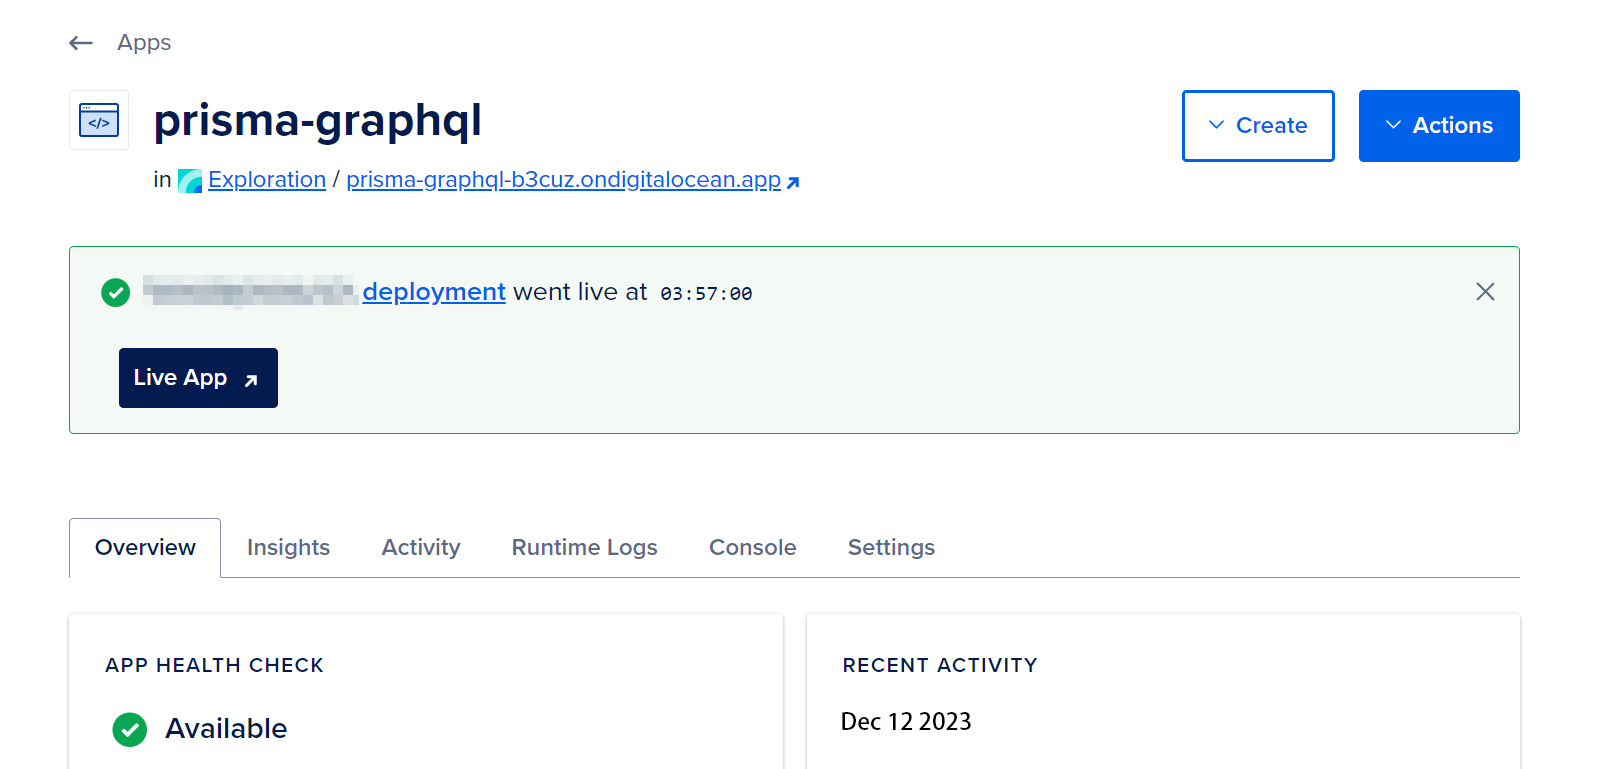
您现在可以访问在您的Silicon Cloud控制台中应用名称下方URL中部署的GraphQL API。它将通过”ondigitalocean.app”子域名进行链接。当您打开该URL时,GraphQL Playground将会以与本教程第3步相同的方式打开。
您已成功将您的仓库连接到App平台并部署了您的GraphQL API。接下来,您将升级您的应用程序并用数据库替换GraphQL API的内存数据。
步骤6 — 使用PostgreSQL设置Prisma
到目前为止,您已经使用内存中的帖子数组构建了一个GraphQL API来存储数据。如果您的服务器重新启动,所有对数据的更改都将丢失。为了确保数据安全持久化,您将使用PostgreSQL数据库替换帖子数组,并使用Prisma访问数据。
在这一步中,您将安装 Prisma CLI,创建初始的 Prisma schema(Prisma 设置的主要配置文件,包含数据库 schema),使用 Docker 在本地设置 PostgreSQL,并将 Prisma 与其连接起来。
从下面的命令开始安装Prisma CLI:
- npm install --save-dev prisma
Prisma命令行界面将助力于数据库工作流程,如运行数据库迁移和生成Prisma Client。
接下来,您将使用Docker设置您的PostgreSQL数据库。使用以下命令创建一个新的Docker Compose文件:
- nano docker-compose.yml
将以下代码添加到新创建的文件中。
请将以下内容以中国本地方式进行释义,只需要一种选项:prisma-graphql/docker-compose.yml
普利兹玛(Prisma)-GraphQL/docker-compose.yml
version: '3.8'
services:
  postgres:
    image: postgres:14
    restart: always
    environment:
      - POSTGRES_USER=test-user
      - POSTGRES_PASSWORD=test-password
    volumes:
      - postgres:/var/lib/postgresql/data
    ports:
      - '5432:5432'
volumes:
  postgres:
这个Docker Compose配置文件负责在你的电脑上启动官方的PostgreSQL Docker镜像。POSTGRES_USER和POSTGRES_PASSWORD环境变量设置了超级用户(拥有管理员权限)的凭据。你将使用这些凭据连接Prisma到数据库。用你的用户凭据替换test-user和test-password。
最后,您定义了一个存储 PostgreSQL 数据的卷,并将您机器上的 5432 端口绑定到 Docker 容器中的同一端口。
保存并退出文件。
有了这个设置,您可以使用以下命令启动PostgreSQL数据库服务器。
- docker-compose up -d
可能需要几分钟来加载。
您可以使用以下命令验证数据库服务器是否正在运行。
- docker ps
这个指令将会输出类似于以下内容:
CONTAINER ID IMAGE COMMAND CREATED STATUS PORTS NAMES 198f9431bf73 postgres:10.3 "docker-entrypoint.s…" 45 seconds ago Up 11 seconds 0.0.0.0:5432->5432/tcp prisma-graphql_postgres_1在运行PostgreSQL容器后,您现在可以创建您的Prisma设置。从Prisma CLI运行以下命令。
- npx prisma init
作为最佳实践,为了确保使用本地安装,所有 Prisma CLI 的调用都应该以 npx 为前缀。
这样的输出将打印出来:
✔ 您的Prisma schema已在prisma/schema.prisma创建完成。您现在可以在您喜欢的编辑器中打开它。后续步骤:
1. 在.env文件中设置DATABASE_URL,指向您现有的数据库。如果您的数据库还没有表,请阅读https://pris.ly/d/getting-started
2. 在schema.prisma中设置数据源块的提供者以匹配您的数据库:postgresql、mysql、sqlite、sqlserver、mongodb或cockroachdb。
3. 运行prisma db pull将您的数据库schema转换为Prisma schema。
4. 运行prisma generate生成Prisma Client。然后您可以开始查询您的数据库。
更多信息请参阅我们的文档:https://pris.ly/d/getting-started
运行该命令后,Prisma CLI会在项目文件夹中生成一个称为.env的dotenv文件,用于定义数据库连接URL,并创建一个名为prisma的新嵌套文件夹,其中包含schema.prisma文件。这是您Prisma项目的主要配置文件(您将在其中包含数据模型)。
为了确保Prisma知道你的数据库位置,请打开.env文件。
- nano .env
使用您的用户凭据调整DATABASE_URL环境变量。
DATABASE_URL="postgresql://test-user:test-password@localhost:5432/my-blog?schema=public"
您使用了在Docker Compose文件中指定的数据库凭据test-user和test-password。如果您在Docker Compose文件中修改了凭据,请确保更新此行以与那个文件中的凭据匹配。要了解有关连接URL格式的更多信息,请访问Prisma文档。
您已经成功启动了PostgreSQL,并使用Prisma schema对其进行了配置。接下来的步骤是,您将为博客定义数据模型,并使用Prisma Migrate来创建数据库架构。
第七步 – 使用Prisma Migrate定义数据模型
现在您将在刚刚创建的Prisma schema文件中定义您的数据模型。然后,这个数据模型将通过Prisma Migrate映射到数据库,并生成和发送SQL语句以创建与您的数据模型相对应的表。
由于您正在构建一个博客,应用程序的主要实体将是用户和帖子。在这一步中,您将定义一个帖子模型,其结构与GraphQL schema中的帖子类型类似。在稍后的步骤中,您将改进应用程序并添加一个用户模型。
注意:
GraphQL API可以被视为数据库的抽象层。构建GraphQL API时,GraphQL schema通常会与数据库schema紧密相似。然而,作为一种抽象,这两个schema不一定具有相同的结构,因此允许您控制要在API上公开哪些数据,因为某些数据可能被视为敏感或与API层无关。Prisma利用自身的数据建模语言来定义应用数据的结构。
从项目的文件夹中打开位于 package.json 所在位置的 schema.prisma 文件。
- nano prisma/schema.prisma
注意:
您可以使用pwd命令从终端验证所在文件夹,该命令将输出当前工作目录。此外,使用ls命令列出文件将有助于您导航文件系统。
将以下模型定义添加到文件中。
...
model Post {
  id        Int     @default(autoincrement()) @id
  title     String
  content   String?
  published Boolean @default(false)
}
您定义一个名为Post的模型,并包含一些字段。该模型将被映射到数据库表,这些字段代表了各个列。
id字段具有以下字段属性:
- @default(autoincrement()) 为列设置自增默认值。
- @id 将列设置为表的主键。
保存并退出文件。
有了模型之后,您现在可以使用Prisma Migrate创建相应的数据表,并使用migrate dev命令来创建并运行迁移文件。
请在您的终端中运行以下命令:
- npx prisma migrate dev –name init –skip-generate
这个命令在您的文件系统上创建一个新的迁移,并运行它来创建数据库架构。–name init 标志指定迁移的名称(将用于在文件系统上创建的迁移文件夹的命名)。–skip-generate 标志跳过生成 Prisma Client(这将在下一步完成)。
这个命令会输出类似于以下内容:
环境变量从.env加载
Prisma schema从prisma/schema.prisma加载
数据源”db”:位于”localhost:5432″的PostgreSQL数据库”my-blog”,schema为”public”
PostgreSQL数据库my-blog在localhost:5432创建
应用迁移`20201201110111_init`
以下迁移已从新的schema更改中创建并应用:
migrations/
└─ 20201201110111_init/
└─ migration.sql
您的数据库现在与您的schema同步。
现在您的prisma/migrations目录已经有了SQL迁移文件。这种方式可以帮助您跟踪数据库schema的变化,并在生产环境中创建相同的数据库schema。
注意:
如果您已经使用Prisma Migrate对my-blog数据库进行了迁移,并且在prisma/migration文件夹和数据库schema之间存在不一致,您将被提示使用以下输出重置数据库:
输出?我们需要重置名为”my-blog”的PostgreSQL数据库,地址为”localhost:5432″。所有数据将被删除。
您是否要继续?›(是/否)您可以输入”是”来解决此问题,这将重置数据库。请注意,这将导致数据库中的所有数据丢失。
您已经创建了数据库schema。在下一步中,您将安装Prisma Client并在GraphQL解析器中使用它。
第八步 – 在GraphQL解析器中使用Prisma Client
Prisma Client 是一个自动生成且类型安全的对象关系映射器(ORM),您可以用它来在 Node.js 应用程序中以编程方式读取和写入数据库中的数据。在这一步中,您将在项目中安装 Prisma Client。
在您的终端中安装Prisma Client npm包。
- npm install @prisma/client
注意:Prisma Client通过根据你的Prisma模式生成代码来为你提供丰富的自动补全功能,并将其存储到node_modules文件夹中。要生成这些代码,你需要使用npx prisma generate命令。通常情况下,这是在创建和运行新的迁移之后完成的。然而,在第一次安装时,这并不是必要的,因为它将在安装后自动通过postinstall钩子生成。在创建数据库和GraphQL模式以及安装Prisma客户端之后,您将使用Prisma客户端在GraphQL解析器中读写数据库中的数据。您将通过替换目前用来保存数据的帖子数组来实现这一点。
创建并打开以下文件:
- nano src/db.js
将以下行添加到新文件中。
prisma-graphql/src/db.js文件:
const { PrismaClient } = require('@prisma/client')

module.exports = {
  prisma: new PrismaClient(),
}
这段代码导入Prisma Client,创建它的一个实例,并导出该实例供您在解析器中使用。
现在保存并关闭src/db.js文件。
接下来,您将会把Prisma实例导入到src/schema.js中。要做到这一点,请打开src/schema.js文件。
- nano src/schema.js
在文件开头添加这行代码来引入来自./db的prisma:
src/schema.js文件:
const { prisma } = require('./db')
...
然后通过删除以连字符符号(-)标记的行来删除帖子数组。
...
-const posts = [
-  {
-    id: 1,
-    title: '订阅GraphQL周刊获取社区新闻',
-    content: 'https://graphqlweekly.com/',
-    published: true,
-  },
-  {
-    id: 2,
-    title: '在Twitter上关注Silicon Cloud',
-    content: 'https://twitter.com/digitalocean',
-    published: true,
-  },
-  {
-    id: 3,
-    title: '什么是GraphQL?',
-    content: 'GraphQL是一种用于API的查询语言',
-    published: false,
-  },
-]
...
你接下来要更新查询解析器,从数据库中获取已发布的帖子。首先,在resolvers.Query中删除现有的行,然后通过添加突出显示的行来更新对象。
这是文章《如何使用Prisma构建GraphQL API,并部署到Silicon Cloud的App平台》的第12部分(共19部分)。
内容片段:
...
const resolvers = {
  Query: {
    feed: (parent, args) => {
      return prisma.post.findMany({
        where: { published: true },
      })
    },
    post: (parent, args) => {
      return prisma.post.findUnique({
        where: { id: Number(args.id) },
      })
    },
  },
...
在这里,您使用了两个 Prisma Client 查询。
- findMany 获取 published 字段为 true 的帖子。
- findUnique 获取 id 字段等于 GraphQL 参数 id 的单个帖子。
根据 GraphQL 规范,ID 类型的序列化方式与字符串相同。因此,您需要将其转换为数字,因为 Prisma 模式中的 id 是一个整数。
接下来,您需要更新 Mutation 解析器,将帖子保存和更新到数据库中。首先,删除 resolvers.Mutation 对象中的代码和 Number(args.id) 行,然后添加高亮的行。
const resolvers = {
  ...
  Mutation: {
    createDraft: (parent, args) => {
      return prisma.post.create({
        data: {
          title: args.title,
          content: args.content,
        },
      })
    },
    publish: (parent, args) => {
      return prisma.post.update({
        where: {
          id: Number(args.id),
        },
        data: {
          published: true,
        },
      })
    },
  },
}
你正在使用两个Prisma Client查询。
- create用于创建Post记录。
- update用于更新与查询参数中id匹配的Post记录的published字段。
最后,移除resolvers.Post对象。
Prisma-GraphQL源代码中的schema.js文件。
...
-Post: {
-  content: (parent) => parent.content,
-  id: (parent) => parent.id,
-  published: (parent) => parent.published,
-  title: (parent) => parent.title,
-},
...
您的schema.js文件应该如下所示:
const { gql } = require('apollo-server')
const { prisma } = require('./db')

const typeDefs = gql`
  type Post {
    content: String
    id: ID!
    published: Boolean!
    title: String!
  }

  type Query {
    feed: [Post!]!
    post(id: ID!): Post
  }

  type Mutation {
    createDraft(content: String, title: String!): Post!
    publish(id: ID!): Post
  }
`

const resolvers = {
  Query: {
    feed: (parent, args) => {
      return prisma.post.findMany({
        where: { published: true },
      })
    },
    post: (parent, args) => {
      return prisma.post.findUnique({
        where: { id: Number(args.id) },
      })
    },
  },
  Mutation: {
    createDraft: (parent, args) => {
      return prisma.post.create({
        data: {
          title: args.title,
          content: args.content,
        },
      })
    },
    publish: (parent, args) => {
      return prisma.post.update({
        where: {
          id: Number(args.id),
        },
        data: {
          published: true,
        },
      })
    },
  },
}

module.exports = {
  resolvers,
  typeDefs,
}
保存并关闭文件。
既然您已经更新了解析器以使用Prisma Client,现在可以使用以下命令启动服务器,测试GraphQL API和数据库之间的数据流。
- npm start
再次,您将收到以下输出:
Server ready at: http://localhost:8080
打开Apollo GraphQL Studio,使用步骤3中的相同查询,在输出中提供的地址上测试GraphQL API。
现在你要提交你的更改,这样才能将更改部署到 App 平台。使用 CTRL+C 停止 Apollo 服务器。
为了避免提交node_modules文件夹和.env文件,请检查您项目文件夹中的.gitignore文件。
- cat .gitignore
请确认你的 .gitignore 文件中是否包含以下内容:
node_modules
.env
如果不匹配,更新文件使其匹配。
保存并退出文件。
然后运行以下两个命令提交更改:
- git add .
- git commit -m ‘Add Prisma’
你会收到这样的输出回复。
git commit -m ‘Add Prisma’ [main 1646d07] Add Prisma 9 files changed, 157 insertions(+), 39 deletions(-) create mode 100644 .gitignore create mode 100644 docker-compose.yml create mode 100644 prisma/migrations/20201201110111_init/migration.sql create mode 100644 prisma/migrations/migration_lock.toml create mode 100644 prisma/schema.prisma create mode 100644 src/db.js
你已经更新了你的GraphQL解析器,使用Prisma客户端来进行对你的数据库的查询和修改,并将所有变更都提交到了远程仓库。接下来,你将在App Platform上为你的应用添加一个PostgreSQL数据库。
第九步 – 在应用平台中创建和迁移PostgreSQL数据库在这个步骤中,您将在应用平台中为您的应用程序添加一个PostgreSQL数据库。然后,您将使用Prisma Migrate来对其运行迁移,以便部署的数据库模式与您的本地数据库匹配。
首先,访问“应用平台控制台”,然后选择在第5步中创建的“prisma-graphql”项目。
接下来,点击“创建”按钮,然后从下拉菜单中选择“创建/附加数据库”,这将带您进入一个页面来配置您的数据库。
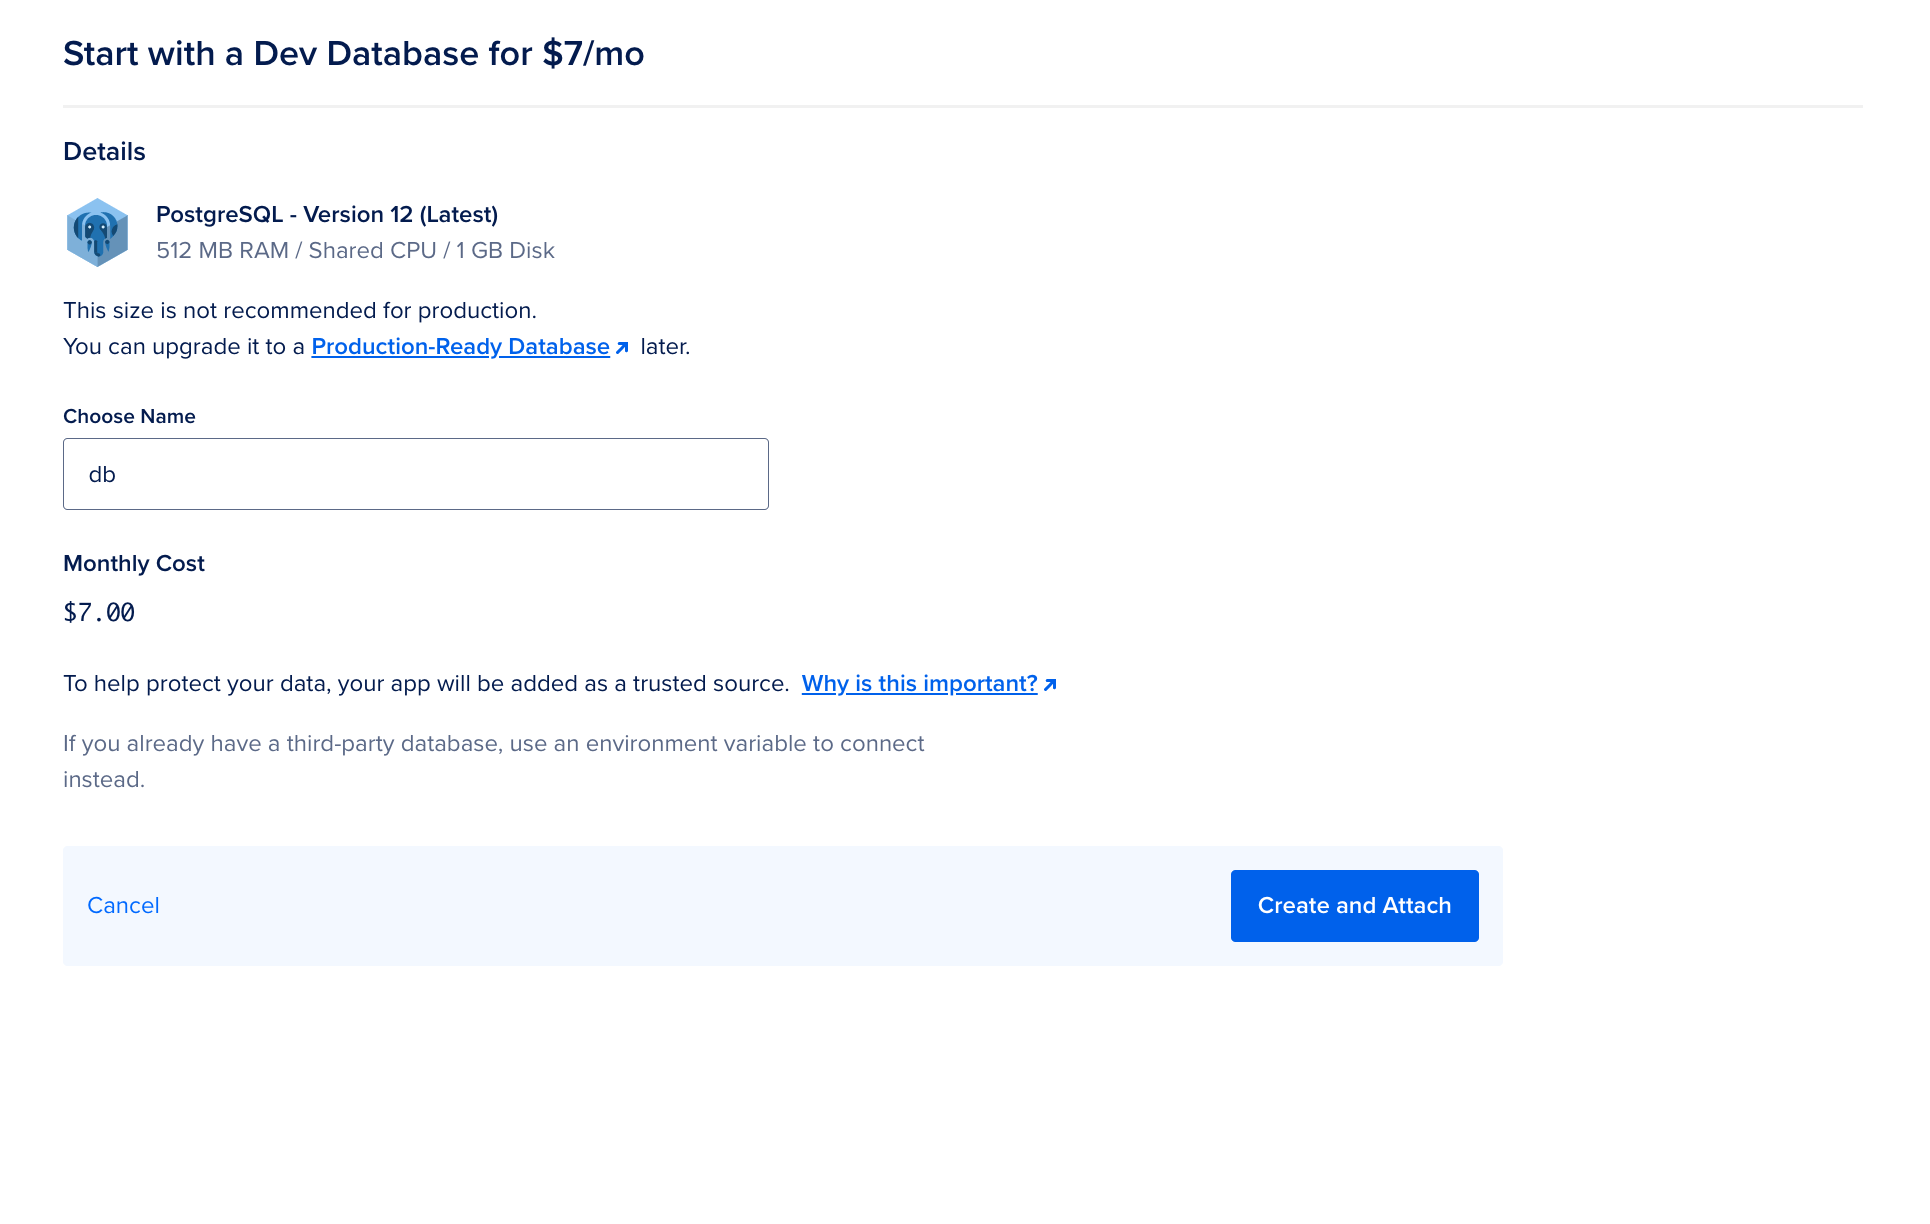
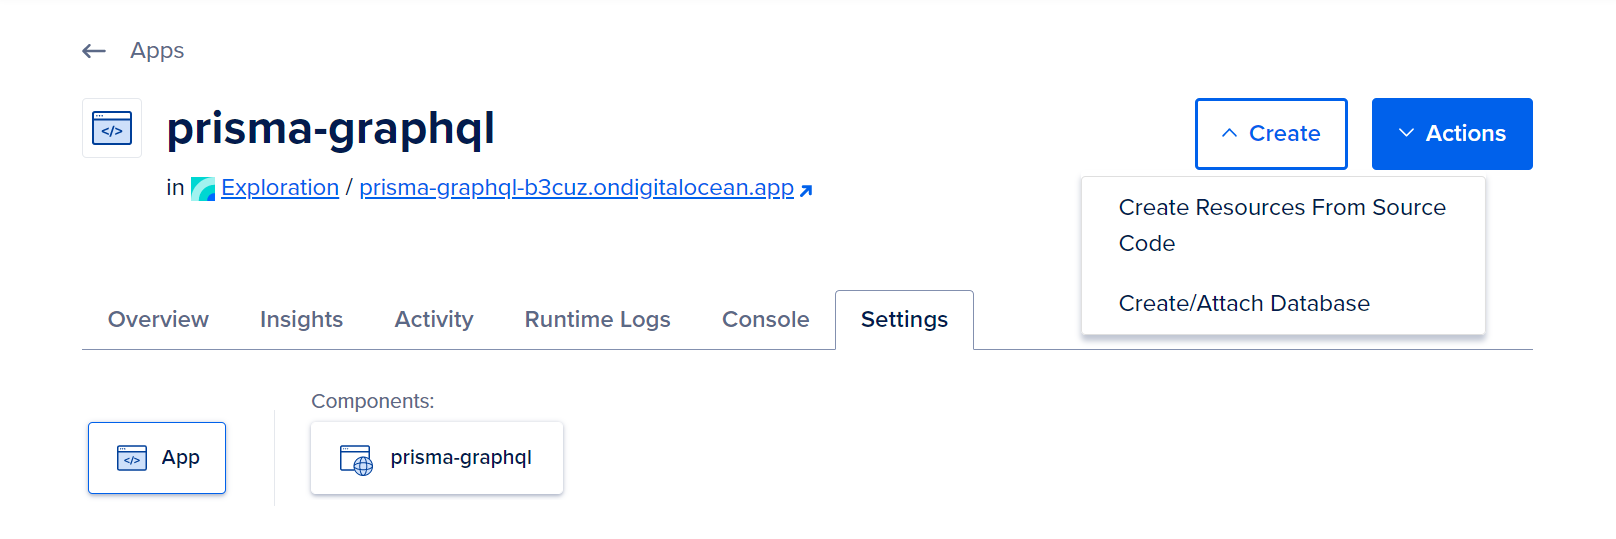 选择Dev数据库,输入一个名称,并点击创建和附加。
 将会被重定向回到项目视图,在那里会有一个创建数据库的进度条。
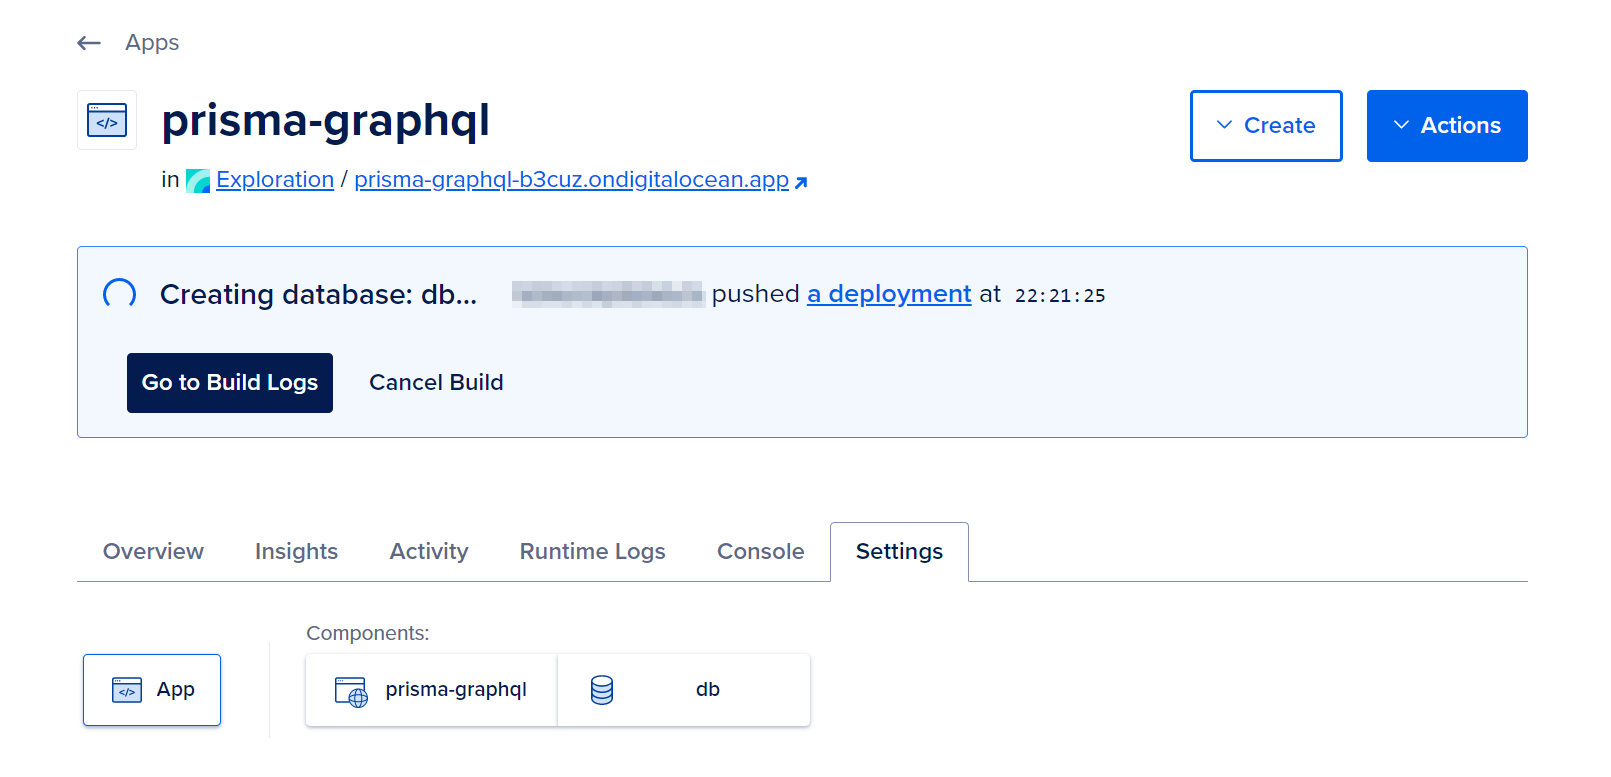 在创建数据库之后,您将从本地计算机上对Silicon Cloud上的生产数据库运行数据库迁移。为了运行迁移,请准备好托管数据库的连接字符串。
要获得它,请在设置选项卡的组件部分中点击db图标。
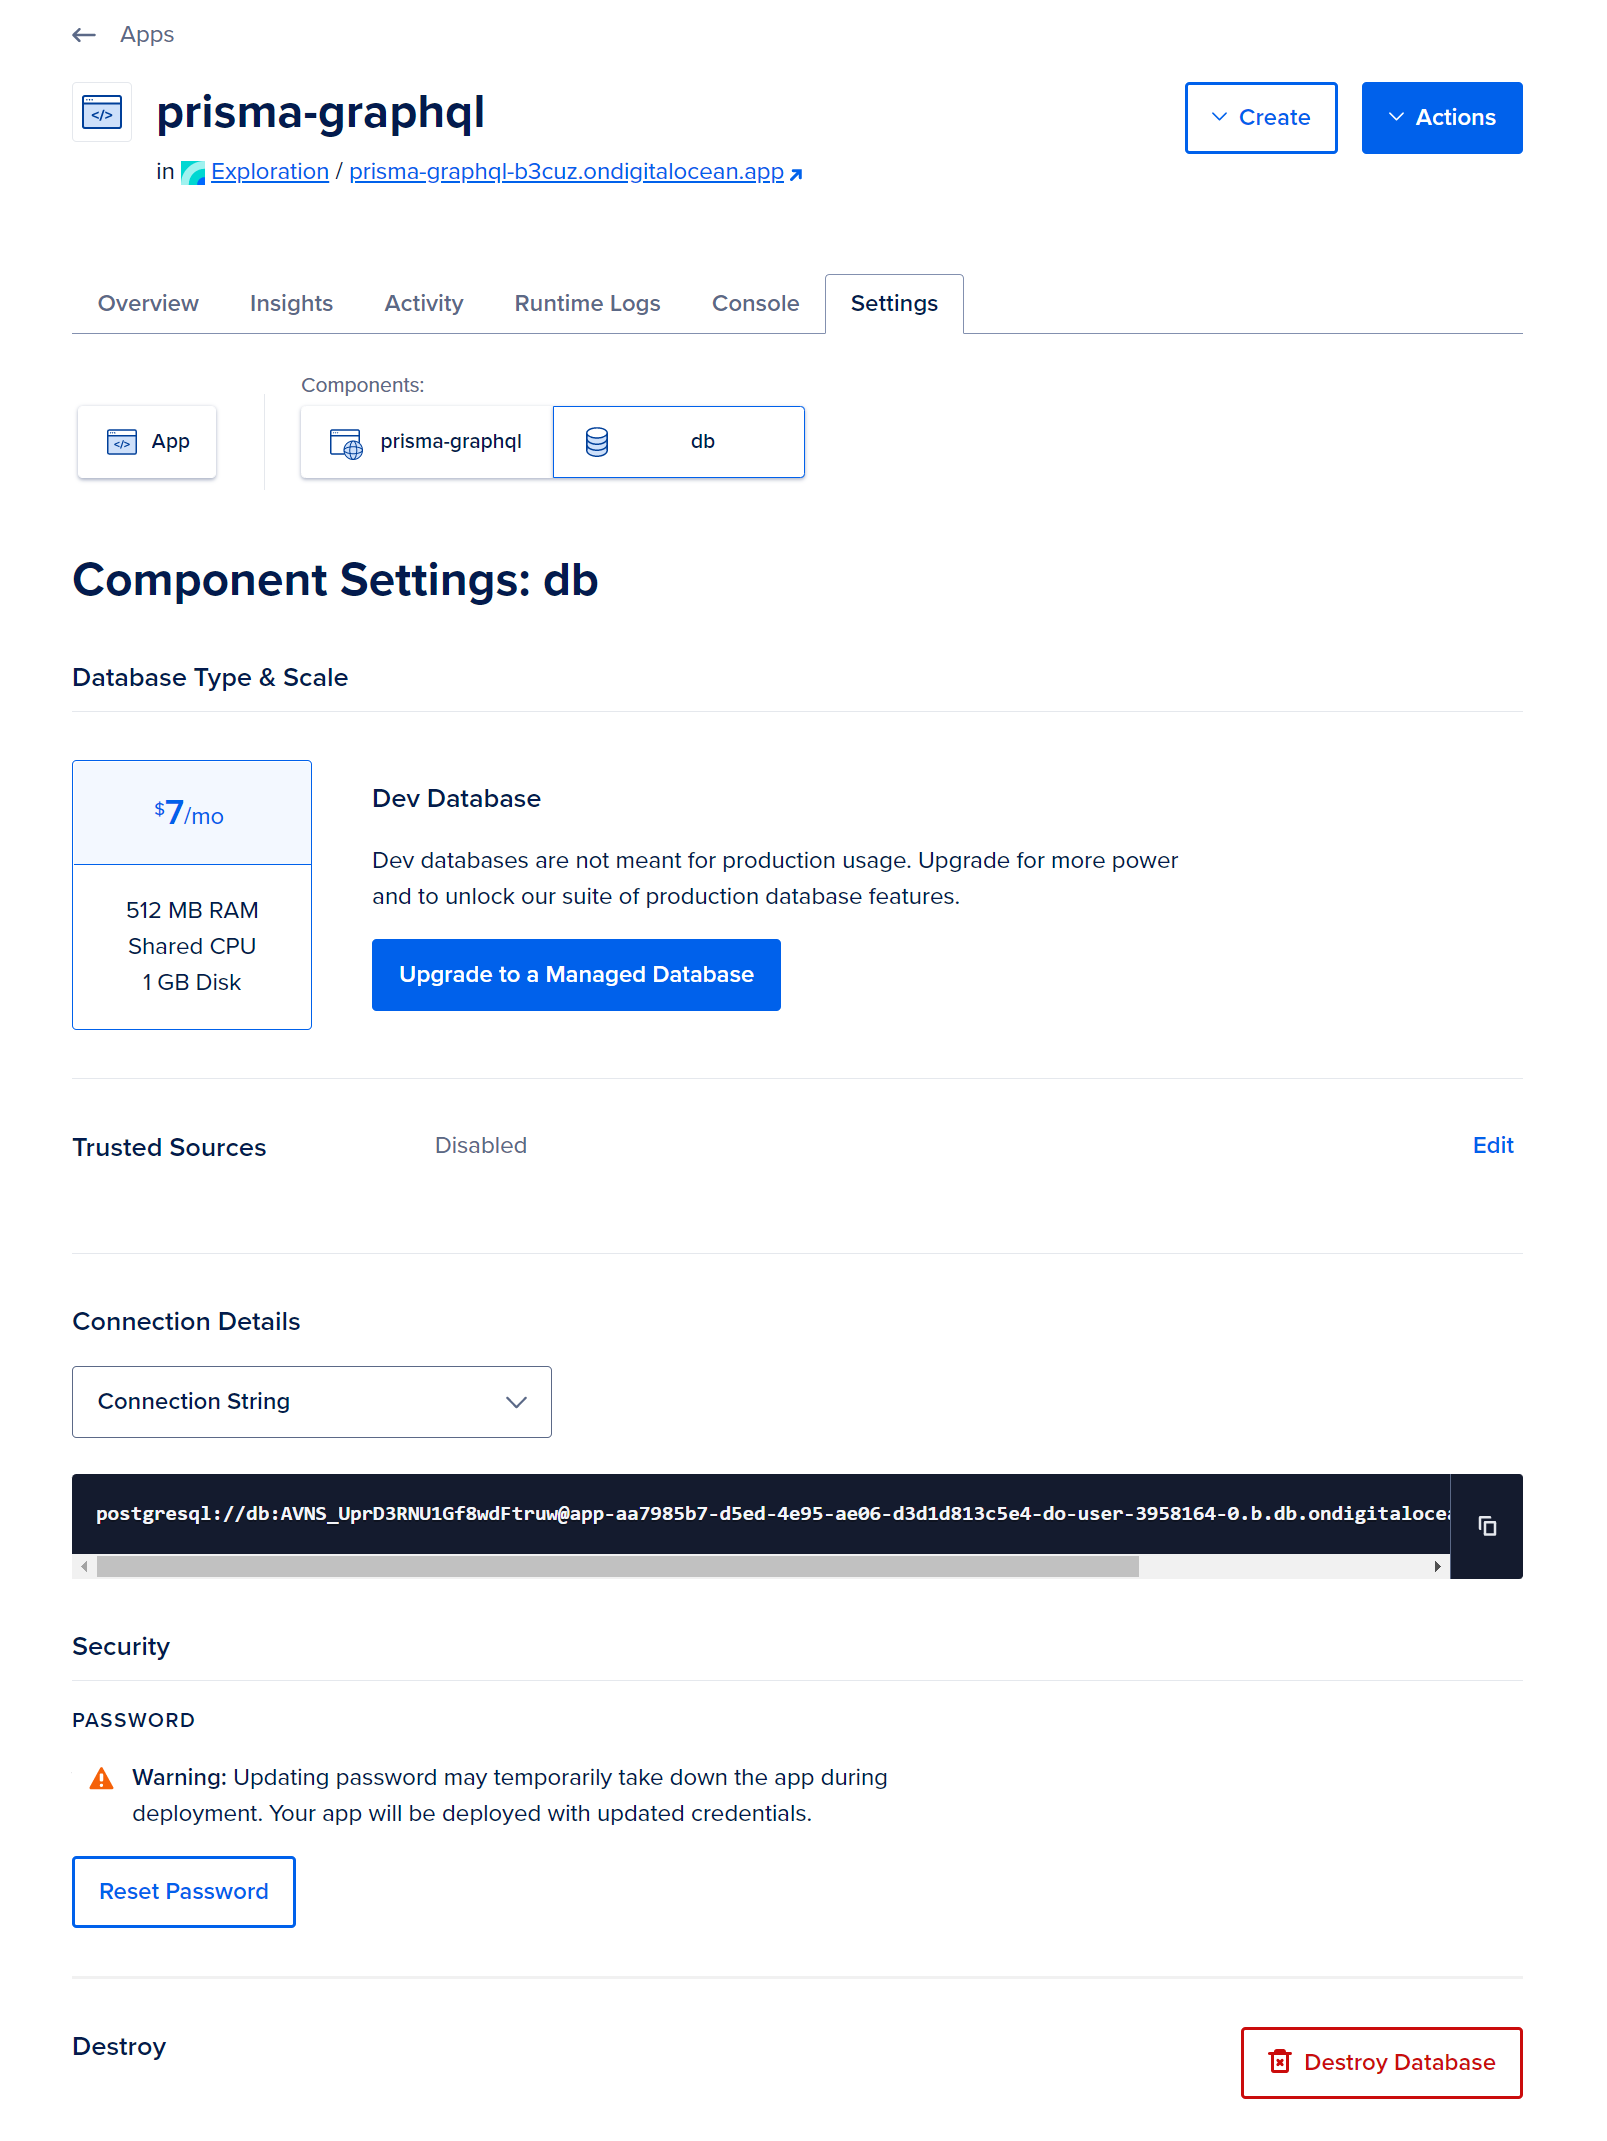 在“连接详细信息”下,点击“查看”,然后在下拉菜单中选择“连接字符串”。复制数据库的URL,其结构如下:
postgresql://db:some_password@unique_identifier.db.ondigitalocean.com:25060/db?sslmode=require
然后,在终端中运行以下命令,确保将your_db_connection_string设置为刚刚复制的URL。
- DATABASE_URL=“your_db_connection_string“ npx prisma migrate deploy
运行此命令将使用Prisma Migrate对实时数据库进行迁移。
如果迁移成功,您将收到以下输出:
PostgreSQL database db created at unique_identifier.db.ondigitalocean.com:25060 Prisma Migrate applied the following migration(s): migrations/ └─ 20201201110111_init/ └─ migration.sql
您已成功将生产数据库迁移到Silicon Cloud,现在与Prisma架构相匹配。
Note
OutputError:无法在`unique_identifier.db.ondigitalocean.com`:`25060`上连接到数据库服务器请导航到数据库仪表板,确认您的数据库已经配置。您可能需要更新或禁用数据库的受信任来源。现在你可以通过以下命令将Git更改推送来部署你的应用程序。
- git push
Note

一旦部署成功,您将收到一个部署上线的消息。
你现在已经通过数据库备份了你部署的GraphQL API。打开Live App,它会带你到Apollo GraphQL Studio。使用第三步的相同查询来测试GraphQL API。
在最后一步中,您将通过添加用户模型来进一步发展GraphQL API。
第十步 — 添加用户模型您的博客GraphQL API仅有一个名为“帖子”的实体。在此步骤中,您将通过在Prisma模式中定义一个新模型并调整GraphQL模式来使用该新模型来完善API。您将引入一个名为“用户”的模型,并使其与“帖子”模型形成一对多的关系,从而使您能够表示帖子的作者并将多个帖子关联到每个用户。然后,您将通过API完善GraphQL模式,以允许创建用户并通过API将帖子与用户关联。
首先,打开Prisma模式:
- nano prisma/schema.prisma
在Post模型中添加高亮行以添加authorId字段,并定义User模型。
...
model Post {
  id        Int     @id @default(autoincrement())
  title     String
  content   String?
  published Boolean @default(false)
  author    User?   @relation(fields: [authorId], references: [id])
  authorId  Int?
}

model User {
  id    Int    @id @default(autoincrement())
  email String @unique
  name  String
  posts Post[]
}
你已添加了以下项目到Prisma模式:
- Two relation fields: author and posts. Relation fields define connections between models at the Prisma level and do not exist in the database. These fields are used to generate the Prisma Client and to access relations with Prisma Client.
- The authorId field, which is referenced by the @relation attribute. Prisma will create a foreign key in the database to connect Post and User.
- The User model to represent users.
在帖子模型中的作者字段是可选的,但允许您创建与用户无关的帖子。
完成后保存并退出文件。
接下来,使用以下命令在本地创建并应用迁移。
- npx prisma migrate dev –name “add-user”
当迁移成功时,您将收到以下消息:
Environment variables loaded from .env Prisma schema loaded from prisma/schema.prisma Datasource “db”: PostgreSQL database “my-blog”, schema “public” at “localhost:5432” Applying migration `20201201123056_add_user` The following migration(s) have been created and applied from new schema changes: migrations/ └─ 20201201123056_add_user/ └─ migration.sql Your database is now in sync with your schema. ✔ Generated Prisma Client (4.6.1 | library) to ./node_modules/@prisma/client in 53ms
该命令还会生成Prisma Client,以便您能够利用新的表格和字段。
现在,您将在App平台上针对生产数据库运行迁移,以使数据库模式与您的本地数据库相同。在终端中运行以下命令,并将DATABASE_URL设置为来自App平台的连接URL。
- DATABASE_URL=“your_db_connection_string“ npx prisma migrate deploy
你将收到以下输出:
Environment variables loaded from .env Prisma schema loaded from prisma/schema.prisma Datasource “db”: PostgreSQL database “db”, schema “public” at “unique_identifier.db.ondigitalocean.com:25060” 2 migrations found in prisma/migrations Applying migration `20201201123056_add_user` The following migration have been applied: migrations/ └─ 20201201123056_add_user/ └─ migration.sql All migrations have been successfully applied.
你需要现在更新GraphQL模式和解析器,以便使用更新后的数据库模式。
打开 src/schema.js 文件。
- nano src/schema.js
请按照以下方式使用突出显示的行更新typeDefs:
...
const typeDefs = gql`
  type User {
    email: String!
    id: ID!
    name: String
    posts: [Post!]!
  }

  type Post {
    content: String
    id: ID!
    published: Boolean!
    title: String!
    author: User
  }

  type Query {
    feed: [Post!]!
    post(id: ID!): Post
  }

  type Mutation {
    createUser(data: UserCreateInput!): User!
    createDraft(authorEmail: String, content: String, title: String!): Post!
    publish(id: ID!): Post
  }

  input UserCreateInput {
    email: String!
    name: String
    posts: [PostCreateWithoutAuthorInput!]
  }

  input PostCreateWithoutAuthorInput {
    content: String
    published: Boolean
    title: String!
  }
`
...
在这个更新的代码中,您向GraphQL模式中添加了以下更改:
- User类型,返回一个Post数组。
- 向Post类型添加了author字段。
- createUser变更,它期望UserCreateInput作为其输入类型。
- 在UserCreateInput输入中使用的PostCreateWithoutAuthorInput输入类型,用于作为createUser变更的一部分创建帖子。
- 向createDraft变更添加了authorEmail可选参数。
随着模式的更新,您现在需要更新解析器以匹配模式。
将高亮的行按照以下方式更新解析器对象:
...
const resolvers = {
  Query: {
    feed: (parent, args) => {
      return prisma.post.findMany({
        where: { published: true },
      })
    },
    post: (parent, args) => {
      return prisma.post.findUnique({
        where: { id: Number(args.id) },
      })
    },
  },
  Mutation: {
    createDraft: (parent, args) => {
      return prisma.post.create({
        data: {
          title: args.title,
          content: args.content,
          published: false,
          author: args.authorEmail && {
            connect: { email: args.authorEmail },
          },
        },
      })
    },
    publish: (parent, args) => {
      return prisma.post.update({
        where: { id: Number(args.id) },
        data: {
          published: true,
        },
      })
    },
    createUser: (parent, args) => {
      return prisma.user.create({
        data: {
          email: args.data.email,
          name: args.data.name,
          posts: {
            create: args.data.posts,
          },
        },
      })
    },
  },
  User: {
    posts: (parent, args) => {
      return prisma.user
        .findUnique({
          where: { id: parent.id },
        })
        .posts()
    },
  },
  Post: {
    author: (parent, args) => {
      return prisma.post
        .findUnique({
          where: { id: parent.id },
        })
        .author()
    },
  },
}
...
现在,createDraft的变更解析器使用authorEmail参数(如果已传递)来创建已创建的草稿与现有用户之间的关系。
新的createUser变更解析器使用嵌套写入功能创建用户和相关帖子。
当查询User或Post时,根据User.posts和Post.author解析器来定义如何解析posts和author字段。使用Prisma的Fluent API来获取相关关系。
保存并退出文件。
启动服务器以测试GraphQL API。
- npm start
开始通过以下GraphQL变更测试createUser解析器:
mutation {
  createUser(data: { email: "natalia@prisma.io", name: "Natalia" }) {
    email
    id
  }
}
这种变更将会创建一个用户。
接下来, 使用以下变更测试 createDraft 解析器:
mutation {
  createDraft(
    authorEmail: "natalia@prisma.io"
    title: "将GraphQL API部署到App平台"
  ) {
    id
    title
    content
    published
    author {
      id
      name
    }
  }
}
当查询的返回值是帖子时,您可以获取作者。在这个例子中,将调用帖子作者的解析器。
测试完成后关闭服务器。
然后提交您的更改并推送以部署API。
- git add .
- git commit -m “添加用户模型”
- git push
你的更新可能需要几分钟来部署。
你已经成功用 Prisma Migrate 进化了你的数据库模式,并将新模型暴露在你的 GraphQL API 中。
结论
在本教程中,你学习了如何使用Prisma构建GraphQL API,并将其部署到Silicon Cloud的App平台。你了解了如何定义GraphQL模式,创建解析器,以及如何使用Prisma客户端与数据库进行交互。此外,你还学习了如何测试你的API并将其部署到云平台。
在本文中,您使用Prisma构建了一个GraphQL API,并将其部署到Silicon Cloud的应用平台上。您使用Apollo Server定义了一个GraphQL模式和解析器。然后,在GraphQL解析器中使用Prisma Client将数据持久化并查询PostgreSQL数据库。作为下一步,您可以通过一个查询扩展GraphQL API,以获取单个用户,并通过一个变更将现有草稿连接到用户。
如果您对探索数据库中的数据感兴趣,请查看Prisma Studio。您也可以访问Prisma文档,了解Prisma的不同方面,并在prisma-examples存储库中探索一些准备好运行的示例项目。
您可以在Silicon Cloud社区代码库中找到该项目的代码。

