如何使用Docker Compose安装WordPress
介绍
WordPress是一个基于MySQL数据库和PHP处理的免费开源内容管理系统(CMS)。由于其可扩展的插件架构和模板系统,大部分的管理工作可以通过Web界面完成。这是为什么WordPress在创建各种类型的网站时都是一个受欢迎的选择,从博客到产品页面再到电子商务网站。
运行WordPress通常涉及安装LAMP(Linux、Apache、MySQL和PHP)或LEMP(Linux、Nginx、MySQL和PHP)堆栈,这可能需要花费很多时间。然而,通过使用Docker和Docker Compose等工具,您可以简化设置您所偏好的堆栈和安装WordPress的过程。与手动安装各个组件不同,您可以使用镜像,这些镜像标准化了库、配置文件和环境变量等内容。然后,在容器中运行这些镜像,容器是运行在共享操作系统上的隔离进程。此外,通过使用Compose,您可以协调多个容器之间的通信,例如应用程序和数据库。
在本教程中,您将建立一个多容器的WordPress安装。您的容器将包括一个MySQL数据库、一个Nginx Web服务器和WordPress本身。您还将通过使用Let’s Encrypt获取与您网站相关联的域名的TLS/SSL证书来保护您的安装。最后,您将设置一个定时任务来更新您的证书,以保证您的域名保持安全。
先决条件
为了按照这个教程操作,你需要准备以下物品:
- A server running Ubuntu 20.04, along with a non-root user with sudo privileges and an active firewall. For guidance on how to set these up, please read our Initial Server Setup guide.
- Docker installed on your server, following Steps 1 and 2 of How To Install and Use Docker on Ubuntu 20.04.
- Docker Compose installed on your server, following Step 1 of How To Install Docker Compose on Ubuntu 20.04.
- A registered domain name. This tutorial will use your_domain throughout. You can get one for free at Freenom, or use the domain registrar of your choice.
- Both of the following DNS records set up for your server. You can follow this introduction to Silicon Cloud DNS for details on how to add them to a Silicon Cloud account:An A record with your_domain pointing to your server’s public IP address.
An A record with www.your_domain pointing to your server’s public IP address.
一旦你把一切都准备好了,你就可以开始第一步了。
第一步——定义Web服务器配置
在运行任何容器之前,你的第一步是为你的Nginx Web服务器定义配置。你的配置文件将包括一些WordPress特定的位置块,以及一个位置块,用于将Let’s Encrypt的验证请求指向Certbot客户端,以实现自动证书续订。
首先,为您的WordPress设置创建一个项目目录。在这个例子中,它被称为wordpress。如果您愿意,您可以给这个目录取一个不同的名字。
- mkdir wordpress
然后导航到目录。
- cd wordpress
接下来,创建一个用于存放配置文件的目录。
- mkdir nginx-conf
用nano或你最喜欢的编辑器打开文件。
- nano nginx-conf/nginx.conf
在这个文件中,添加一个服务器块,包含服务器名称和文档根目录的指令,以及用于指导Certbot客户端请求证书、PHP处理和静态资源请求的位置块。
请将以下代码添加到文件中。请确保将your_domain替换为您自己的域名。
server {
        listen 80;
        listen [::]:80;

        server_name your_domain www.your_domain;

        index index.php index.html index.htm;

        root /var/www/html;

        location ~ /.well-known/acme-challenge {
                allow all;
                root /var/www/html;
        }

        location / {
                try_files $uri $uri/ /index.php$is_args$args;
        }

        location ~ \.php$ {
                try_files $uri =404;
                fastcgi_split_path_info ^(.+\.php)(/.+)$;
                fastcgi_pass wordpress:9000;
                fastcgi_index index.php;
                include fastcgi_params;
                fastcgi_param SCRIPT_FILENAME $document_root$fastcgi_script_name;
                fastcgi_param PATH_INFO $fastcgi_path_info;
        }

        location ~ /\.ht {
                deny all;
        }

        location = /favicon.ico {
                log_not_found off; access_log off;
        }
        location = /robots.txt {
                log_not_found off; access_log off; allow all;
        }
        location ~* \.(css|gif|ico|jpeg|jpg|js|png)$ {
                expires max;
                log_not_found off;
        }
}
我们的服务器区块包括以下信息:
指导方针:
- listen: This tells Nginx to listen on port 80, which will allow you to use Certbot’s webroot plugin for your certificate requests. Note that you are not including port 443 yet — you will update your configuration to include SSL once you have successfully obtained your certificates.
- server_name: This defines your server name and the server block that should be used for requests to your server. Be sure to replace your_domain in this line with your own domain name.
- index: This directive defines the files that will be used as indexes when processing requests to your server. You modified the default order of priority here, moving index.php in front of index.html so that Nginx prioritizes files called index.php when possible.
- root: This directive names the root directory for requests to your server. This directory, /var/www/html, is created as a mount point at build time by instructions in your WordPress Dockerfile. These Dockerfile instructions also ensure that the files from the WordPress release are mounted to this volume.
位置区块
- location ~ /.well-known/acme-challenge: This location block will handle requests to the .well-known directory, where Certbot will place a temporary file to validate that the DNS for your domain resolves to your server. With this configuration in place, you will be able to use Certbot’s webroot plugin to obtain certificates for your domain.
- location /: In this location block, a try_files directive is used to check for files that match individual URI requests. Instead of returning a 404 Not Found status as a default, however, you’ll pass control to WordPress’s index.php file with the request arguments.
- location ~ \.php$: This location block will handle PHP processing and proxy these requests to your wordpress container. Because your WordPress Docker image will be based on the php:fpm image, you will also include configuration options that are specific to the FastCGI protocol in this block. Nginx requires an independent PHP processor for PHP requests. In this case, these requests will be handled by the php-fpm processor that’s included with the php:fpm image.
Additionally, this location block includes FastCGI-specific directives, variables, and options that will proxy requests to the WordPress application running in your wordpress container, set the preferred index for the parsed request URI, and parse URI requests. - location ~ /\.ht: This block will handle .htaccess files since Nginx won’t serve them. The deny_all directive ensures that .htaccess files will never be served to users.
- location = /favicon.ico, location = /robots.txt: These blocks ensure that requests to /favicon.ico and /robots.txt will not be logged.
- location ~* \.(css|gif|ico|jpeg|jpg|js|png)$: This block turns off logging for static asset requests and ensures that these assets are highly cacheable, as they are typically expensive to serve.
关于FastCGI代理的更多信息,请阅读《理解和实现Nginx中的FastCGI代理》。关于服务器和位置块的信息,请查阅《理解Nginx服务器和位置块选择算法》。
在编辑完成后保存并关闭文件。如果你使用的是nano,可以通过按下CTRL+X,Y,然后按下ENTER键来完成操作。
通过设置Nginx配置,您可以继续创建运行时传递给应用程序和数据库容器的环境变量。
步骤2 – 定义环境变量
您的数据库和WordPress应用程序容器在运行时需要访问某些环境变量,以使您的应用程序数据持久化并可访问。这些变量包括敏感和非敏感信息:敏感值为您的MySQL root密码和应用程序数据库用户和密码,非敏感信息为您的应用程序数据库名称和主机。
与其在Docker Compose文件中设置所有这些值,即包含有关容器运行方式的主文件,不如将敏感值设置在一个.env文件中并限制其传播。这样可以防止这些值被复制到你的项目存储库并公开暴露出去。
在您的主项目目录~/wordpress中,打开一个名为.env的文件。
- nano .env
您在此文件中设置的机密值包括用于MySQL root用户的密码,以及WordPress将用于访问数据库的用户名和密码。
请将以下变量名和值添加到文件中。记得为每个变量提供自己的值。
MYSQL_ROOT_PASSWORD=your_root_password
MYSQL_USER=your_wordpress_database_user
MYSQL_PASSWORD=your_wordpress_database_password
包括了根管理员账户的密码,以及您应用数据库的首选用户名和密码。
在完成编辑后保存并关闭文件。
由于您的 .env 文件包含敏感信息,所以您希望确保它被包含在您的项目的 .gitignore 和 .dockerignore 文件中。这样一来,Git 和 Docker 就知道不要将这些文件复制到您的 Git 仓库和 Docker 镜像中。
如果你計劃使用Git進行版本控制,請使用git init將你的當前工作目錄初始化為一個存儲庫。
- git init
然后创建并打开一个.gitignore文件。
- nano .gitignore
将.env文件添加到该文件中。
.env
在你完成编辑后保存并关闭文件。
同样,将.env添加到.dockerignore文件中是一个很好的预防措施,这样在将该目录作为构建上下文时,它就不会出现在您的容器中。
打开文件。
- nano .dockerignore
将.env文件添加到文件中。
〜/wordpress/.dockerignore~/wordpress/.dockerignore的释义:家目录下wordpress文件夹中的.dockerignore文件。
.env
以下是可选的,在此之下,您可以添加与您的应用程序开发相关的文件和目录。
~/wordpress/.dockerignore
.env
.git
docker-compose.yml
.dockerignore
当你完成时,请保存并关闭文件。
现在您已经准备好敏感信息,可以继续在docker-compose.yml文件中定义您的服务。
第三步 – 使用Docker Compose定义服务
您的docker-compose.yml文件将包含您设置的服务定义。Compose中的服务是运行的容器,而服务定义则指定每个容器的运行信息。
通过使用Compose,您可以定义不同的服务来运行多容器应用程序,因为Compose允许您通过共享网络和卷将这些服务连接在一起。这将对您当前的设置非常有帮助,因为您将为您的数据库、WordPress应用程序和Web服务器创建不同的容器。您还将创建一个容器来运行Certbot客户端,以获取用于您的Web服务器的证书。
首先,在中创建并打开docker-compose.yml文件。
- nano docker-compose.yml
将以下代码添加到您的Compose文件版本和db数据库服务的定义中。
用中文对以下内容进行释义:~/wordpress/docker-compose.yml
协议:docker-compose.yml位于~/wordpress目录中。
version: '3'

services:
  db:
    image: mysql:8.0
    container_name: db
    restart: unless-stopped
    env_file: .env
    environment:
      - MYSQL_DATABASE=wordpress
    volumes:
      - dbdata:/var/lib/mysql
    command: '--default-authentication-plugin=mysql_native_password'
    networks:
      - app-network
数据库服务定义包含以下选项:
- image: This tells Compose what image to pull to create the container. You are pinning the mysql:8.0 image here to avoid future conflicts as the mysql:latest image continues to be updated. For more information about version pinning and avoiding dependency conflicts, read the Docker documentation on Dockerfile best practices.
- container_name: This specifies a name for the container.
- restart: This defines the container restart policy. The default is no, but you have set the container to restart unless it is stopped manually.
- env_file: This option tells Compose that you would like to add environment variables from a file called .env, located in your build context. In this case, the build context is your current directory.
- environment: This option allows you to add additional environment variables, beyond those defined in your .env file. You will set the MYSQL_DATABASE variable equal to wordpress to provide a name for your application database. Because this is non-sensitive information, you can include it directly in the docker-compose.yml file.
- volumes: Here, you’re mounting a named volume called dbdata to the /var/lib/mysql directory on the container. This is the standard data directory for MySQL on most distributions.
- command: This option specifies a command to override the default CMD instruction for the image. In this particular case, you will add an option to the Docker image’s standard mysqld command, which starts the MySQL server on the container. This option, –default-authentication-plugin=mysql_native_password, sets the –default-authentication-plugin system variable to mysql_native_password, specifying which authentication mechanism should govern new authentication requests to the server. Since PHP and therefore your WordPress image won’t support MySQL’s newer authentication default, you must make this adjustment in order to authenticate your application database user.
- networks: This specifies that your application service will join the app-network network, which you will define at the bottom of the file.
接下来,在数据库服务定义下方,增加你的WordPress应用程序服务的定义。
~/wordpress/docker-compose.yml 可以用以下的中文方式来表达:
~/wordpress/docker-compose.yml 文件的中文意思是:
...
  wordpress:
    depends_on:
      - db
    image: wordpress:5.1.1-fpm-alpine
    container_name: wordpress
    restart: unless-stopped
    env_file: .env
    environment:
      - WORDPRESS_DB_HOST=db:3306
      - WORDPRESS_DB_USER=$MYSQL_USER
      - WORDPRESS_DB_PASSWORD=$MYSQL_PASSWORD
      - WORDPRESS_DB_NAME=wordpress
    volumes:
      - wordpress:/var/www/html
    networks:
      - app-network
在此服务定义中,您正在命名容器并定义重启策略,就像您在数据库服务中所做的一样。您还添加了一些特定于该容器的选项。
- depends_on: This option ensures that your containers will start in order of dependency, with the wordpress container starting after the db container. Your WordPress application relies on the existence of your application database and user, so expressing this order of dependency will enable your application to start properly.
- image: For this setup, you are using the 5.1.1-fpm-alpine WordPress image. As discussed in Step 1, using this image ensures that your application will have the php-fpm processor that Nginx requires to handle PHP processing. This is also an alpine image, derived from the Alpine Linux project, which will help keep your overall image size down. For more information about the benefits and drawbacks of using alpine images and whether or not this makes sense for your application, review the full discussion under the Image Variants section of the Docker Hub WordPress image page.
- env_file: Again, you specify that you want to pull values from your .env file, since this is where you defined your application database user and password.
- environment: Here, you’re using the values you defined in your .env file, but are assigning them to the variable names that the WordPress image expects: WORDPRESS_DB_USER and WORDPRESS_DB_PASSWORD. You’re also defining a WORDPRESS_DB_HOST, which will be the MySQL server running on the db container that’s accessible on MySQL’s default port, 3306. Your WORDPRESS_DB_NAME will be the same value you specified in the MySQL service definition for your MYSQL_DATABASE: wordpress.
- volumes: You are mounting a named volume called wordpress to the /var/www/html mountpoint created by the WordPress image. Using a named volume in this way will allow you to share your application code with other containers.
- networks: You’re also adding the wordpress container to the app-network network.
接下来,在WordPress应用程序服务定义之下,添加以下定义以配置您的Web服务器Nginx服务。
~/wordpress/docker-compose.yml~/wordpress/docker-compose.yml 可以再次表达为:
~/wordpress/容器编排文件.yml
...
  webserver:
    depends_on:
      - wordpress
    image: nginx:1.15.12-alpine
    container_name: webserver
    restart: unless-stopped
    ports:
      - "80:80"
    volumes:
      - wordpress:/var/www/html
      - ./nginx-conf:/etc/nginx/conf.d
      - certbot-etc:/etc/letsencrypt
    networks:
      - app-network
在这里,你给你的容器命名,并使其依赖于wordpress容器来进行启动顺序。你还使用了一个alpine映像——1.15.12-alpine Nginx映像。
此服务定义还包括以下选项:
- ports: This exposes port 80 to enable the configuration options you defined in your nginx.conf file in Step 1.
- volumes: Here, you are defining a combination of named volumes and bind mounts:wordpress:/var/www/html: This will mount your WordPress application code to the /var/www/html directory, the directory you set as the root in your Nginx server block.
./nginx-conf:/etc/nginx/conf.d: This will bind mount the Nginx configuration directory on the host to the relevant directory on the container, ensuring that any changes you make to files on the host will be reflected in the container.
certbot-etc:/etc/letsencrypt: This will mount the relevant Let’s Encrypt certificates and keys for your domain to the appropriate directory on the container.
你还将这个容器添加到了app-network网络中。
最后,在您的Web服务器定义的下方,添加certbot服务的最后一个服务定义。请确保将此处列出的电子邮件地址和域名替换为您自己的信息。
~/wordpress/docker-compose.yml我的建议给您的是:
~/wordpress/docker-compose.yml
  certbot:
    depends_on:
      - webserver
    image: certbot/certbot
    container_name: certbot
    volumes:
      - certbot-etc:/etc/letsencrypt
      - wordpress:/var/www/html
    command: certonly --webroot --webroot-path=/var/www/html --email sammy@your_domain --agree-tos --no-eff-email --staging -d your_domain -d www.your_domain
这个定义告诉Compose从Docker Hub拉取certbot/certbot镜像。它还使用了命名卷来与Nginx容器共享资源,包括certbot-etc中的域名证书和密钥,以及wordpress中的应用程序代码。
再说一遍,你使用了depends_on来指定在webserver服务运行时应启动certbot容器。
你还包含了一个命令选项,用于指定要与容器的默认certbot命令一起运行的子命令。certonly子命令将使用以下选项获取证书。
- –webroot: This tells Certbot to use the webroot plugin to place files in the webroot folder for authentication. This plugin depends on the HTTP-01 validation method, which uses an HTTP request to prove that Certbot can access resources from a server that responds to a given domain name.
- –webroot-path: This specifies the path of the webroot directory.
- –email: Your preferred email for registration and recovery.
- –agree-tos: This specifies that you agree to ACME’s Subscriber Agreement.
- –no-eff-email: This tells Certbot that you do not wish to share your email with the Electronic Frontier Foundation (EFF). Feel free to omit this if you would prefer.
- –staging: This tells Certbot that you would like to use Let’s Encrypt’s staging environment to obtain test certificates. Using this option allows you to test your configuration options and avoid possible domain request limits. For more information about these limits, please read Let’s Encrypt’s rate limits documentation.
- -d: This allows you to specify domain names you would like to apply to your request. In this case, you’ve included your_domain and www.your_domain. Be sure to replace these with your own domain.
在certbot服务定义的下方添加你的网络和卷定义:
...
volumes:
  certbot-etc:
  wordpress:
  dbdata:

networks:
  app-network:
    driver: bridge
您的顶级卷键定义了卷certbot-etc,wordpress和dbdata。当Docker创建卷时,卷的内容存储在由Docker管理的主机文件系统的/var/lib/docker/volumes/目录中。然后,每个卷的内容都会从该目录挂载到使用该卷的任何容器中。通过这种方式,可以在容器之间共享代码和数据。
用户定义的桥接网络应用网络允许容器间的通信,因为它们位于同一台Docker守护进程主机上。这样可以简化应用程序内部的流量和通信,因为它在同一桥接网络上打开了所有容器之间的端口,同时不向外界公开任何端口。因此,您的数据库、WordPress和Web服务器容器可以彼此通信,您只需要暴露80端口以供应用程序的前端访问。
以下是完整的docker-compose.yml文件:
以下是docker-compose.yml文件的整个内容:
version: '3'

services:
  db:
    image: mysql:8.0
    container_name: db
    restart: unless-stopped
    env_file: .env
    environment:
      - MYSQL_DATABASE=wordpress
    volumes:
      - dbdata:/var/lib/mysql
    command: '--default-authentication-plugin=mysql_native_password'
    networks:
      - app-network

  wordpress:
    depends_on:
      - db
    image: wordpress:5.1.1-fpm-alpine
    container_name: wordpress
    restart: unless-stopped
    env_file: .env
    environment:
      - WORDPRESS_DB_HOST=db:3306
      - WORDPRESS_DB_USER=$MYSQL_USER
      - WORDPRESS_DB_PASSWORD=$MYSQL_PASSWORD
      - WORDPRESS_DB_NAME=wordpress
    volumes:
      - wordpress:/var/www/html
    networks:
      - app-network

  webserver:
    depends_on:
      - wordpress
    image: nginx:1.15.12-alpine
    container_name: webserver
    restart: unless-stopped
    ports:
      - "80:80"
    volumes:
      - wordpress:/var/www/html
      - ./nginx-conf:/etc/nginx/conf.d
      - certbot-etc:/etc/letsencrypt
    networks:
      - app-network

  certbot:
    depends_on:
      - webserver
    image: certbot/certbot
    container_name: certbot
    volumes:
      - certbot-etc:/etc/letsencrypt
      - wordpress:/var/www/html
    command: certonly --webroot --webroot-path=/var/www/html --email sammy@your_domain --agree-tos --no-eff-email --staging -d your_domain -d www.your_domain

volumes:
  certbot-etc:
  wordpress:
  dbdata:

networks:
  app-network:
    driver: bridge
当你编辑完毕,请保存并关闭文件。
有了您的服务定义,您可以开始启动容器并测试您的证书请求了。
第四步:获取SSL证书和凭证
使用`docker-compose up`命令启动容器,按照您指定的顺序创建并运行容器。通过添加`-d`参数,该命令会在后台运行db、wordpress和webserver容器。
- docker-compose up -d
以下输出确认您的服务已经创建成功:
Creating db … done Creating wordpress … done Creating webserver … done Creating certbot … done
使用docker-compose ps命令,查看您的服务的状态。
- docker-compose ps
完成后,您的数据库、WordPress和Web服务器服务将处于运行状态,并且certbot容器将以0状态消息退出。
Name Command State Ports ————————————————————————- certbot certbot certonly –webroot … Exit 0 db docker-entrypoint.sh –def … Up 3306/tcp, 33060/tcp webserver nginx -g daemon off; Up 0.0.0.0:80->80/tcp wordpress docker-entrypoint.sh php-fpm Up 9000/tcp
如果数据库、WordPress或Web服务器服务的”State”列中除了”Up”以外的任何状态,或者certbot容器的退出状态不是0,这意味着你可能需要使用docker-compose logs命令检查服务日志。
- docker-compose logs service_name
现在你可以使用docker-compose exec命令检查你的证书是否已经挂载到web服务器容器上。
- docker-compose exec webserver ls -la /etc/letsencrypt/live
一旦您的证书请求成功,下面是输出内容:
total 16 drwx—— 3 root root 4096 May 10 15:45 . drwxr-xr-x 9 root root 4096 May 10 15:45 .. -rw-r–r– 1 root root 740 May 10 15:45 README drwxr-xr-x 2 root root 4096 May 10 15:45 your_domain
既然你知道你的请求会成功,你可以编辑certbot服务定义,移除–staging标志。
打开 docker-compose.yml 文件。
- nano docker-compose.yml
在文件中找到certbot服务定义的部分,并用命令选项中的–force-renewal标志替换–staging标志,这将告诉Certbot您希望使用与现有证书相同的域名请求新证书。以下是更新标志的certbot服务定义:
...
  certbot:
    depends_on:
      - webserver
    image: certbot/certbot
    container_name: certbot
    volumes:
      - certbot-etc:/etc/letsencrypt
      - certbot-var:/var/lib/letsencrypt
      - wordpress:/var/www/html
    command: certonly --webroot --webroot-path=/var/www/html --email sammy@your_domain --agree-tos --no-eff-email --force-renewal -d your_domain -d www.your_domain
...
您现在可以运行docker-compose up来重新创建certbot容器。您还需在命令中加上–no-deps选项,告诉Compose可以跳过启动webserver服务的步骤,因为它已经在运行中。
- docker-compose up –force-recreate –no-deps certbot
以下输出表明您的证书请求成功:
Recreating certbot … done Attaching to certbot certbot | Saving debug log to /var/log/letsencrypt/letsencrypt.log certbot | Plugins selected: Authenticator webroot, Installer None certbot | Renewing an existing certificate certbot | Performing the following challenges: certbot | http-01 challenge for your_domain certbot | http-01 challenge for www.your_domain certbot | Using the webroot path /var/www/html for all unmatched domains. certbot | Waiting for verification… certbot | Cleaning up challenges certbot | IMPORTANT NOTES: certbot | – Congratulations! Your certificate and chain have been saved at: certbot | /etc/letsencrypt/live/your_domain/fullchain.pem certbot | Your key file has been saved at: certbot | /etc/letsencrypt/live/your_domain/privkey.pem certbot | Your cert will expire on 2019-08-08. To obtain a new or tweaked certbot | version of this certificate in the future, simply run certbot certbot | again. To non-interactively renew *all* of your certificates, run certbot | “certbot renew” certbot | – Your account credentials have been saved in your Certbot certbot | configuration directory at /etc/letsencrypt. You should make a certbot | secure backup of this folder now. This configuration directory will certbot | also contain certificates and private keys obtained by Certbot so certbot | making regular backups of this folder is ideal. certbot | – If you like Certbot, please consider supporting our work by: certbot | certbot | Donating to ISRG / Let’s Encrypt: https://letsencrypt.org/donate certbot | Donating to EFF: https://eff.org/donate-le certbot | certbot exited with code 0
有了您的证书,您可以继续修改您的Nginx配置以包含SSL。
步骤五- 修改网络服务器配置和服务定义
在您的Nginx配置中启用SSL将涉及到添加一个HTTP重定向到HTTPS,指定SSL证书和密钥的位置,以及添加安全参数和头部。
由于您将重新创建Web服务器服务以包含这些附加功能,您现在可以停止它。
- docker-compose stop webserver
在修改配置文件之前,使用curl从Certbot获取推荐的Nginx安全参数。
- curl -sSLo nginx-conf/options-ssl-nginx.conf https://raw.githubusercontent.com/certbot/certbot/master/certbot-nginx/certbot_nginx/_internal/tls_configs/options-ssl-nginx.conf
这个命令将把这些参数保存在一个名为 options-ssl-nginx.conf 的文件中,该文件位于 nginx-conf 目录中。
接下来,删除你之前创建的Nginx配置文件。
- rm nginx-conf/nginx.conf
创建并打开文件的另一个版本。
- nano nginx-conf/nginx.conf
请将以下代码添加到文件中,以将HTTP重定向到HTTPS,并添加SSL凭据、协议和安全标头。请记得将your_domain替换为您自己的域名。
~/wordpress/nginx-conf/nginx.conf~/wordpress/nginx-conf/nginx.conf
server {
        listen 80;
        listen [::]:80;

        server_name your_domain www.your_domain;

        location ~ /.well-known/acme-challenge {
                allow all;
                root /var/www/html;
        }

        location / {
                rewrite ^ https://$host$request_uri? permanent;
        }
}

server {
        listen 443 ssl http2;
        listen [::]:443 ssl http2;
        server_name your_domain www.your_domain;

        index index.php index.html index.htm;

        root /var/www/html;

        server_tokens off;

        ssl_certificate /etc/letsencrypt/live/your_domain/fullchain.pem;
        ssl_certificate_key /etc/letsencrypt/live/your_domain/privkey.pem;

        include /etc/nginx/conf.d/options-ssl-nginx.conf;

        add_header X-Frame-Options "SAMEORIGIN" always;
        add_header X-XSS-Protection "1; mode=block" always;
        add_header X-Content-Type-Options "nosniff" always;
        add_header Referrer-Policy "no-referrer-when-downgrade" always;
        add_header Content-Security-Policy "default-src * data: 'unsafe-eval' 'unsafe-inline'" always;
        # add_header Strict-Transport-Security "max-age=31536000; includeSubDomains; preload" always;
        # enable strict transport security only if you understand the implications

        location / {
                try_files $uri $uri/ /index.php$is_args$args;
        }

        location ~ \.php$ {
                try_files $uri =404;
                fastcgi_split_path_info ^(.+\.php)(/.+)$;
                fastcgi_pass wordpress:9000;
                fastcgi_index index.php;
                include fastcgi_params;
                fastcgi_param SCRIPT_FILENAME $document_root$fastcgi_script_name;
                fastcgi_param PATH_INFO $fastcgi_path_info;
        }

        location ~ /\.ht {
                deny all;
        }

        location = /favicon.ico {
                log_not_found off; access_log off;
        }
        location = /robots.txt {
                log_not_found off; access_log off; allow all;
        }
        location ~* \.(css|gif|ico|jpeg|jpg|js|png)$ {
                expires max;
                log_not_found off;
        }
}
HTTP 服务器块指定 Certbot 更新请求的网站根目录为 `.well-known/acme-challenge` 目录。它还包括一个重写指令,将 HTTP 请求指向根目录并转换为 HTTPS。
HTTPS服务器块启用了SSL和HTTP2。要了解有关HTTP/2对HTTP协议的迭代以及其对网站性能的好处的更多信息,请阅读《如何在Ubuntu 18.04上设置支持HTTP/2的Nginx》的介绍部分。
该块还包括您SSL证书和密钥的位置,以及您保存在nginx-conf/options-ssl-nginx.conf中的已建议的Certbot安全参数。
此外,还包括一些安全头部,能够使您在SSL Labs和Security Headers服务器测试网站上获得A级评价。这些头部包括X-Frame-Options、X-Content-Type-Options、引荐政策、内容安全策略以及X-XSS-Protection。HTTP严格传输安全(HSTS)头部被注释掉了 —— 只有在您理解相关影响并评估其”preload”功能后才能启用。
您的根目录和索引指令也位于此块中,与第一步中讨论的其余WordPress特定的位置块一样。
编辑完成后,保存并关闭文件。
在重新创建网络服务器服务之前,您需要向网络服务器服务定义中添加一个443端口映射。
打开你的 docker-compose.yml 文件。
- nano docker-compose.yml
在Web服务器服务定义中,添加以下端口映射:
~/wordpress/docker-compose.yml
...
  webserver:
    depends_on:
      - wordpress
    image: nginx:1.15.12-alpine
    container_name: webserver
    restart: unless-stopped
    ports:
      - "80:80"
      - "443:443"
    volumes:
      - wordpress:/var/www/html
      - ./nginx-conf:/etc/nginx/conf.d
      - certbot-etc:/etc/letsencrypt
    networks:
      - app-network
编辑后的内容如下,这是完整的docker-compose.yml文件。
version: '3'

services:
  db:
    image: mysql:8.0
    container_name: db
    restart: unless-stopped
    env_file: .env
    environment:
      - MYSQL_DATABASE=wordpress
    volumes:
      - dbdata:/var/lib/mysql
    command: '--default-authentication-plugin=mysql_native_password'
    networks:
      - app-network

  wordpress:
    depends_on:
      - db
    image: wordpress:5.1.1-fpm-alpine
    container_name: wordpress
    restart: unless-stopped
    env_file: .env
    environment:
      - WORDPRESS_DB_HOST=db:3306
      - WORDPRESS_DB_USER=$MYSQL_USER
      - WORDPRESS_DB_PASSWORD=$MYSQL_PASSWORD
      - WORDPRESS_DB_NAME=wordpress
    volumes:
      - wordpress:/var/www/html
    networks:
      - app-network

  webserver:
    depends_on:
      - wordpress
    image: nginx:1.15.12-alpine
    container_name: webserver
    restart: unless-stopped
    ports:
      - "80:80"
      - "443:443"
    volumes:
      - wordpress:/var/www/html
      - ./nginx-conf:/etc/nginx/conf.d
      - certbot-etc:/etc/letsencrypt
    networks:
      - app-network

  certbot:
    depends_on:
      - webserver
    image: certbot/certbot
    container_name: certbot
    volumes:
      - certbot-etc:/etc/letsencrypt
      - wordpress:/var/www/html
    command: certonly --webroot --webroot-path=/var/www/html --email sammy@your_domain --agree-tos --no-eff-email --force-renewal -d your_domain -d www.your_domain

volumes:
  certbot-etc:
  wordpress:
  dbdata:

networks:
  app-network:
    driver: bridge
编辑完成后保存并关闭文件。
重建Web服务器服务。
- docker-compose up -d –force-recreate –no-deps webserver
请使用docker-compose ps命令检查您的服务。
- docker-compose ps
输出应指示您的数据库、WordPress和Web服务器服务正在运行。
Name Command State Ports ———————————————————————————————- certbot certbot certonly –webroot … Exit 0 db docker-entrypoint.sh –def … Up 3306/tcp, 33060/tcp webserver nginx -g daemon off; Up 0.0.0.0:443->443/tcp, 0.0.0.0:80->80/tcp wordpress docker-entrypoint.sh php-fpm Up 9000/tcp
在您的容器运行时,您可以通过Web界面完成Wordpress安装。
第六步:通过网络界面完成安装。
在容器运行的情况下,通过WordPress的网页界面完成安装。
在您的浏览器中,导航到您服务器的域名。请记得将your_domain替换为您自己的域名。
https://your_domain
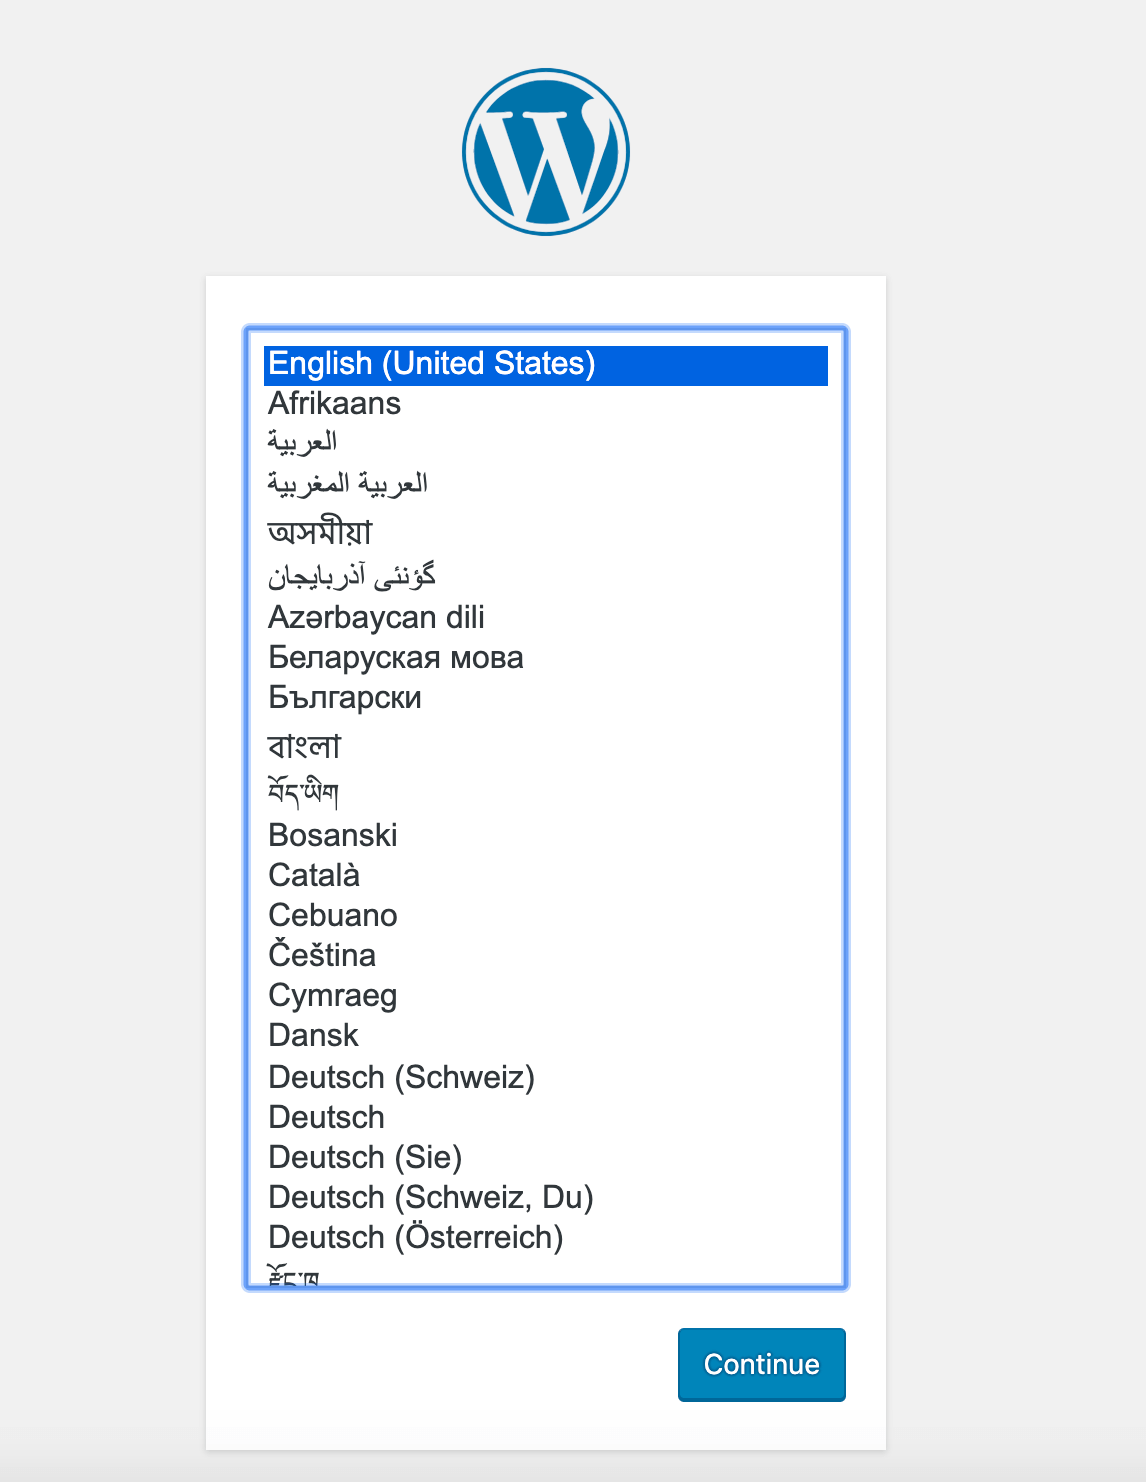
请选择您希望使用的语言:

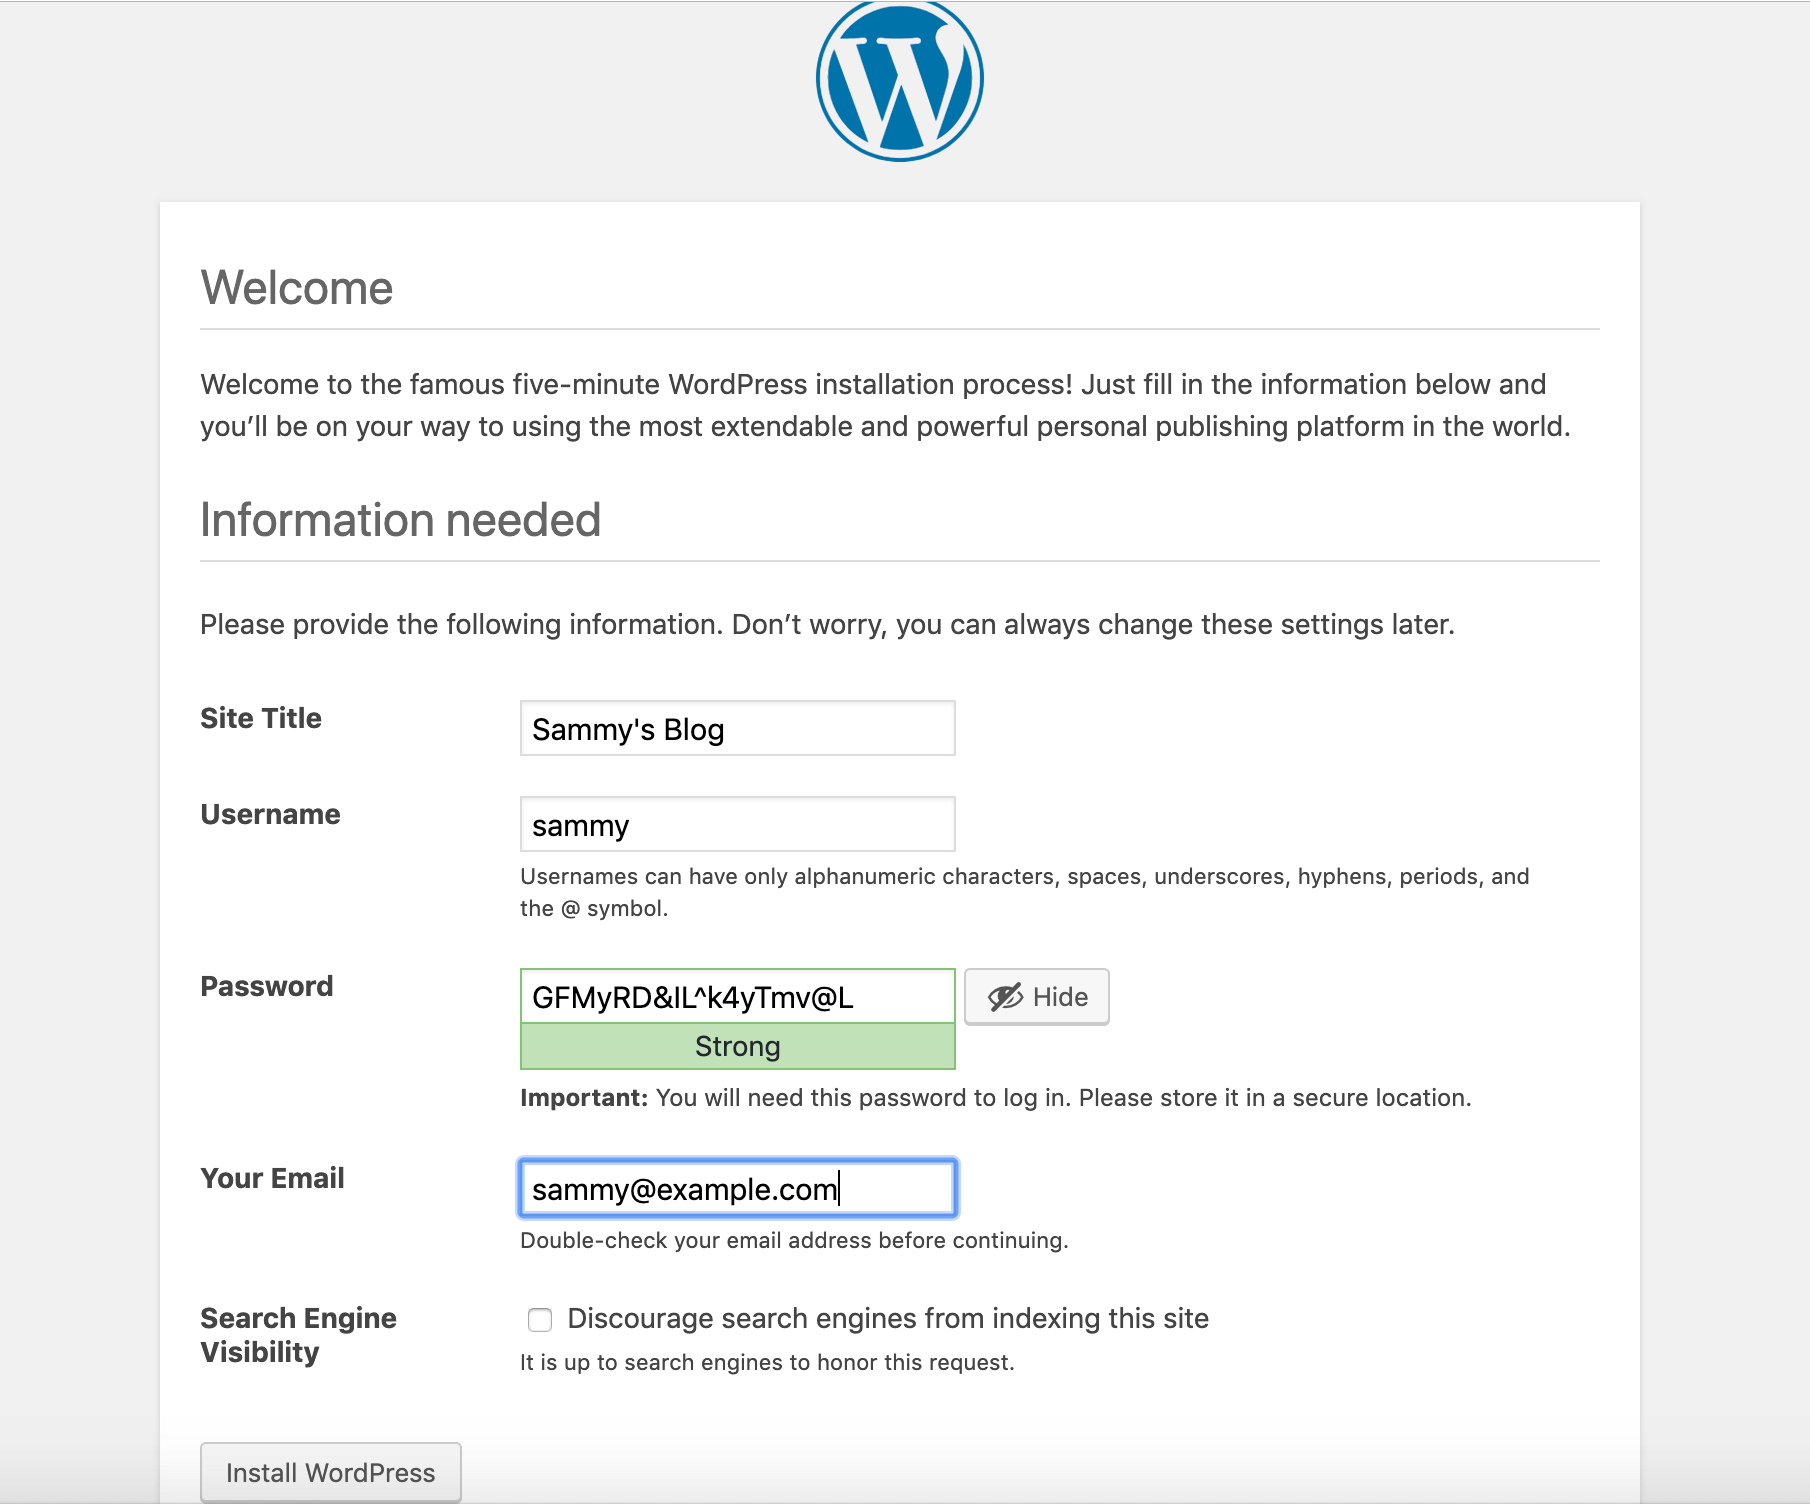
点击“继续”后,您将会进入主设置页面,您需要为您的网站选择一个名称和一个用户名。在这里选择一个容易记住的用户名(而不是“admin”)和一个强密码是一个好主意。您可以使用WordPress自动生成的密码,也可以自己创建密码。
最后,您需要输入您的电子邮件地址,并决定是否要阻止搜索引擎对您的网站进行索引。

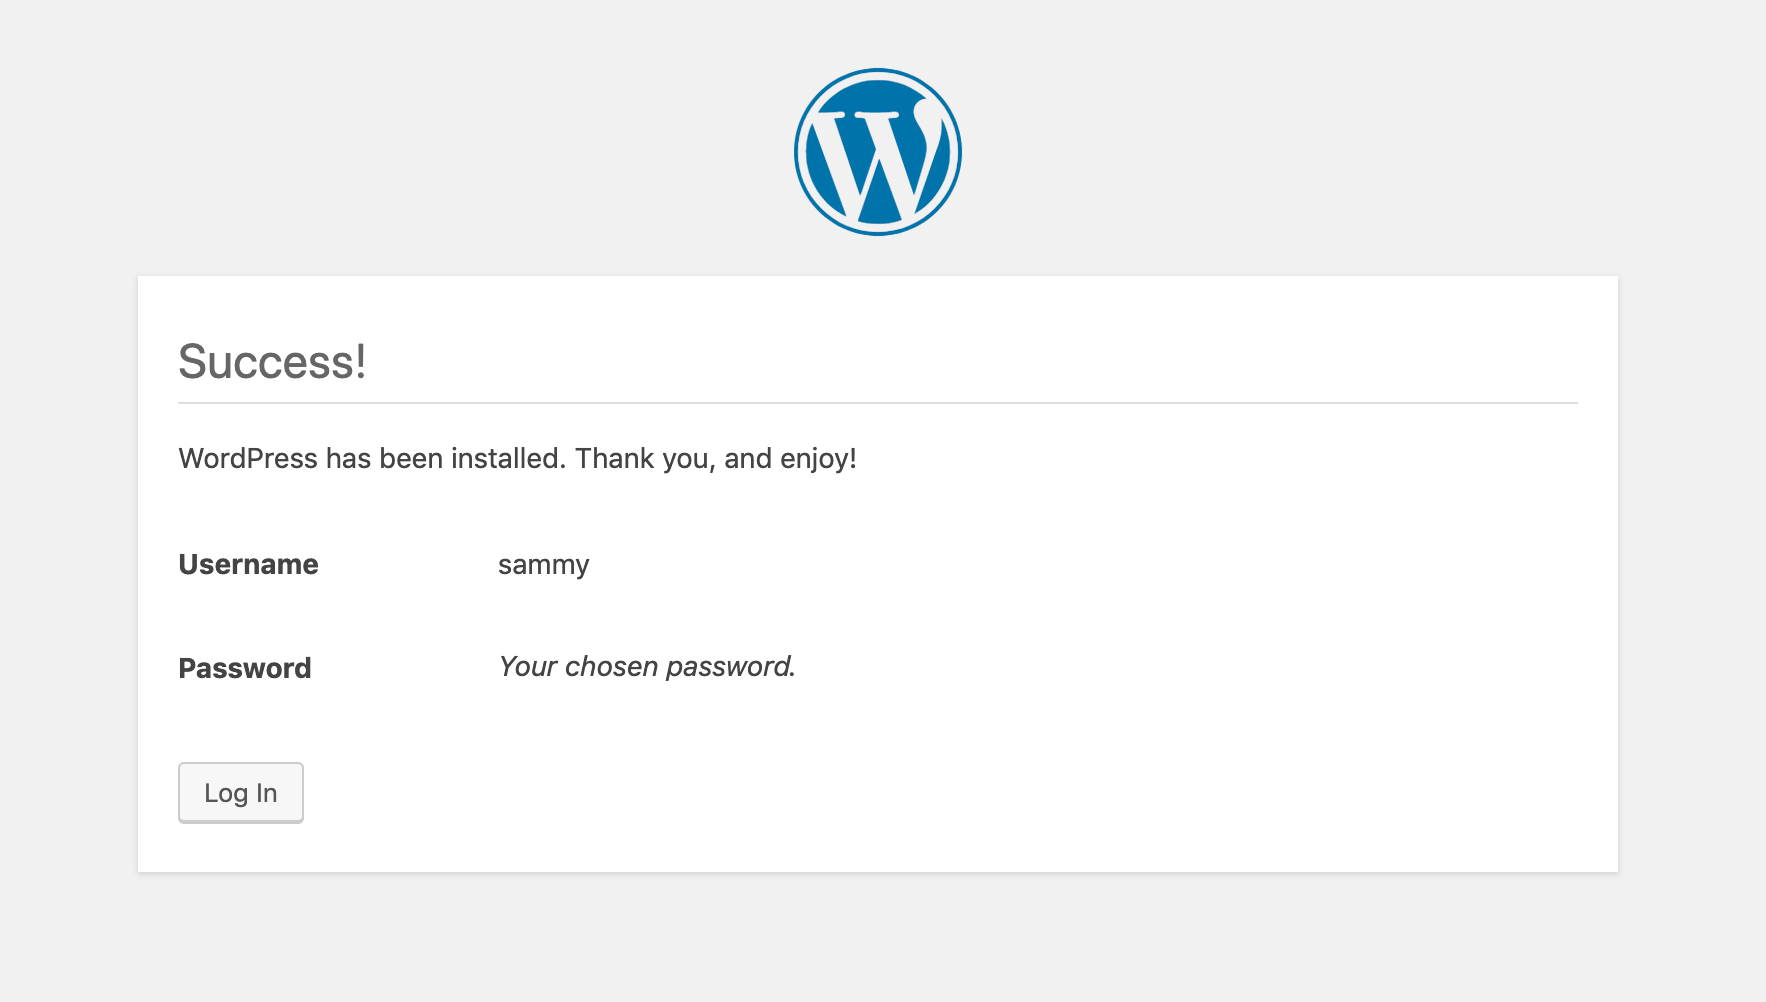
点击页面底部的安装WordPress会带您到登录提示。

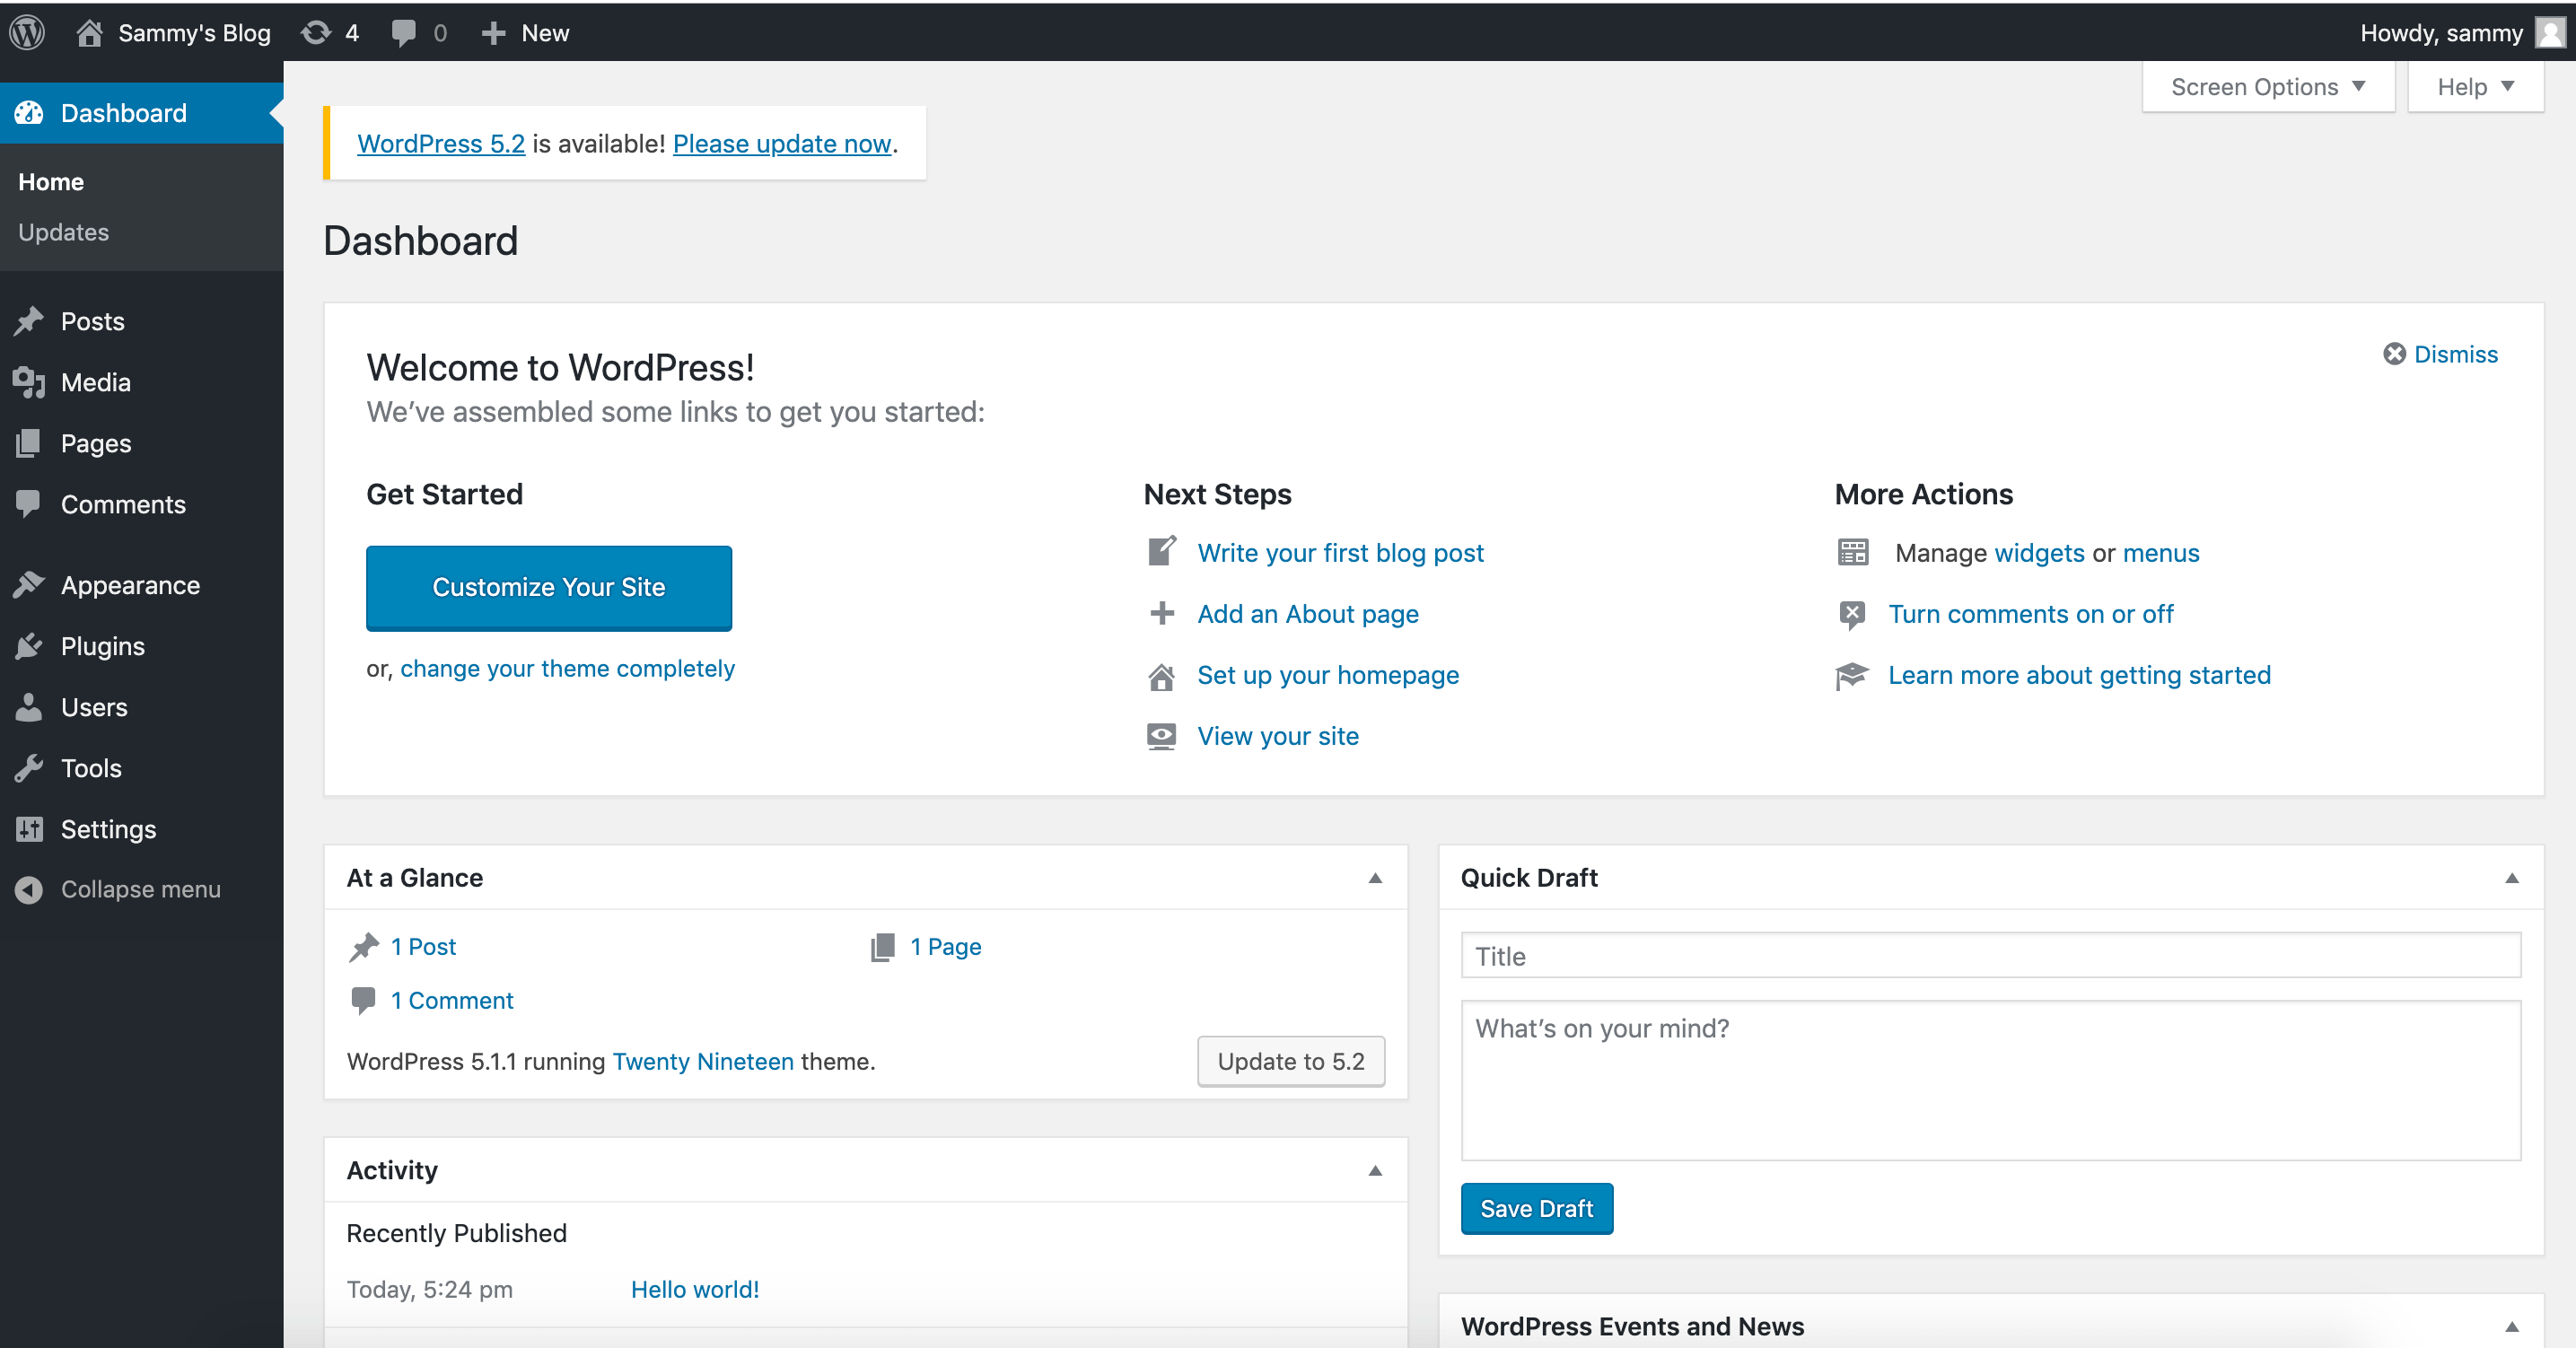
一旦登录,您将可以访问WordPress管理仪表板。

完成WordPress安装后,您可以采取措施确保您的SSL证书能够自动更新。
步骤 7 — 更新证书
Let’s Encrypt证书有效期为90天。您可以设置自动更新流程以确保其不过期。其中一种方法是使用cron定时工具创建一个任务。在下面的示例中,您将创建一个cron任务,定期运行一个脚本来更新您的证书并重新加载您的Nginx配置。
首先,打开一个名为 ssl_renew.sh 的脚本。
- nano ssl_renew.sh
将以下代码添加到脚本中,以更新您的证书并重新加载您的Web服务器配置。请记住将示例用户名此处替换为您自己的非根用户名。
#!/bin/bash

COMPOSE="/usr/local/bin/docker-compose --no-ansi"
DOCKER="/usr/bin/docker"

cd /home/sammy/wordpress/
$COMPOSE run certbot renew --dry-run && $COMPOSE kill -s SIGHUP webserver
$DOCKER system prune -af
这个脚本首先将docker-compose二进制文件指定给一个叫COMPOSE的变量,并指定了–no-ansi选项,这将在运行docker-compose命令时禁用ANSI控制字符。然后它做同样的事情,将docker二进制文件指定给变量。最后,它切换到~/wordpress项目目录,并运行以下docker-compose命令。
- docker-compose run: This will start a certbot container and override the command provided in your certbot service definition. Instead of using the certonly subcommand, the renew subcommand is used, which will renew certificates that are close to expiring. Also included is the –dry-run option to test your script.
- docker-compose kill: This will send a SIGHUP signal to the webserver container to reload the Nginx configuration.
然后运行docker system prune命令来移除所有未使用的容器和镜像。
编辑完成后关闭文件。使用以下命令使其可执行:
- chmod +x ssl_renew.sh
接下来,打开您的根crontab文件,以在指定的时间间隔运行续订脚本。
sudo crontab -e
如果这是您第一次编辑此文件,您将被要求选择一个编辑器。
no crontab for root – using an empty one Select an editor. To change later, run ‘select-editor’. 1. /bin/nano <—- easiest 2. /usr/bin/vim.basic 3. /usr/bin/vim.tiny 4. /bin/ed Choose 1-4 [1]: …
在这个文件的最底部,添加如下一行:
...
*/5 * * * * /home/sammy/wordpress/ssl_renew.sh >> /var/log/cron.log 2>&1
这将把任务间隔设置为每五分钟一次,这样你就可以测试你的续订请求是否按预期工作。一个名为cron.log的日志文件将被创建来记录任务的相关输出。
五分钟后,检查cron.log文件以确认续约请求是否成功。
- tail -f /var/log/cron.log
下面的输出证实了成功续订。
– – – – – – – – – – – – – – – – – – – – – – – – – – – – – – – – – – – – – – – – ** DRY RUN: simulating ‘certbot renew’ close to cert expiry ** (The test certificates below have not been saved.) Congratulations, all renewals succeeded. The following certs have been renewed: /etc/letsencrypt/live/your_domain/fullchain.pem (success) ** DRY RUN: simulating ‘certbot renew’ close to cert expiry ** (The test certificates above have not been saved.) – – – – – – – – – – – – – – – – – – – – – – – – – – – – – – – – – – – – – – – –
在命令行中输入CTRL+C,以退出。
你可以修改crontab文件来设置每日的间隔。例如,要在每天中午运行脚本,你可以修改文件的最后一行为以下内容。
...
0 12 * * * /home/sammy/wordpress/ssl_renew.sh >> /var/log/cron.log 2>&1
您还需要从您的ssl_renew.sh脚本中移除–dry-run选项。
~/wordpress/ssl_renew.sh~/wordpress/ssl_renew.sh 可以表达为: “~/wordpress/ssl_renew.sh”
#!/bin/bash

COMPOSE="/usr/local/bin/docker-compose --no-ansi"
DOCKER="/usr/bin/docker"

cd /home/sammy/wordpress/
$COMPOSE run certbot renew && $COMPOSE kill -s SIGHUP webserver
$DOCKER system prune -af
你的定时任务将确保你的Let’s Encrypt证书在符合条件时进行续订,以防止过期。你还可以使用Logrotate工具设置日志轮转并压缩日志文件。
结论
在这个教程中,你使用Docker Compose来创建一个带有Nginx web服务器的WordPress安装。作为工作流的一部分,你获取了与你的WordPress网站关联的域名的TLS/SSL证书。此外,你创建了一个cron作业,在需要时更新这些证书。
为进一步提高网站性能和冗余度,您可以参考以下有关WordPress资源传递和备份的文章。
- How to Speed Up WordPress Asset Delivery Using Silicon Cloud Spaces CDN.
- How To Back Up a WordPress Site to Spaces.
- How To Store WordPress Assets on Silicon Cloud Spaces.
如果你对使用Kubernetes进行容器化工作流感兴趣,你还可以查看:
- How To Set Up WordPress with MySQL on Kubernetes Using Helm.

